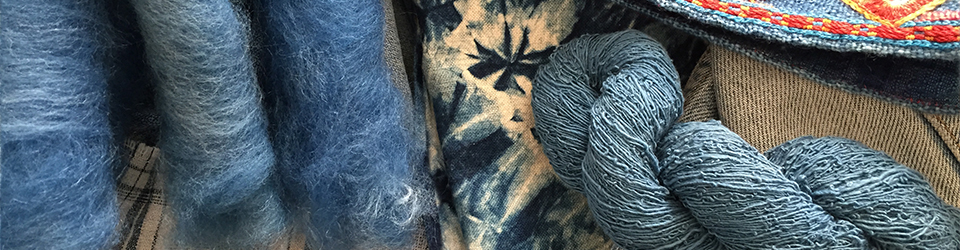


In April 2014 I decided to spin and weave fabric a fabric from singles (unplied yarn) for my first planned garment. I bought black (‘black’ in this context means very dark brown) Shetland for the weft, above top left. It was a bit boring when spun from the top, so I carded bats including some slivers of multi-coloured silk. I thought Black Massam (the other two images) would make a good warp. Massam being the offspring of a Teeswater ram put to Dalebred or Swaledale ewes, the fibres should be longer, a bit coarser, and have more sheen than the Shetland. In the event neither of the tops were quite as I expected: the Shetland had a lot of kemp (very coarse flattened hairs) and more hair mixed in with the wool, and the Massam was shorter and very variable in thickness. Nonetheless I persevered. Once spun the warp was steamed to set the twist then sized to make it easier to manage; the weft was steamed (otherwise it can twist into little pigtails after the shuttle is thrown and before it’s locked into place by the changed shed).
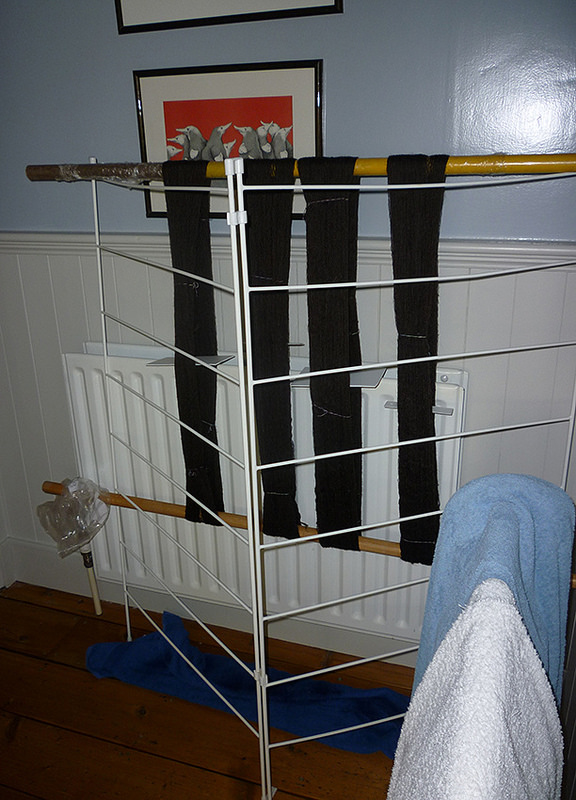
The sized warp dries under light tension.
I warped and threaded my Baby Wolf loom for an 8-shaft broken diamond twill at 30 epi. The yarns behaved reasonably well on the loom although I had more breakages than I like, mainly where I’d made quick-and-dirty joins while spinning, laying the spun end from the orifice onto the fibre instead of opening up the spun end to join fuzz-to-fuzz. I wasted far more time protecting fraying joins with hair gel than I’d have done making them properly in the first place! The quick joins are fine for yarn to be plied, but they’re disasters waiting to happen if you’re weaving singles.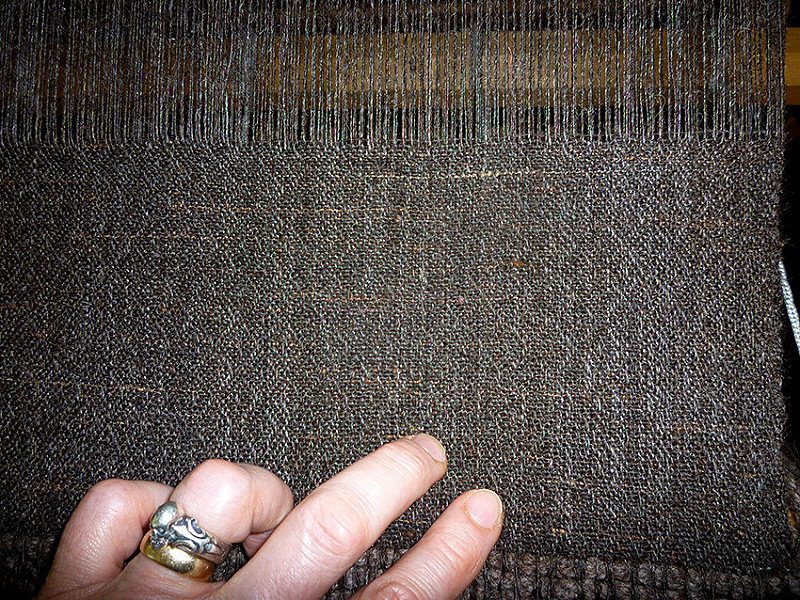
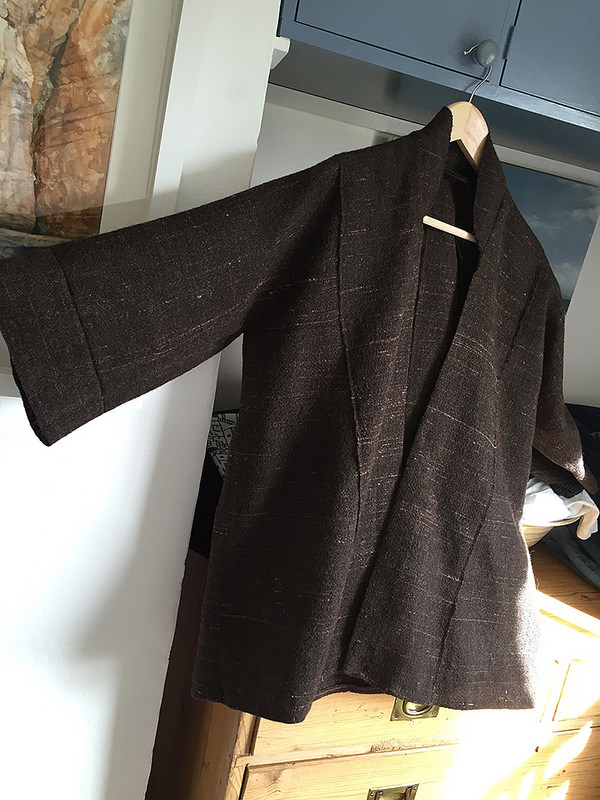
I can’t remember how much fabric I had when I finished, but I do remember the wonderful feel of it washed (zig-zag stitch the ends, throw in the washing machine wool wash cycle, remember to clean the filter afterward!) finished (hot iron both sides, no cloth) and the satisfying weight of the roll. But what should I make? Laying out modern pattern pieces on my narrow fabric would be wasteful, and I’m not a tailored jacket sort of person. I decided on a jacket based on Pattern 23, ‘Man’s coat, Afghanistan’ from Dorothy Burnham’s extremely useful Cut My Cote. Never having made anything other than commercial patterns, and never having made anything that actually FIT me, I wasn’t sure how to work from Burnham’s sketches of the pattern pieces laid out on the fabric width.

I enrolled in one of Alison Smith‘s ‘Three Day Own Choice’ workshops and – amazingly – emerged having learned to translate the sketch to paper pattern pieces, use these to make a toile, adjust the pattern, cut my fabric, overlock/serger all the edges, sew the jacket AND insert a mandarin collar into the existing collar band. I can’t recommend Alison too highly! I returned home with a lightweight unlined jacket, on which my exposed selvedges are a decorative detail. (Alison’s suggestion, she liked them. All weavers may now pick their jaws off the ground and replace them.)
The lack of internal seam finish annoyed me. I decided to weave lengths of inkle band to cover the seam allowances but, several months and about 8m of band later, concluded this was a bad idea: the decorative bands were too bright and, worse, made the seams too stiff. The jacket went into time out (also known as a plastic bag in the closet).
Imagine the flickering calendar pages of time passing…
After seeing one of the reconstructed Herjolfsnes garments at the Ship Museum in Roskilde in 2016, I started thinking about making some of the dresses for myself, first in a commercial fabric and then in handspun handwoven. Reading about the garments and sewing techniques in Woven into the Earth: Textile Finds in Norse Greenland and its companion Medieval Garments Reconstructed, I remembered the abandoned jacket: I could rip off the inkle bands and practice medieval sewing techniques!
In order to sew, I had to have thread. Handspun thread. Not being able to carefully select the best hairs from my fleeces after washing and shearing my double-coated sheep, I dug through my stash to find the remaining twist of Shetland from the weft. The mix of kemp, hair and wool means it’s far from perfect, but it works.


Top left, singles spun on a light spindle; Below, my plying spindle and mugs;
Right, the final 2-ply thread.
I take pride in my ability to wind fine spun singles into balls without using a core but it is easier to ply from the balls if they don’t bounce around: using a pebble as a core adds weight, and putting each ball into a mug and wrapping the singles around the handle before taking it to the spindle makes it much easier to control. The plied yarn is well within the parameters of those used on the Herjolfsnes originals.
The book mentions the possibility that the threads were finished with something, perhaps beeswax, before sewing. I found quite a lot of information about thread finishes, something that I – a non-sewer – knew nothing about, on the internet. I decided to try running the thread across beeswax before using it, and now I’m a convert, at least for handspun wool thread.

The wax stiffens the thread, making it easier to thread the needle. Being slightly sticky it pulls off some of the fuzz from the thread (see the hairs left in the wax), which makes the thread much easier to work with. And it smells lovely.
Three or four inches at a time, I’m trimming the overlocked finish off the raw edges and binding them down to the garment.

Pebbles from California on which to wind thread, the snips I use to trim the fabric, and the bowl from Dawn P. in which for some reason I kept ALL the edges I’d trimmed off the seam allowances.
I think it’s time I threw that lot away.
Before sewing, the raw edges on the Herjolfsnes garments were stabilised by ‘singling’: a fine thread was sewn to and fro into the thickness of the fabric, in from the edge, not stabbed up and down through the fabric. I haven’t enough raw edge on the seam allowances to do that, so I’m taking pains to run the needle in and out of the fabric for additional stabilising as I sew one way, then I take it back over the fabric to the starting point. A picture is worth a thousand words:

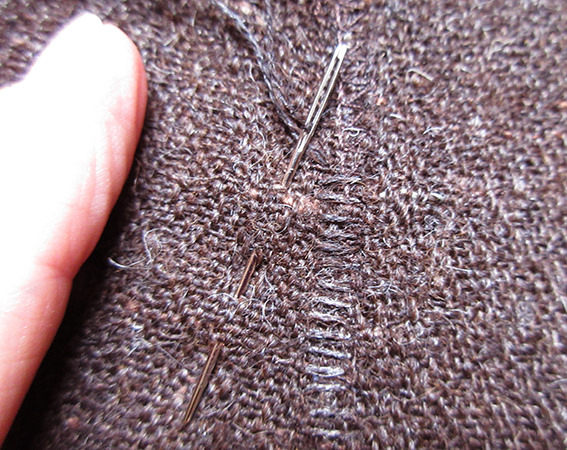
I’m trying to stitch every 2mm or a little less. You can see the waxy whiteness of the beeswax on those recent stitches, but it soon disappears as the garment is handled.
I think the end result looks good, is appropriate for a handspun, handwoven fabric, and will allow me to tell people about the astonishing finds at Herjolfsnes.

Some of the internal seams. The stitches are not generally this visible: I chose the light angle to highlight them.

Seams as they appear on the outside of the garment. The stitches pick up a thread or two of the fabric at both ends, so create a subtle and decorative ridge.
Once I finish all the internal seams (as you can see from the pattern, there are more than a few), I will try my hand (and foot) at fut-slyinging, incorporating a foot-tensioned tablet-woven decorative band along the hems. I think all this handspun thread, hand sewn and woven really should outweigh the fact that the garment seams are machine-sewn!
Also, some of those seams were even sewn with an appropriate needle. Bone.

In January 2020 I realised that I should tell the story of the jacket that stars in my article on seam techniques from Norse Greenland in Piecework Magazine Summer 2020. And then 2020 went a bit pear-shaped for the entire world. As I begin to pick up the juggling balls where I left them, I can start by clearing out my Blog drafts folder!
