Category Archives: Uncategorized

A gift for Lynn

Lynn deserved a gift for many reasons. She sent me gifts of fabric and yarn; no need to send her fabric or yarn, she has lots. Same is true of spinning fibre and fibre tools and books . Mand, more importantly, I wanted to send something of myself. A needlebook! What a brilliant idea! (Alternatively: how predictable!)

frontclosed

I’ve been making a lot of needlebooks lately. Sara Lamb spent a long time – years – trying to convince me that it was good to make things even if I’d never use them, but I didn’t get it. Until one day I did: if I want my hands to acquire a skill, I have to do that thing. That’s how we and our hands learn these things, by doing them.

Lynn sews, sometimes by hand. A needlebook might be useful as well as a decorative, tangible expression of my friendship. Lynn likes blue, she’s a hand spinner and weaver, so handspun and handwoven would be appropriate. I sorted through some of my most precious vintage Japanese textiles. We first met In Real Life at SOAR in Stephenie Gaustad’s handspinning cotton class (where I fell deeply and irrevocably in love with one of Alden Amos’ banjo charkas, but that’s another story best left untold), so there should be some of my own handspun cotton sashiko thread as well as handspun silk. Lynn’s an ecologist and natural historian, so the ammonite section button seemed perfect. I like skulls – and they’re a reminder of where we fragile beings come from and will end up – so bone skull beads on the handspun silk fingerloop braid closure.

Front&back

The broad piece of turquoise silk on the spine is from a pack of remnant silk fabrics that arrived out of the blue one day (see what I did there?), a random gift from Lynn.

Book covers should be stiff, but not too stiff. Some needlebook makers use quilt batting, but I think spare fabric is more appropriate to the Japanese boro tradition. So the cover was assembled and stitched to a single piece of modern Japanese cotton

inside stitching

and that was then lined with another piece of vintage handspun, handwoven Japanese ikat fabric.

Needlebooks have pages, usually of felt or wool, perhaps because wool is perceived as less likely to hold moisture to rust the needles. I’m not sure about that, wool has a fabulous ability to hold moisture without feeling damp. Anyway, I wanted to use cotton because I needed something I could embroider. I thought immediately of Lynn when I came across this image of the Jurassic dragonfly Cymatophlebia longialata from the NatHisMus London on Facebook (can’t find it anywhere else).

87014277_10156535778431537_6075802118655049728_o

In fact it was this image that spurred me to start stitching this needlebook. I couldn’t capture the delicacy and subtle shades of colour refracting from the stone, but I’m reasonably pleased with what I accomplished, given my level of skill. It’s worked on a piece of indigo cotton fabric used for Japanese martial arts clothing, edged with true buttonhole stitch in DMC cotton floss dyed in my ferrous sulphate indigo vat.

dragonflu

I don’t have a picture of the other side of the internal pages, but there’s a piece of fulled cashmere sweater just in case protein fibres are kinder to needles.

My mind understands that we’ve only ever had the illusion of control over our lives and the world we live in, but nonetheless over the last few years my heart and I have burned the midnight oil for hours, lying awake trying to work out how to keep everything I love safe and well. In the evenings my projects have become ever smaller and more complex as I am driven to control something, just ONE THING in my life.

I can control my stitches. I can put each stitch where I want it and as my needle passes through the fabric I can make that stitch a wish for better times. For me, for those I love, for those who use what I make. Lynn, I wish you well and happy.

Slow stitches: visible mending

Over the last few months I’m finding a routine, a pattern to my days. Paying work begins first thing in the morning and continues until my conscience is clear. Spinning and weaving (other than tapestry weaving, of which more anon) are also daytime occupations. In the evening I sit in my comfortable chair wearing two pairs of glasses (my bifocals plus reading magnifiers) with the floor-standing task lamp lighting the sewing in my lap as I stitch and think about the life cycle of fabrics.

The time and skill needed to make handspun yarn into handwoven cloth means that fabric and clothing was once precious, something that could be measured more accurately by the days, weeks and years of the makers’ lives than by the retailer’s arm length (the ell) or measuring tape. The increasing interest in boro/boromono, chikuchiku, and other visible mending techniques pays lip service to this, but I think fashion and the stitchers working with new fabrics, even buying fashionably-distressed new clothing in order to repair it are missing one of the points: their stitches are adding value by creating something beautiful, not by repairing something too precious to discard. I am genuinely looking forward to repairing something made from my own handmade fabrics, but in the interim I’m repairing things that are precious for other reasons.

sweathsirt

I bought this (black!) sweatshirt as a souvenir at Flag Fen when it was still an active Bronze Age archaeology site in the early 1990s. I wore it regularly, until the ribbing was losing its structure and holes were appearing in the fabric. When I picked it out of the workclothes pile to wear in the garden about 6 months ago I realised it had become precious to me as a reminder of a past time and place, so I put it to one side for repair.

I chose a red handspun mulberry silk for the repairs to reflect its new-found value, to match the logo, and because the red looks wonderful against the faded charcoal greys.
An embroidery hoop holding the fabric straight under light tension made it easier to follow the lines of the knit fabric and maintain even stitching. Magnification is essential: I can’t see to stitch this with reading glasses alone!

hole

With the fabric under tension it’s easier to darn the hole with sewing thread matching the fabric colour and the parallel lines of the knit fabric are clearly visible. Think of the lines of the knit fabric as the warp on a loom, with the red silk needle-woven as if it were weft.   Plain weave weave is over one, under one. A 3/1 twill is over 3, under 1. The repair at top left was done freehand, without the embroidery hoop, as evidenced by the way I lost count of the overs and unders. I love the sense of movement, though.

With patience and good light it’s possible to needle weave complex patterns over the darn:

morecomplex

anothre

That’s a diamond twill somewhat flattened by the difference in ‘weight’ between the silk and the knit fabric rib.
I tried several methods to restore some elasticity to the flabby over-stretched ribbing, but none were successful so I resorted to reinforcement and decoration with a mix of running stitch and chain stitch.

cuff

I may add some of this to the sweatshirt neckline, but then again I may not. It doesn’t need repair.

My vintage (made between 1971 and 1984) denim jacket had some intrinsic value: I paid hard cash for it at a flea market. There are several posts about my stitched repairs to the yoke, starting here. A couple of weeks ago I added a skull-and-roses on the main back using my hand-cut stencil and Japanese Indigo leaves. Even a pass through the ‘delicate’ cycle of the washing machine to wash out the hydrogen peroxide neutralising the bleach (highlighting the skull) and washing out the leaf juice revealed more weak points in the fabric: more opportunities for repair!

jacketback.jpg

The edges of the cuffs and facings range from ‘showing wear’ to ‘disintegrating’. I trialled an edging of Palestrina stitch in the same red silk I used for the sweatshirt; it works but is a little less even than I’d hoped on the disintegrating edge. It might have been better to encase the cuff in another fabric and stitch that, but for some reason I can’t explain I feel that would be the wrong thing to do on this jacket. I will try to come up with a better solution, though, because the facings are just as worn. I do know that I don’t want vertical scarlet lines down my front, so even if I use Palestrina or some other ‘blanket stitch’ it won’t be red silk.

The photo below shows the Palestrina stitch cuff with a different repair strengthening worn areas of the fabric body.

cuffandline.jpg

People on Facebook have asked how I do this. It looks impressive but is very simple provided you’ve got magnifying glasses and good light: I’m simply backstitching a single strand of embroidery floss down the ‘ditch’ in the twill. Just for fun here’s a X80 view of the stitches and the ‘ditch’, which on this – the good or blue side of the denim – is created by the weft revealed as it passes over one warp thread: on each side of the ditch it dives under three warp threads. The diagonal results from the shift one thread to the right (in this photo) in each successive weft pass. The weft is white, the warp (the long verticals) was once dyed blue with indigo, but the surface of the cotton and its embedded indigo wore away leaving only indigo dust embedded in the crevices of the fabric. The needle in the photo is only embedded in the backstitch position to give you the idea: I confess I usually stab-stitch the backstitch for more accuracy when I’m working it.

detail

This is what it looks like over a larger area. I started working only with blue to maintain the sense of blue in the jacket fabric, but couldn’t resist the opportunity to change colour across a wider area. The white fuzz is in an area where the warp has been worn away to reveal the weft. In a small area like this I re-create the ditch lines with backstitch holding the weft threads together but if it’s any larger I add a backing fabric for strength, especially on the shoulders or other areas subject to stress. The visibility of that particular fuzz is annoying me, so I will probably go back and needle weave some darning structure under the backstitch to add structure before trimming some of that fuzz away.

multicolditch


me

Now with added nettle! (a quick update)

A heads-up for anyone interested in bast fibres in general and nettle in particular: Liz Hammond-Kaarremaa and I are seriously investigating nettle fibre. I’ll be focussing on retting and other techniques that might have been used in northern Europe, as well as the splitting and spinning techniques used to work with ramie in Asia.

We’ll be recording some of our work on the Coastal Fibres blog. Come and visit!

longstripscraped.jpg

The four fibrous strips of a nettle ‘skin’ stripped away from the pith and scraped clear of most unwanted plant material.


That new obsession I mentioned

I’ve decided to practice stitching on the sampler from the Hand & Lock Opus Anglicanum workshop instead of planning something amazing without in fact knowing what I’m doing. I’m already pleased with the decision because I’ve learned that some threads seem to split more nicely than others: all this is split stitch, but the brown shows the stitches much more neatly than the blue, which seems to want to twist and close the open surface created by the splitting. ‘Laying’ the stitches in a finished fill by smoothing the area with the side of the needle makes an real difference to the sheen and smoothness of the fill. I suspect it’s even more important if working in silk rather than single strands of cotton embroidery floss. The direction of the stitches really matters: they have to flow, ideally avoiding sharp corners, so plan ahead.

Incidentally I’m wearing +3.5 reading glasses to work this; each stitch is 1.0–1.5mm long and my ageing eyesight can’t copy on its own. It’s such fun that I spend too long at it each evening: although the fabric is mounted in a hoop that stands by itself, my arms complain about being held in sewing position. I may need to order a cheap pair of reading glasses set up for a longer distance from the optician so I can sit a little straighter with my arms extended a little more.

But this is fun. I’ve decided that weird object he’s holding is a book, which I think I’ll couch in purple silk because I have some. I don’t know what he thinks is hanging from his belt, but I think it’s a bag for the book. I have no idea why the shadow is so dark under his chin; it could be a beard, but I like the line of his unencumbered chin too much to change it. I may run with a couched gold halo around his head but it does look a bit like a Rastafarian ‘tam’ … a tempting thought.

No wonder he looks apprehensive and admonitory! “Don’t you dare” he’s saying, “you heathen. DO NOT DARE DISRESPECT ME!”

opusang-sampler

There is a lot of beautiful stitching and information about opus anglicanum here. I’ve seen that ‘cabbage stitch’ used to create a pattern of dapples on a horse;  I’m thinking of using it for some of the Pearly Monster’s surface in case I don’t have enough plastic pearl beads. Although I may have some in the Box of Requirement.

Spinning for weaving: workshop at Letchworth Settlement on April 1 2017

24 February 2017: I have had to cancel the Fibre East workshop for personal reasons, but was able to re-schedule it earlier in the year: April 1, 2017, at the Letchworth Settlement. This workshop is also fully subscribed.


Spinning For Weaving
The workshop will cover as many aspects of this as possible (no limits!), so I expect we’ll cover more than the subjects listed below.
Topics will include wheel set-up** and spinning techniques, including ‘production’ spinning; faults and flaws to avoid in your weaving yarns; preparing your handspun yarns for weaving (with special reference to singles, including the use of sizes). We will discuss how the intended purpose of a yarn should influence choice of fibre and spinning technique. We will examine a selection of historic or handspun, handwoven textiles from the UK and elsewhere in order to learn from times and places with strong traditions of handmade fabrics. Having looked at handspun textiles we will at least discuss how to approach the task of replicating the yarn needed to weave a particular textile.

Although the focus is on spinning for weaving, this workshop may be of interest to anyone who’d like to learn to think mindfully about their spinning projects. It is NOT suitable for beginning spinners: attendees must already be able to produce a continuous yarn using a spinning wheel or spindle. Although we will look at some cotton fabrics, the workshop is primarily about spinning wool.
It is a full-day workshop on Saturday 1 from 1000 until 1700. Hot water, tea and coffee will be available, but you’ll need to bring your own lunch.

Note: some of my historic fabrics are stored with sandalwood, cedar wood and lavender soaps or essential oils to deter pests. I will air the fabrics before the workshop but if you’re sensitive to any of these please let me know ASAP so I can air them longer and more thoroughly.

This workshop is limited to 10 students: I need to be sure that everyone has a good chance to try everything, and that I can spend time with those who need it. Cost is £80 per person including materials, of which £20 is a non-refundable deposit to cover room hire and ensure your place in the class. ‘Non-refundable’ means I promise to return your money only if I have to cancel the class.

** In answer to the question in the comments about using a spindle:
People were spinning for weaving with spindles long before wheels existed, so if you’re comfortable spinning medium to fine singles on a spindle you will be fine. You might want to park-and-draft to experiment with true woollen long draw.

The full workshop description and registration forms can be downloaded here:

spintoweave2017desc

spintoweave2017reg


Ethel Mairet’s natural dyeing I: Highland Blue

The hand weaver and dyer Ethel Mairet was a significant member of the British Arts and Crafts movement in the early 20th century. Wikipedia has a summary of her life and work here. (“Ethel went away alone and built a house near Barnstaple complete with studios for textile dyeing and weaving” seems such a bald summary of what must have been a terribly difficult time.)

Ethel Mairet is one of my weaving ‘ancestors’, in that my mentors were taught by people who were themselves taught or inspired by Mairet’s work. I had the pleasure of seeing some of her weaving in the flesh at the National Portrait Galleries ‘Anarchy & Beauty’ exhibition, including a jacket woven from handspun eri silk dyed with natural dyes, here shown in A Weaver’s Life: Ethel Mairet, 1872–1952.

image_medium

Mairet moved to Ditchling, Sussex, in 1916 to join a group of crafts persons including Eric Gill. In the same year (Wikipedia is wrong) she published A Book On Vegetable Dyes (free download from archive.org at that link). Now, a century later, Ditchling Museum of Art & Craft is celebrating Mairet’s work, asking dyers to recreate her recipes for display today.

How could I resist?

I volunteered to work with two of her recipes*, the first being Recipe 8, p69: BLUE FOR WOOL (Highlands), which begins
‘Take a sufficiency of Indigo. (For medium shade about 1 oz. to every pound of wool).  Dissolve it in about as much stale urine (about a fortnight old) as will make a bath for the wool …’
At heart I am about 5 years old: I cannot resist making blue using a smelly technique that other people find revolting. But more importantly, the indigo urine vat is one of the oldest methods of dyeing. I wrote about its history and chemistry here as part of my Summer of Blue. That vat suffered as a result of my inability to keep it warm, but I’ve since found a way to maintain the necessary temperature.

I put the ‘donations accepted’ container in the bathroom and a couple of weeks later the experiment began.

sigstart

All natural indigo powder contains some non-indigo vegetable matter, the proportion of which is reflected in the cost per gram. The vegetable matter is undesirable not only because it isn’t indigo (and hence doesn’t dye), but also because it adds to sediment at the bottom of the vat that can stain things that contact it. I know from experience that bacterial breakdown of the urine creates sediment anyway, so I used a cheaper grade for this vat, adding about 15g of powder to the 2.5l of the stale urine in a 3litre jar on the 27 November. At this point – having been stored at cold room temperature – the urine was at pH8 and smelled largely of stale urine with very little ammonia.

‘Make it lukewarm.’ 
The first time I made a sig vat, I tried everything I could think of to keep it warm, from black plastic bins in full sun (or what passes for full sun in a British summer) to an insulated box and a hot water bottle and finally a heating pad. Nothing worked consistently: slow/occasional fermentation would bring the vat into condition, I could dye a small quantity of fibre – and then it would stubbornly remain blue and miserable for days. That failure – when the instructions seemed so straightforward! – drove me to find out how and why indigo vats work. Now I know temperature was probably only one of several failures, and I have the tools to check and correct the performance of the vat.

Last summer I built a den in the garage for my indigo fermentation vats: a sturdy cardboard box floored with a thick layer of insulation, with a tray acting as lid. The cord running into the box powers a home-brew ‘brew band’ that keeps a vat at blood heat. During the summer I used it to heat a large volume of liquid in that plastic bin, but here the bin is a waterbath for the urine vat in the glass jar. I put the jar in the bath to warm overnight while I wetted the yarns from the Ditchling Museum.

sigden

‘Put in the wool and keep it at the same temperature till the dyeing is done.’
The plastic screw-top bottle hiding shyly to the left of the box is my ‘spare’ urine supply. Fermentation vats rely on the nutrients in the urine, so I soak dyestuffs in urine to wet them: wetting with tap water will only dilute the urine and weaken the fermentation.

On 28 November, after only 24 hours of warmth, the vat was alkaline, at or near pH10 and smelled noticeably of ammonia. HURRAH, bacteria are digesting the urea in the urine, consuming oxygen and creating ammonia to raise the pH: in other words, this vat is working!sig30nov-addfibre

I added the four yarns, each skein suspended by a string to prevent it falling into the sediment that would develop at the bottom of the vat. This wasn’t entirely successful, alas. Better to use a deeper vat with a lot more urine.

‘For a deep navy blue it will take a month, but a pale blue will be done in 3 or 4 days. Every morning and evening the wool must be taken out of the dye bath, wrung out and put back again. The bath must be kept covered and the temperature carefully attended to.’
[I checked the pH as well.]

sig30nov-fibre

Taking photos one-handed with an iPhone when also handling something with a pungent, penetrating and lingering odour proved tricky, so I don’t have many photos of the process. Here you can see the characteristic yellow-green of an active indigo vat turning blue before my eyes.

By 10 December the vat was at pH8-9: regular opening and airing allows ammonia to escape as gas, so the liquid became less alkaline, while moving the yarns about added oxygen. Both of these mean more indigo in the vat was returning to its blue non-soluble form.

sig9decremove

‘Some add a decoction of dock roots the last day, which is said to fix the blue.’
I didn’t, and I wouldn’t say it. All my research suggests indigo isn’t fixed in that way: once the colourless soluble form oxidises, the particles are either wedged firmly in place or they aren’t. I suppose dock root decoction might act like a glue to coat the yarn and hold the particles in place, but that’s only going to last until the glue is washed out.

I called it a day, removed the yarns for the last time and left them to fully oxidise, slightly thankful that the cold weather means the smell is somewhat less all-pervasive than it was in the summer, when my husband claimed the odour was killing birds as they flew past.

sigyarnsoxidising

‘The wool must then be thoroughly washed. This is a fast dye.’
Well, for some meanings of the word ‘fast’. Slow in terms of time, but fast in the sense that it’s generally regarded as wash- and lightfast once any unattached particles of indigo are removed. Jeans and other items dyed with indigo lose colour as the surface of the fabric erodes to reveal undyed material.

I handwashed the skeins in a non-bio detergent for delicate fabrics and rinsed thoroughly in cold water. Given the alkalinity of the vat and our extremely hard water I finished the wool and silk in a final rinse acidified with vinegar.

sigyarnsfinish

The yarns and process summary, about to be packed off to Ditchling. I am pleased to report they not only demonstrate one of Mairet’s dye recipes, but also the classic ‘vat odour’ that once indicated the finest and fastest shades of blue.

*my work on the second recipe, ‘Extract of Indigo’ (treated with sulphuric acid!) can be read here.

This blog is changing its spots

Blogs can do that, unlike leopards.

This blog (carpe diem, which can now also be found at wroot.blog) will focus on spinning, weaving, dyeing, and other textile projects.

All the existing content and new travel stories and will now appear in a new blog titled ‘A&S on the road’ at this URL:

https://colddraketravels.wordpress.com

I’ll try to remember to copy interesting fibre projects to the travel blog because I know some of my readers enjoy All The Things.

And now I have some deleting to do …


Copenhagen Day Four: Roskilde and the Vikingeskibsmuseet

Are you sitting comfortably? Then I’ll begin.

A long time ago, at a Medieval Textiles conference in London in 2011, I was held spellbound by Anna Nørgård talking about spinning and weaving sails for the reconstructed Viking Age ships at Roskilde. I took copious notes – I still have them on file – and clearly remember purposefully forging through the crowd to handle the samples of yarn and sailcloth, as it came off the loom and after waterproofing with fat from whatever animals had died recently. I promised myself that one day I would go to the Roskilde Vikingeskibsmuseet and see the woollen sails on the ships. 

The timing of this entire holiday was determined about 6 months ago by the availability of evening cruises on the fjord (in reality a large brackish waterbody, no cliffs. This is Denmark, not Norway) in vessels built at the Skibsmuseet, plus A Birthday date. 

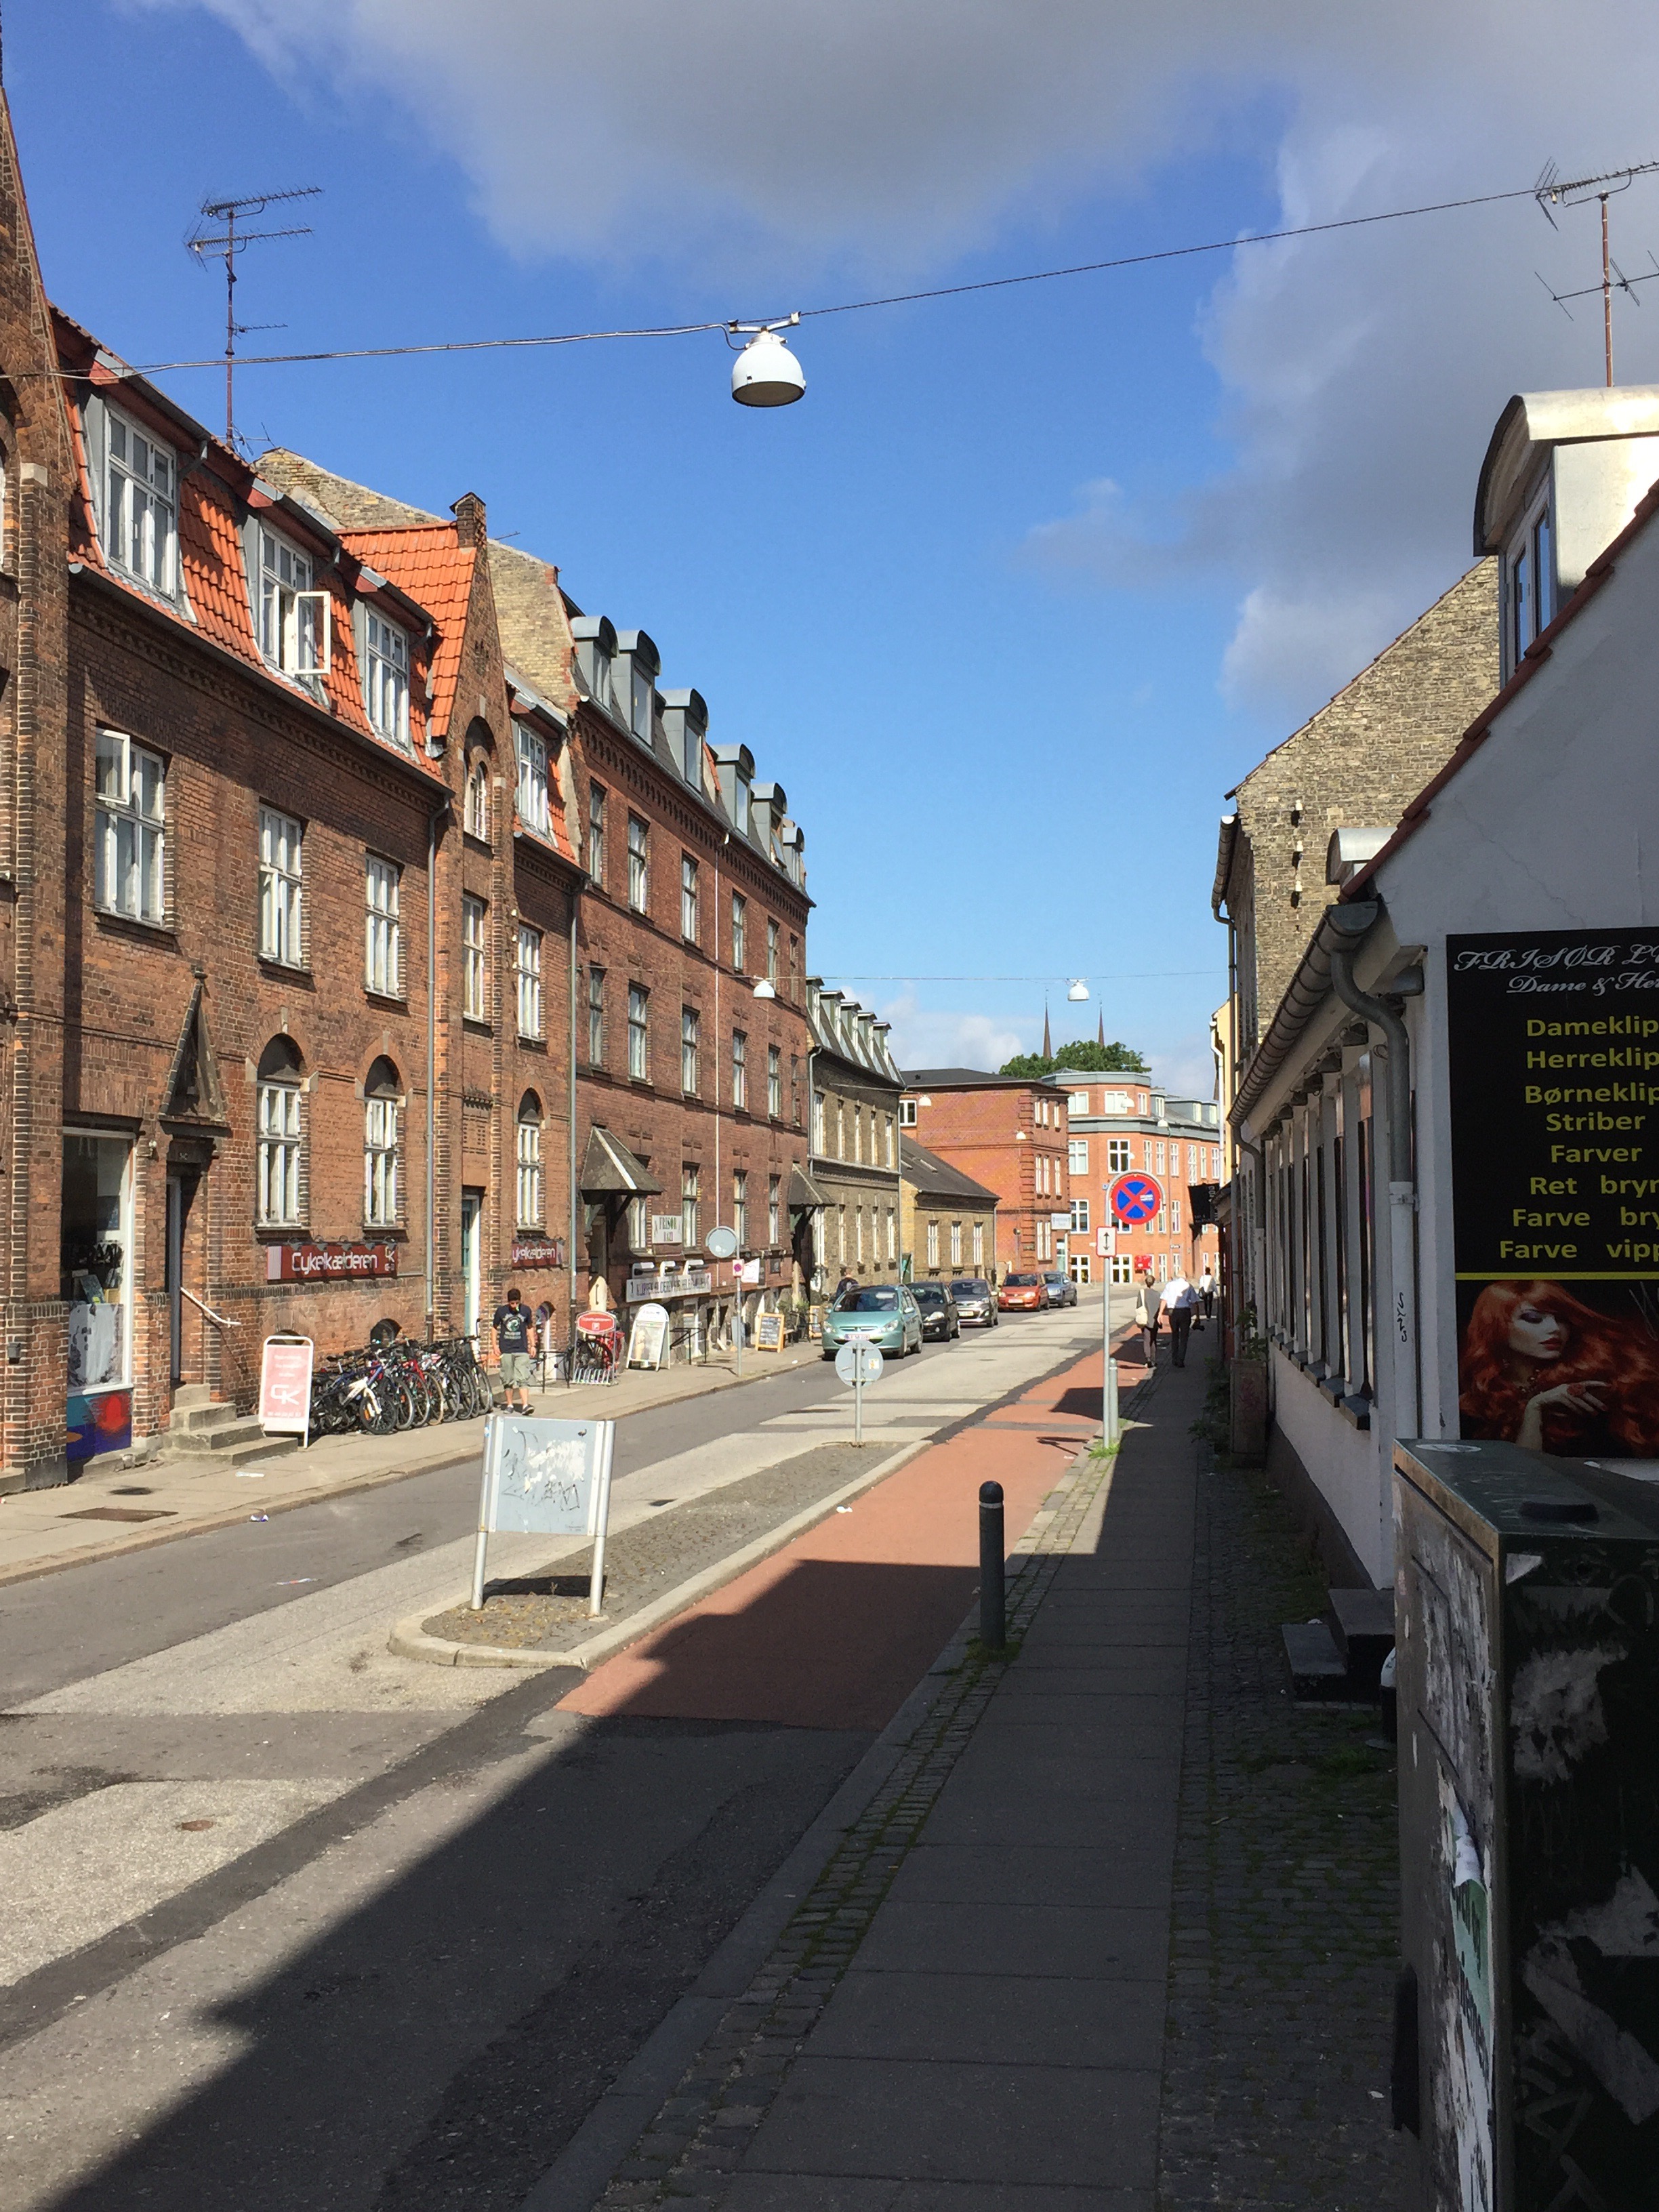
The twin pointy things visible over the rooftops are two spires of Roskilde Cathedral.

So at long last on Thursday morning we walked north to Nørreport for the train to Roskilde.There is more to see here:  Roskilde Cathedral is a UNESCO World Heritage Site, the first Gothic cathedral in Scandinavia, the first Gothic cathedral built of brick, and the burial place of Danish monarchs since the 15th century. 

It’s impressive. Very impressive. Strangely approachable, almost homely in warm red brick by comparison with the   more usual cold grey stone. Someone was practising on the organ (the oldest parts of which date from 1555).

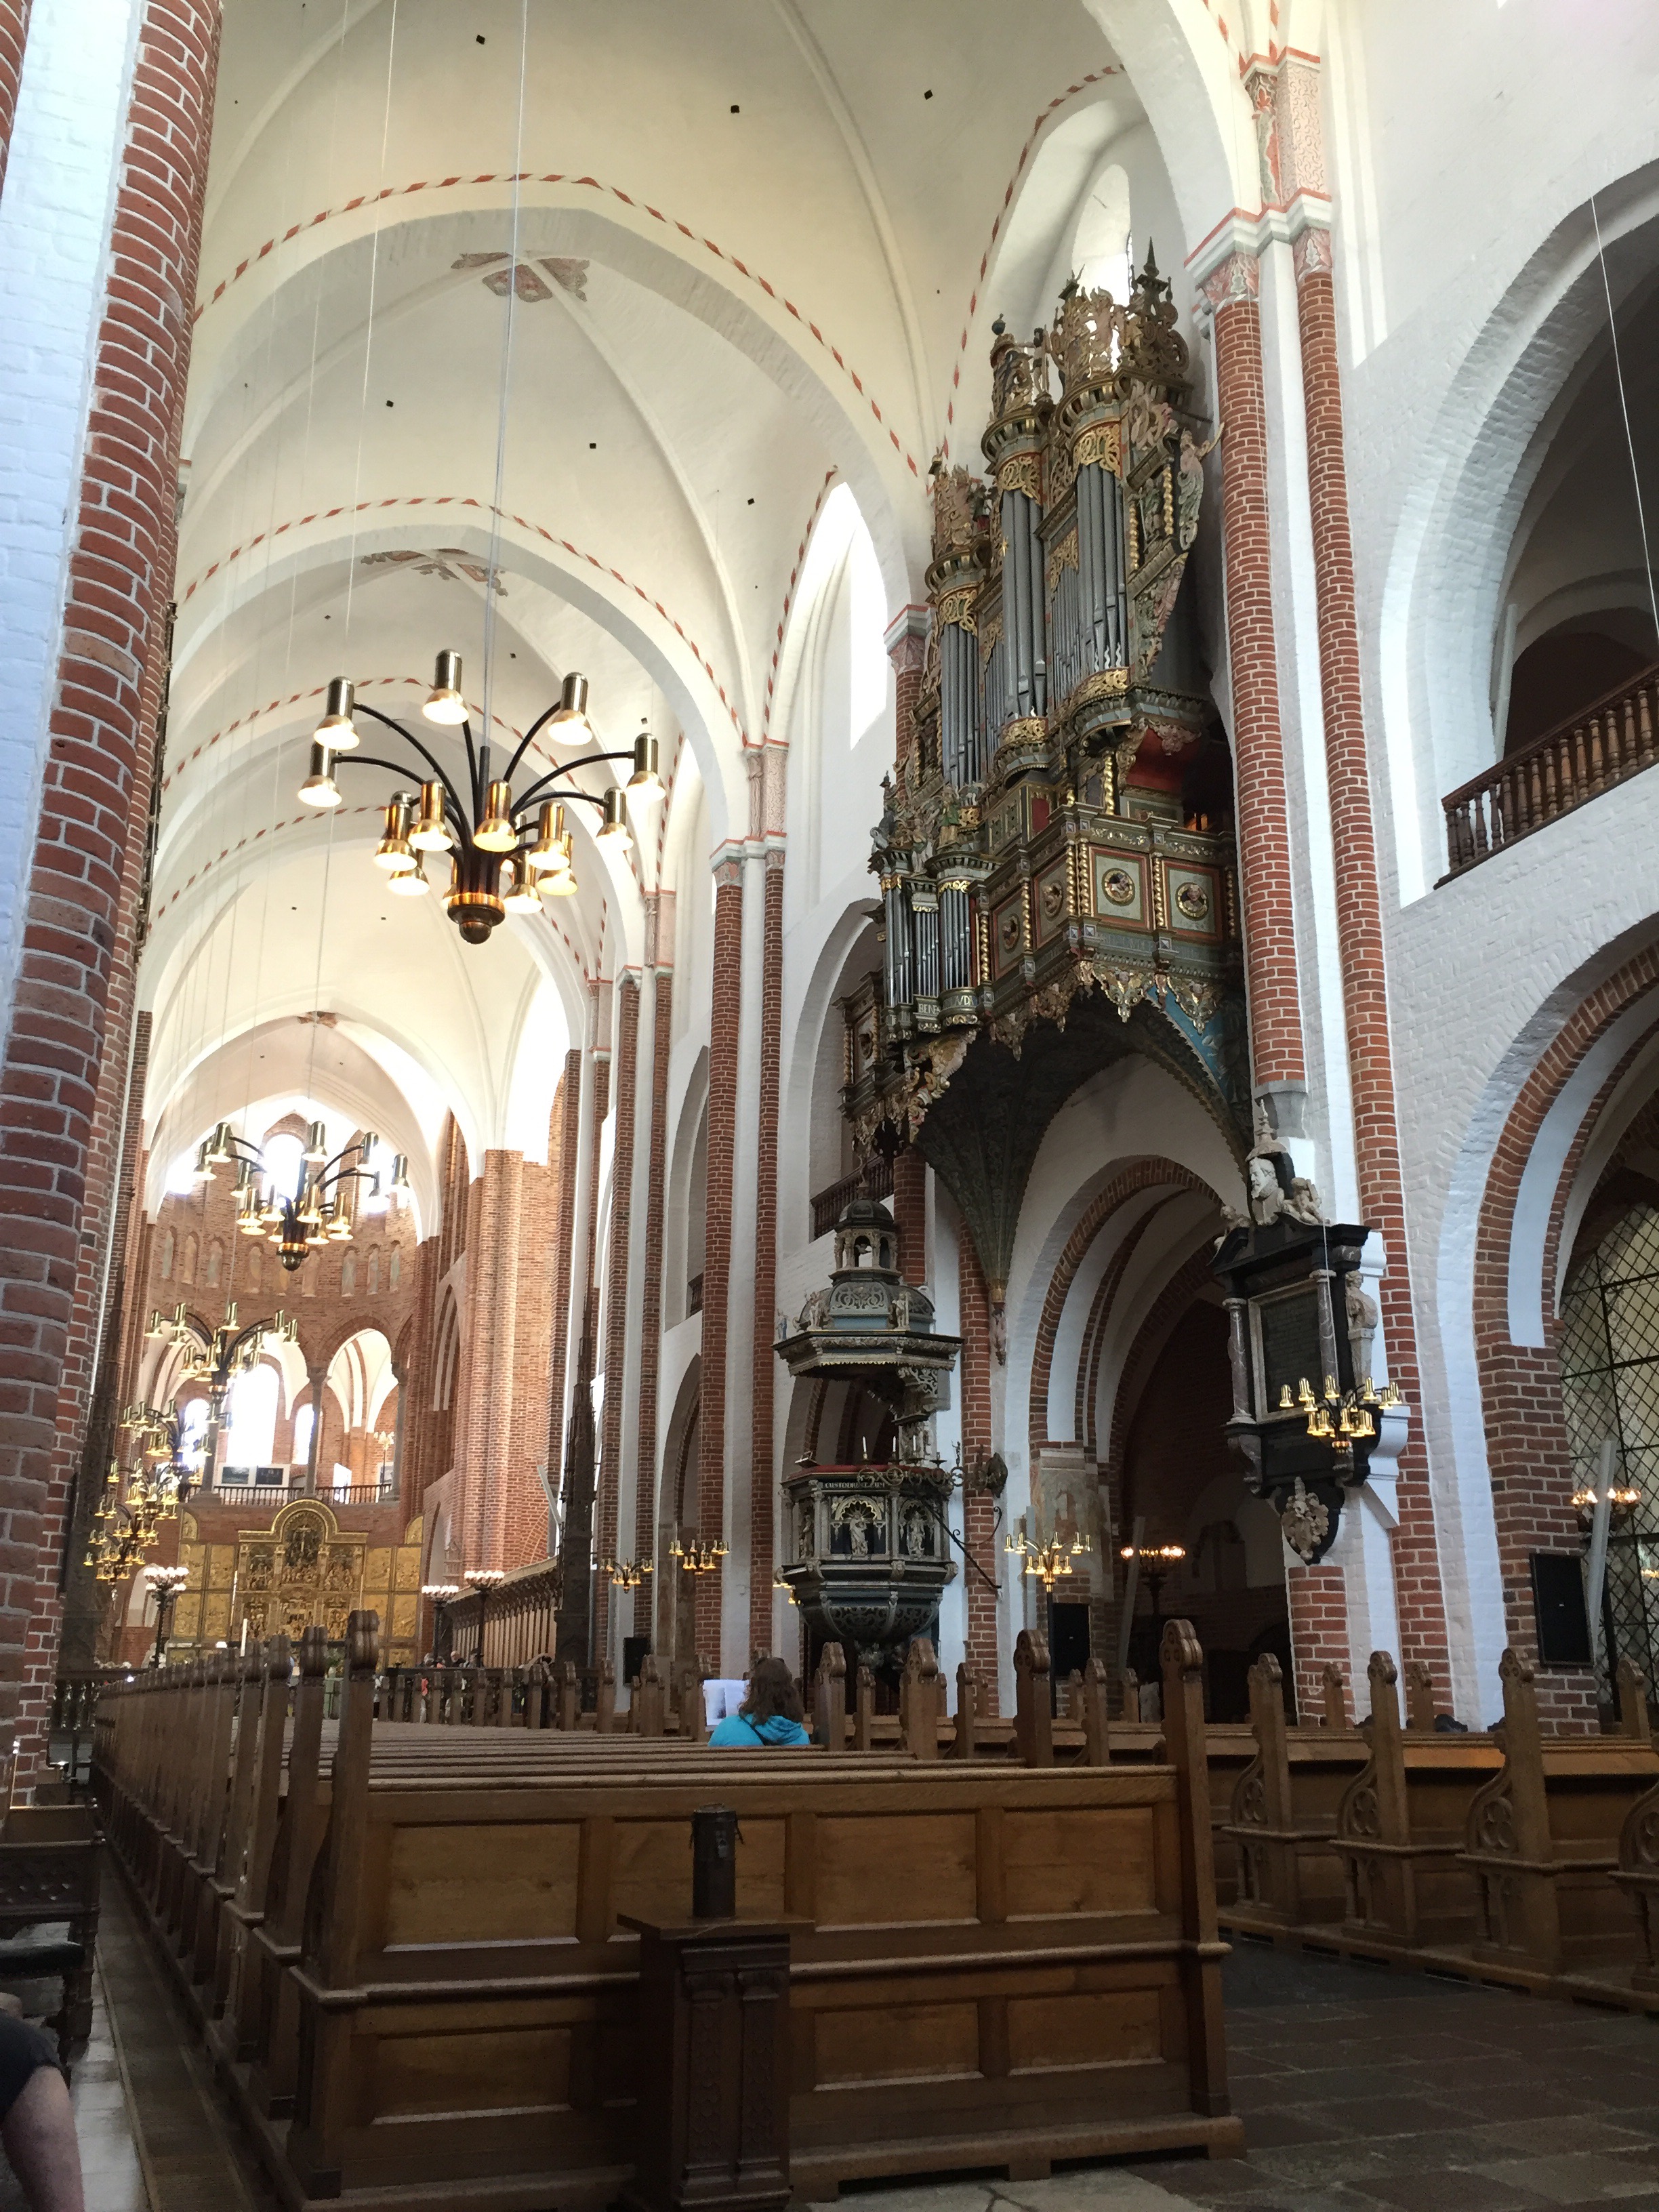
Medieval wall paintings cover some of the chapels. Those in St Birgitta’s chapel date from the early 1500s.

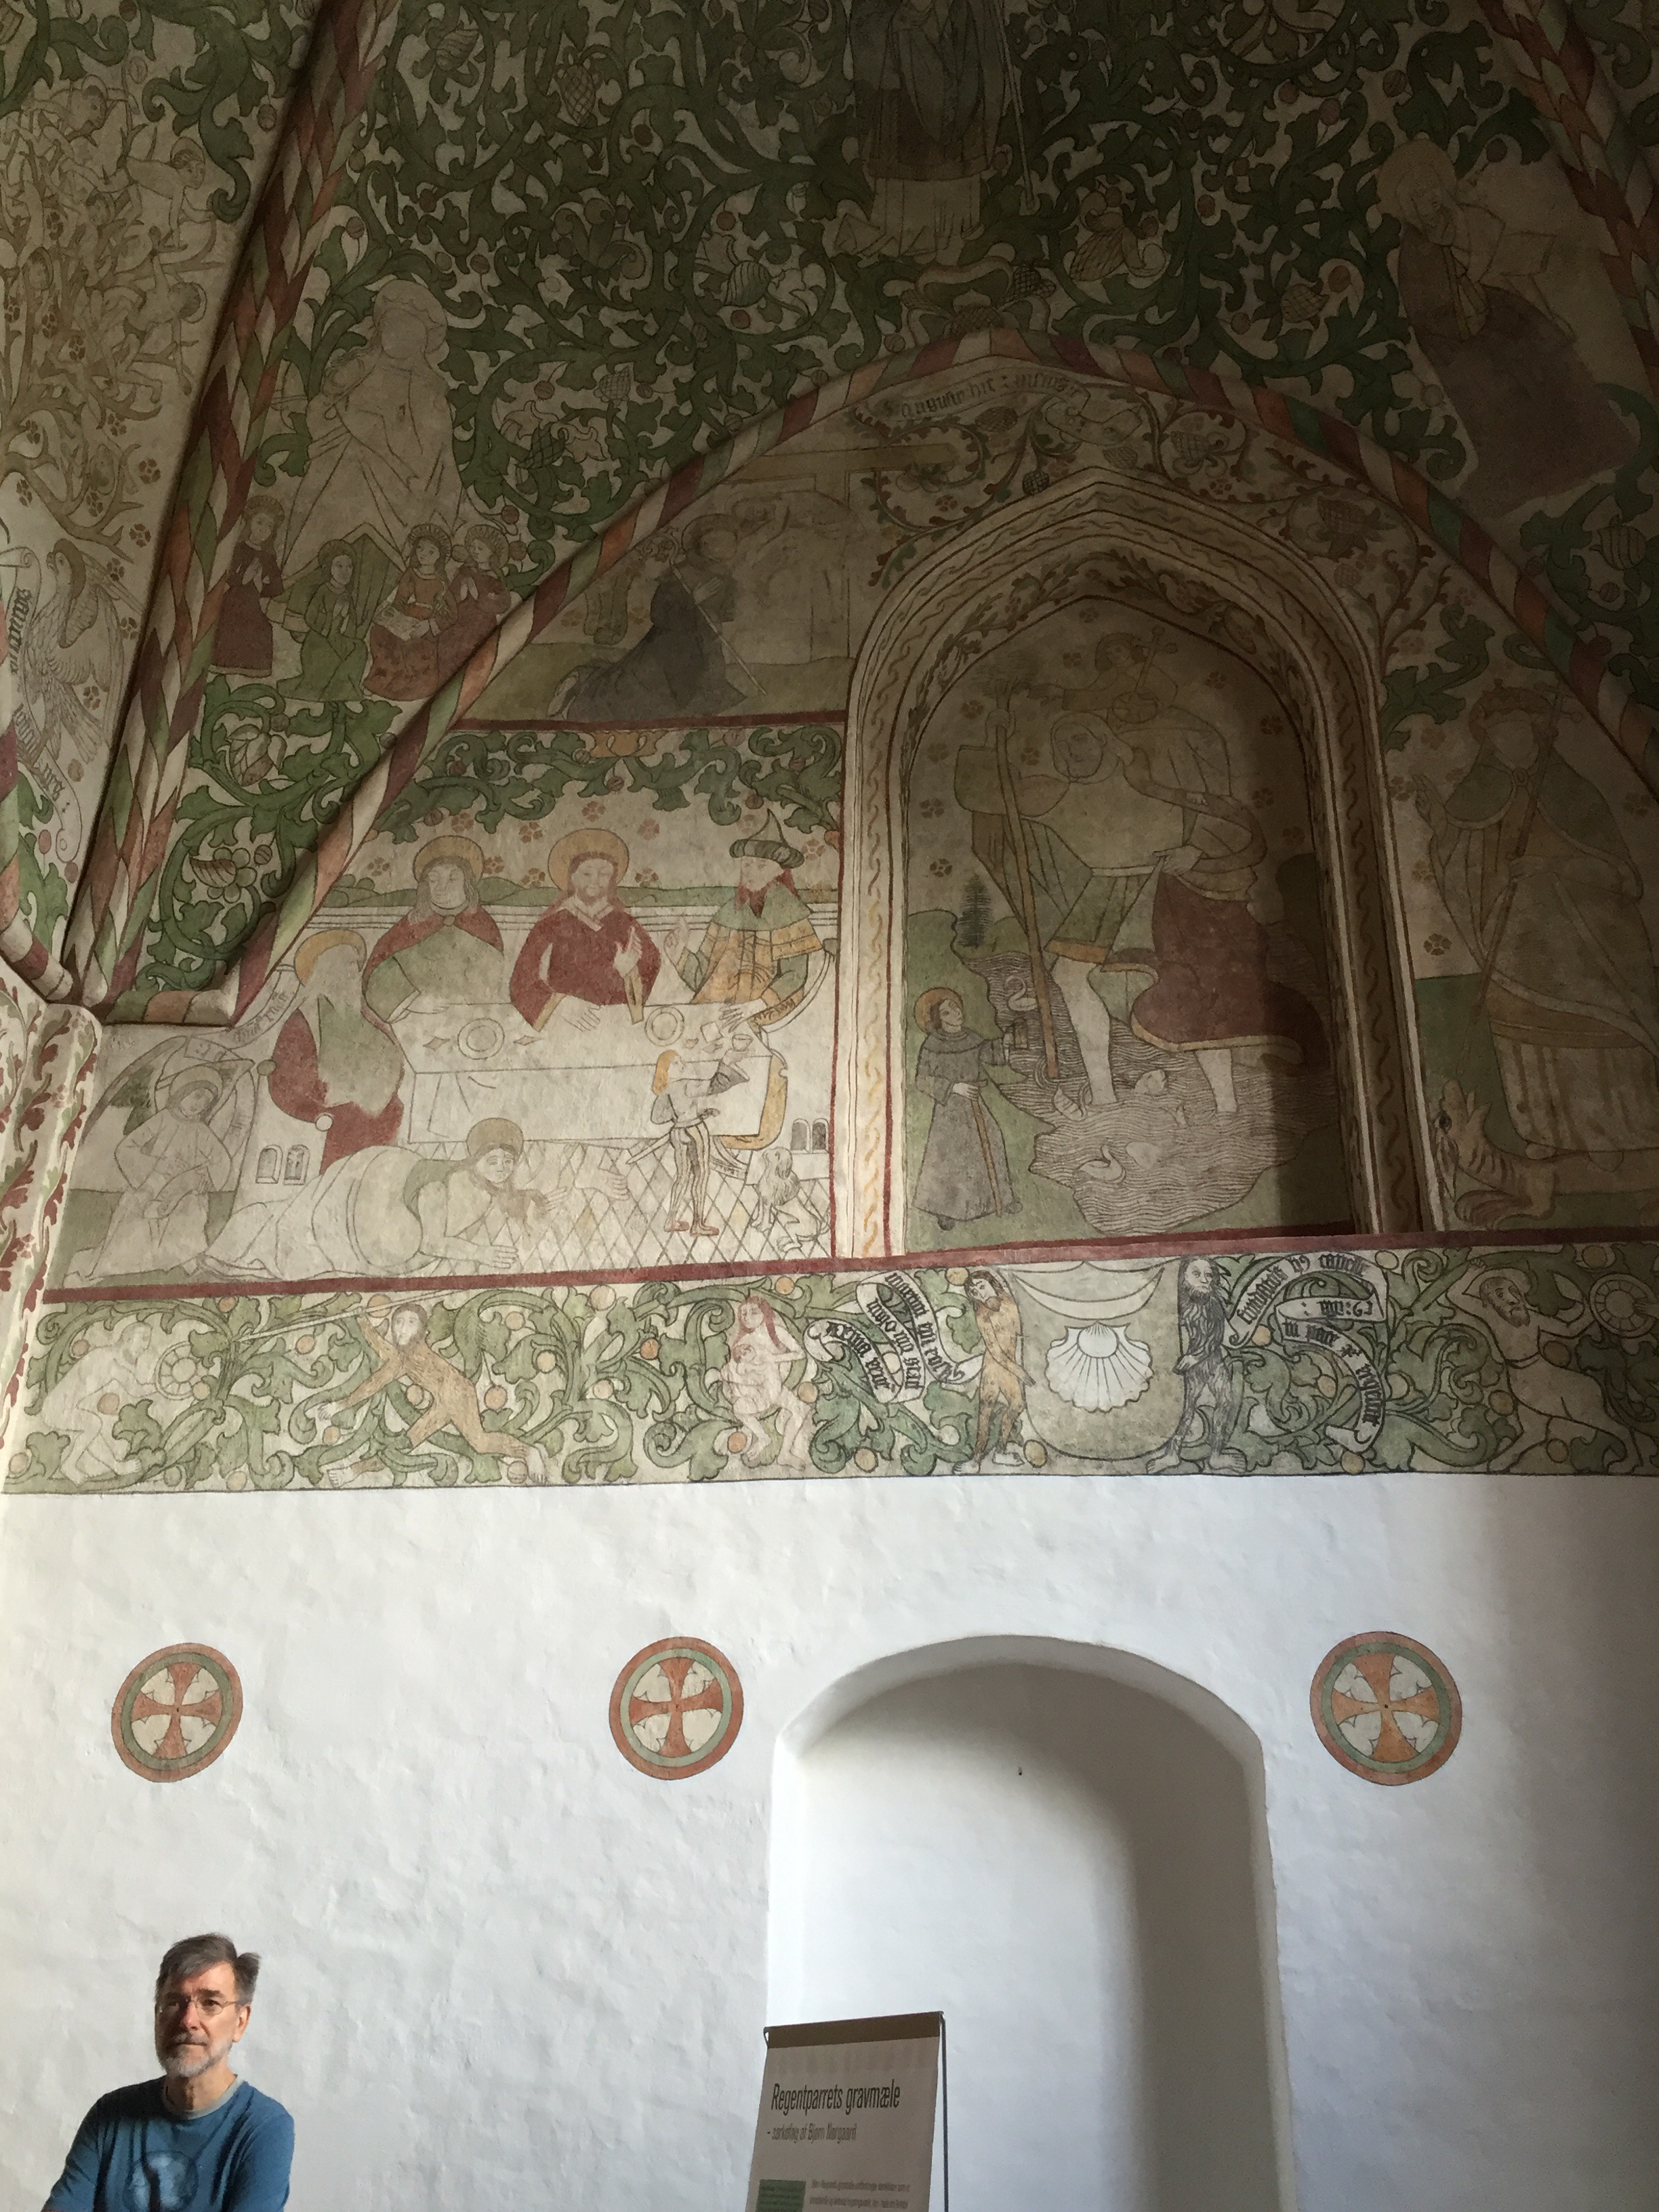
The main theme, though, is the death of Danish monarchs. There’s a good summary here with photos, albeit not English text.

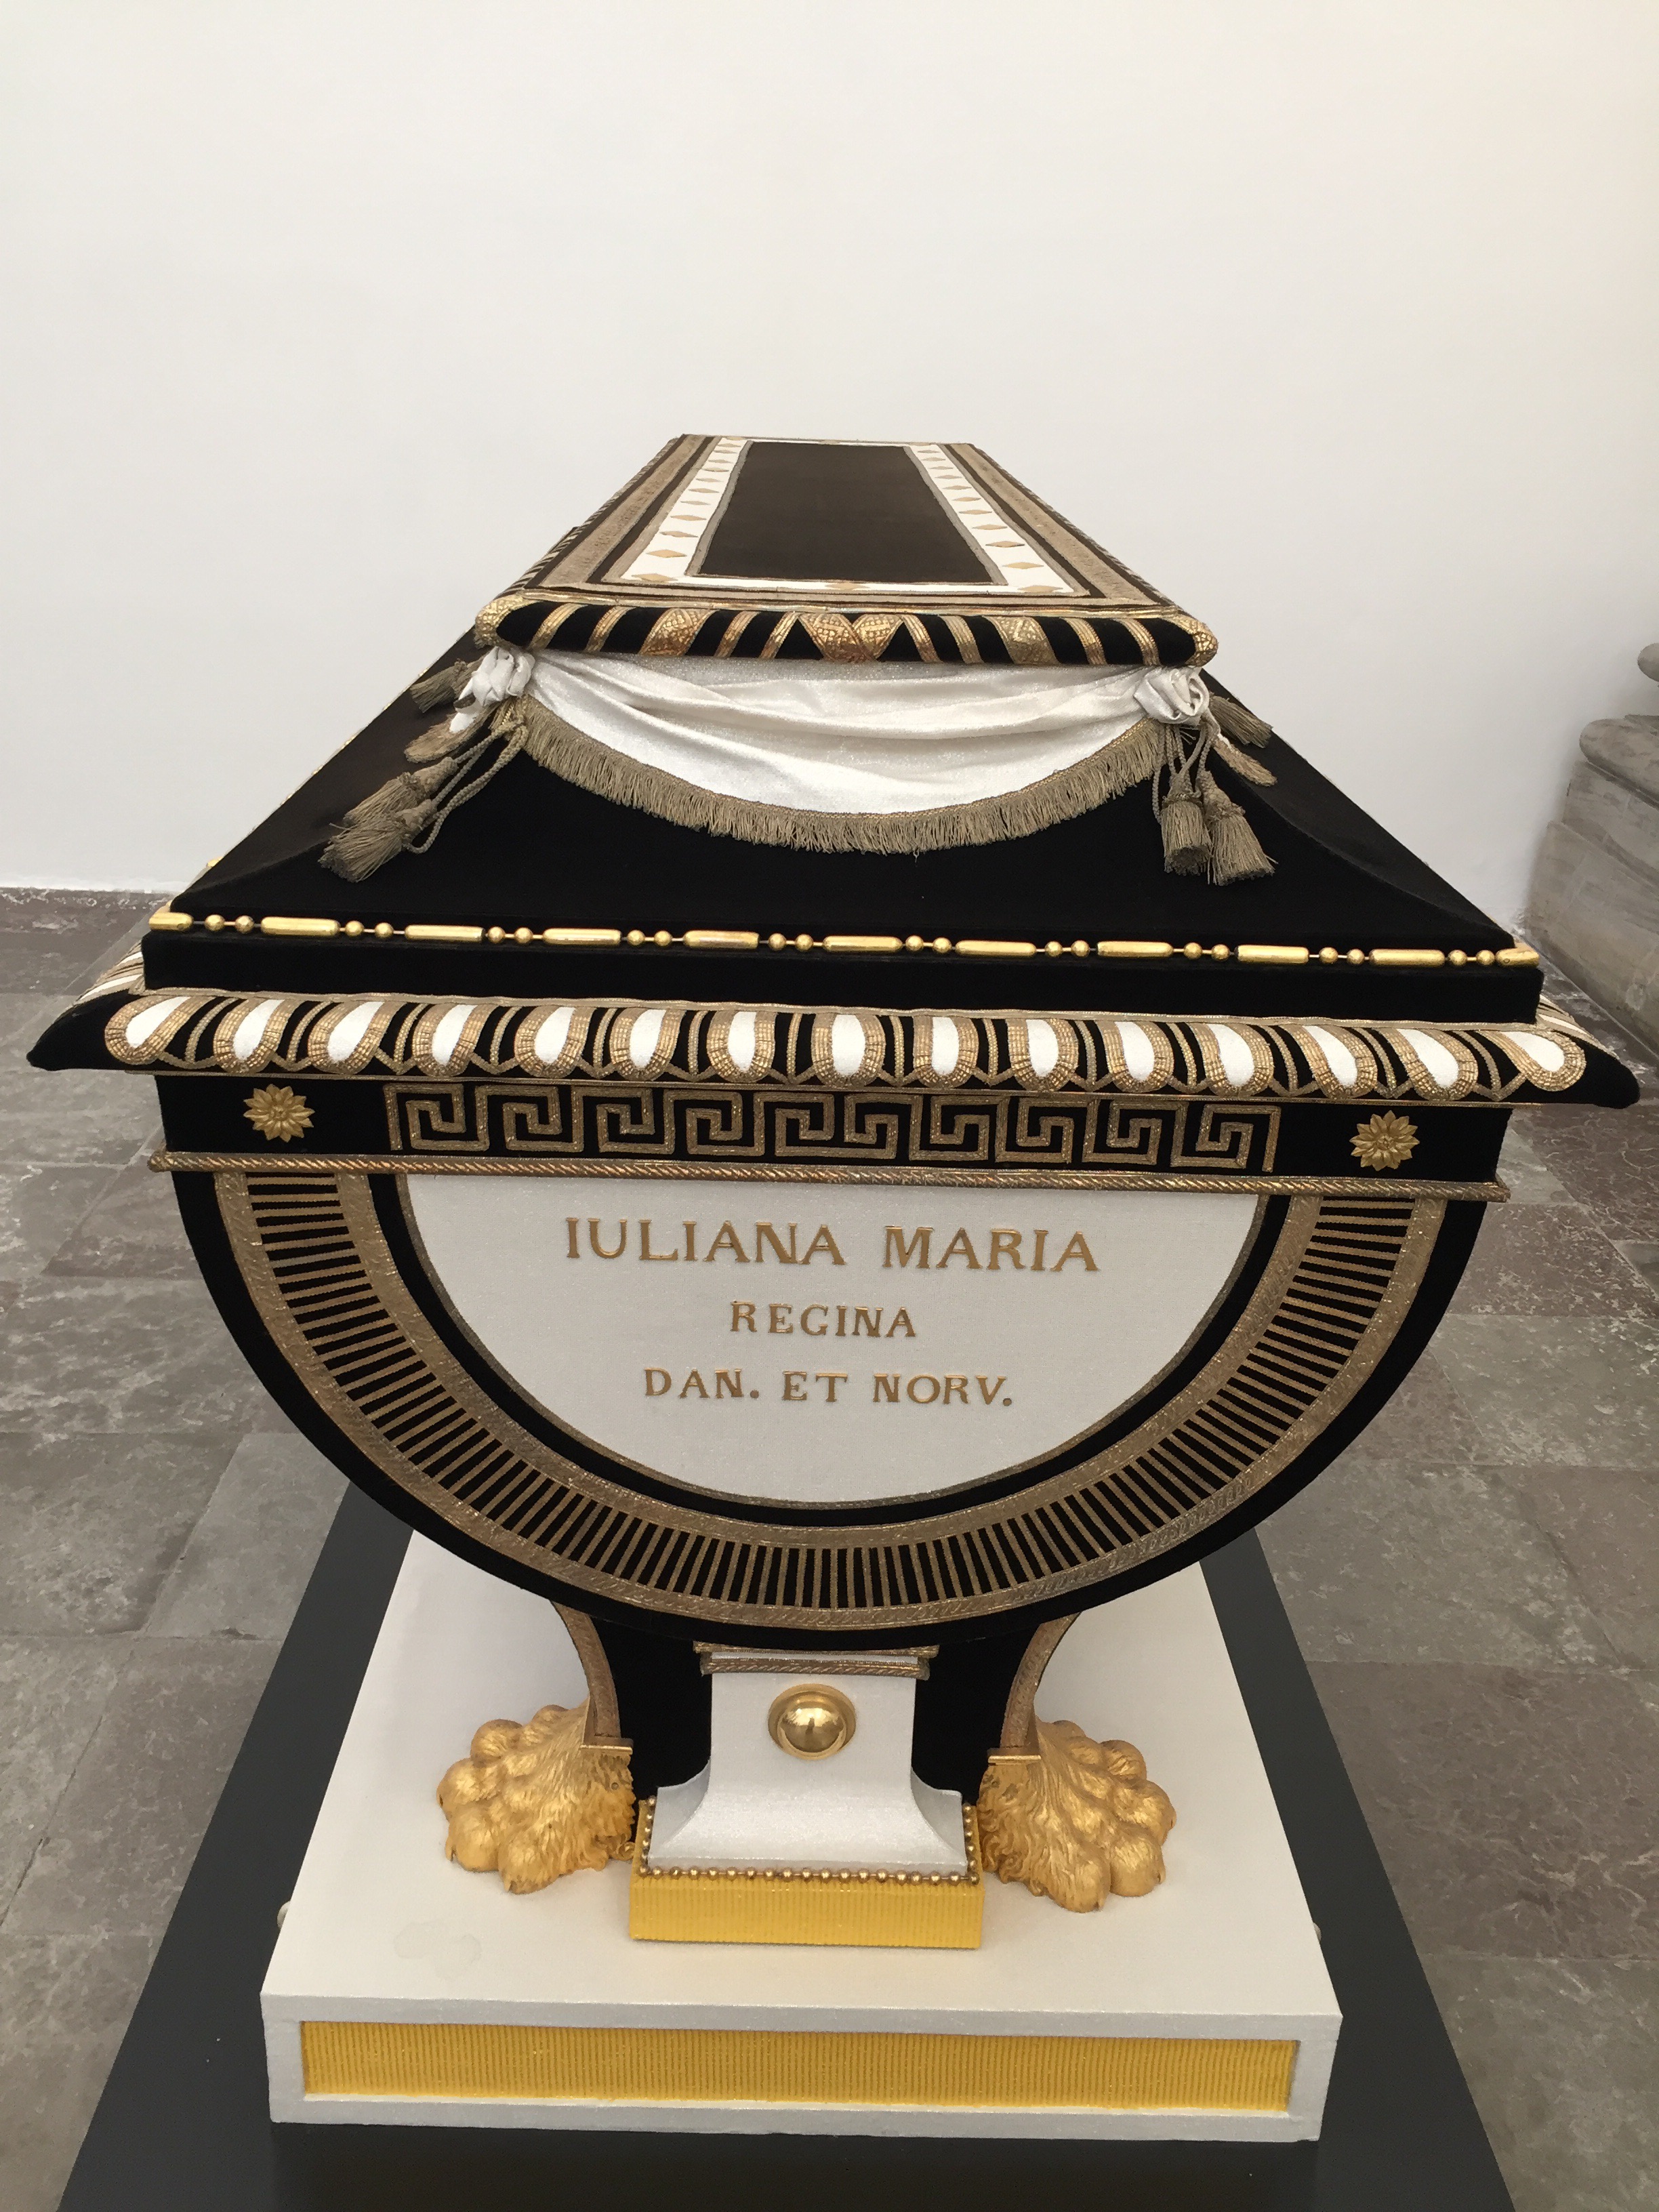
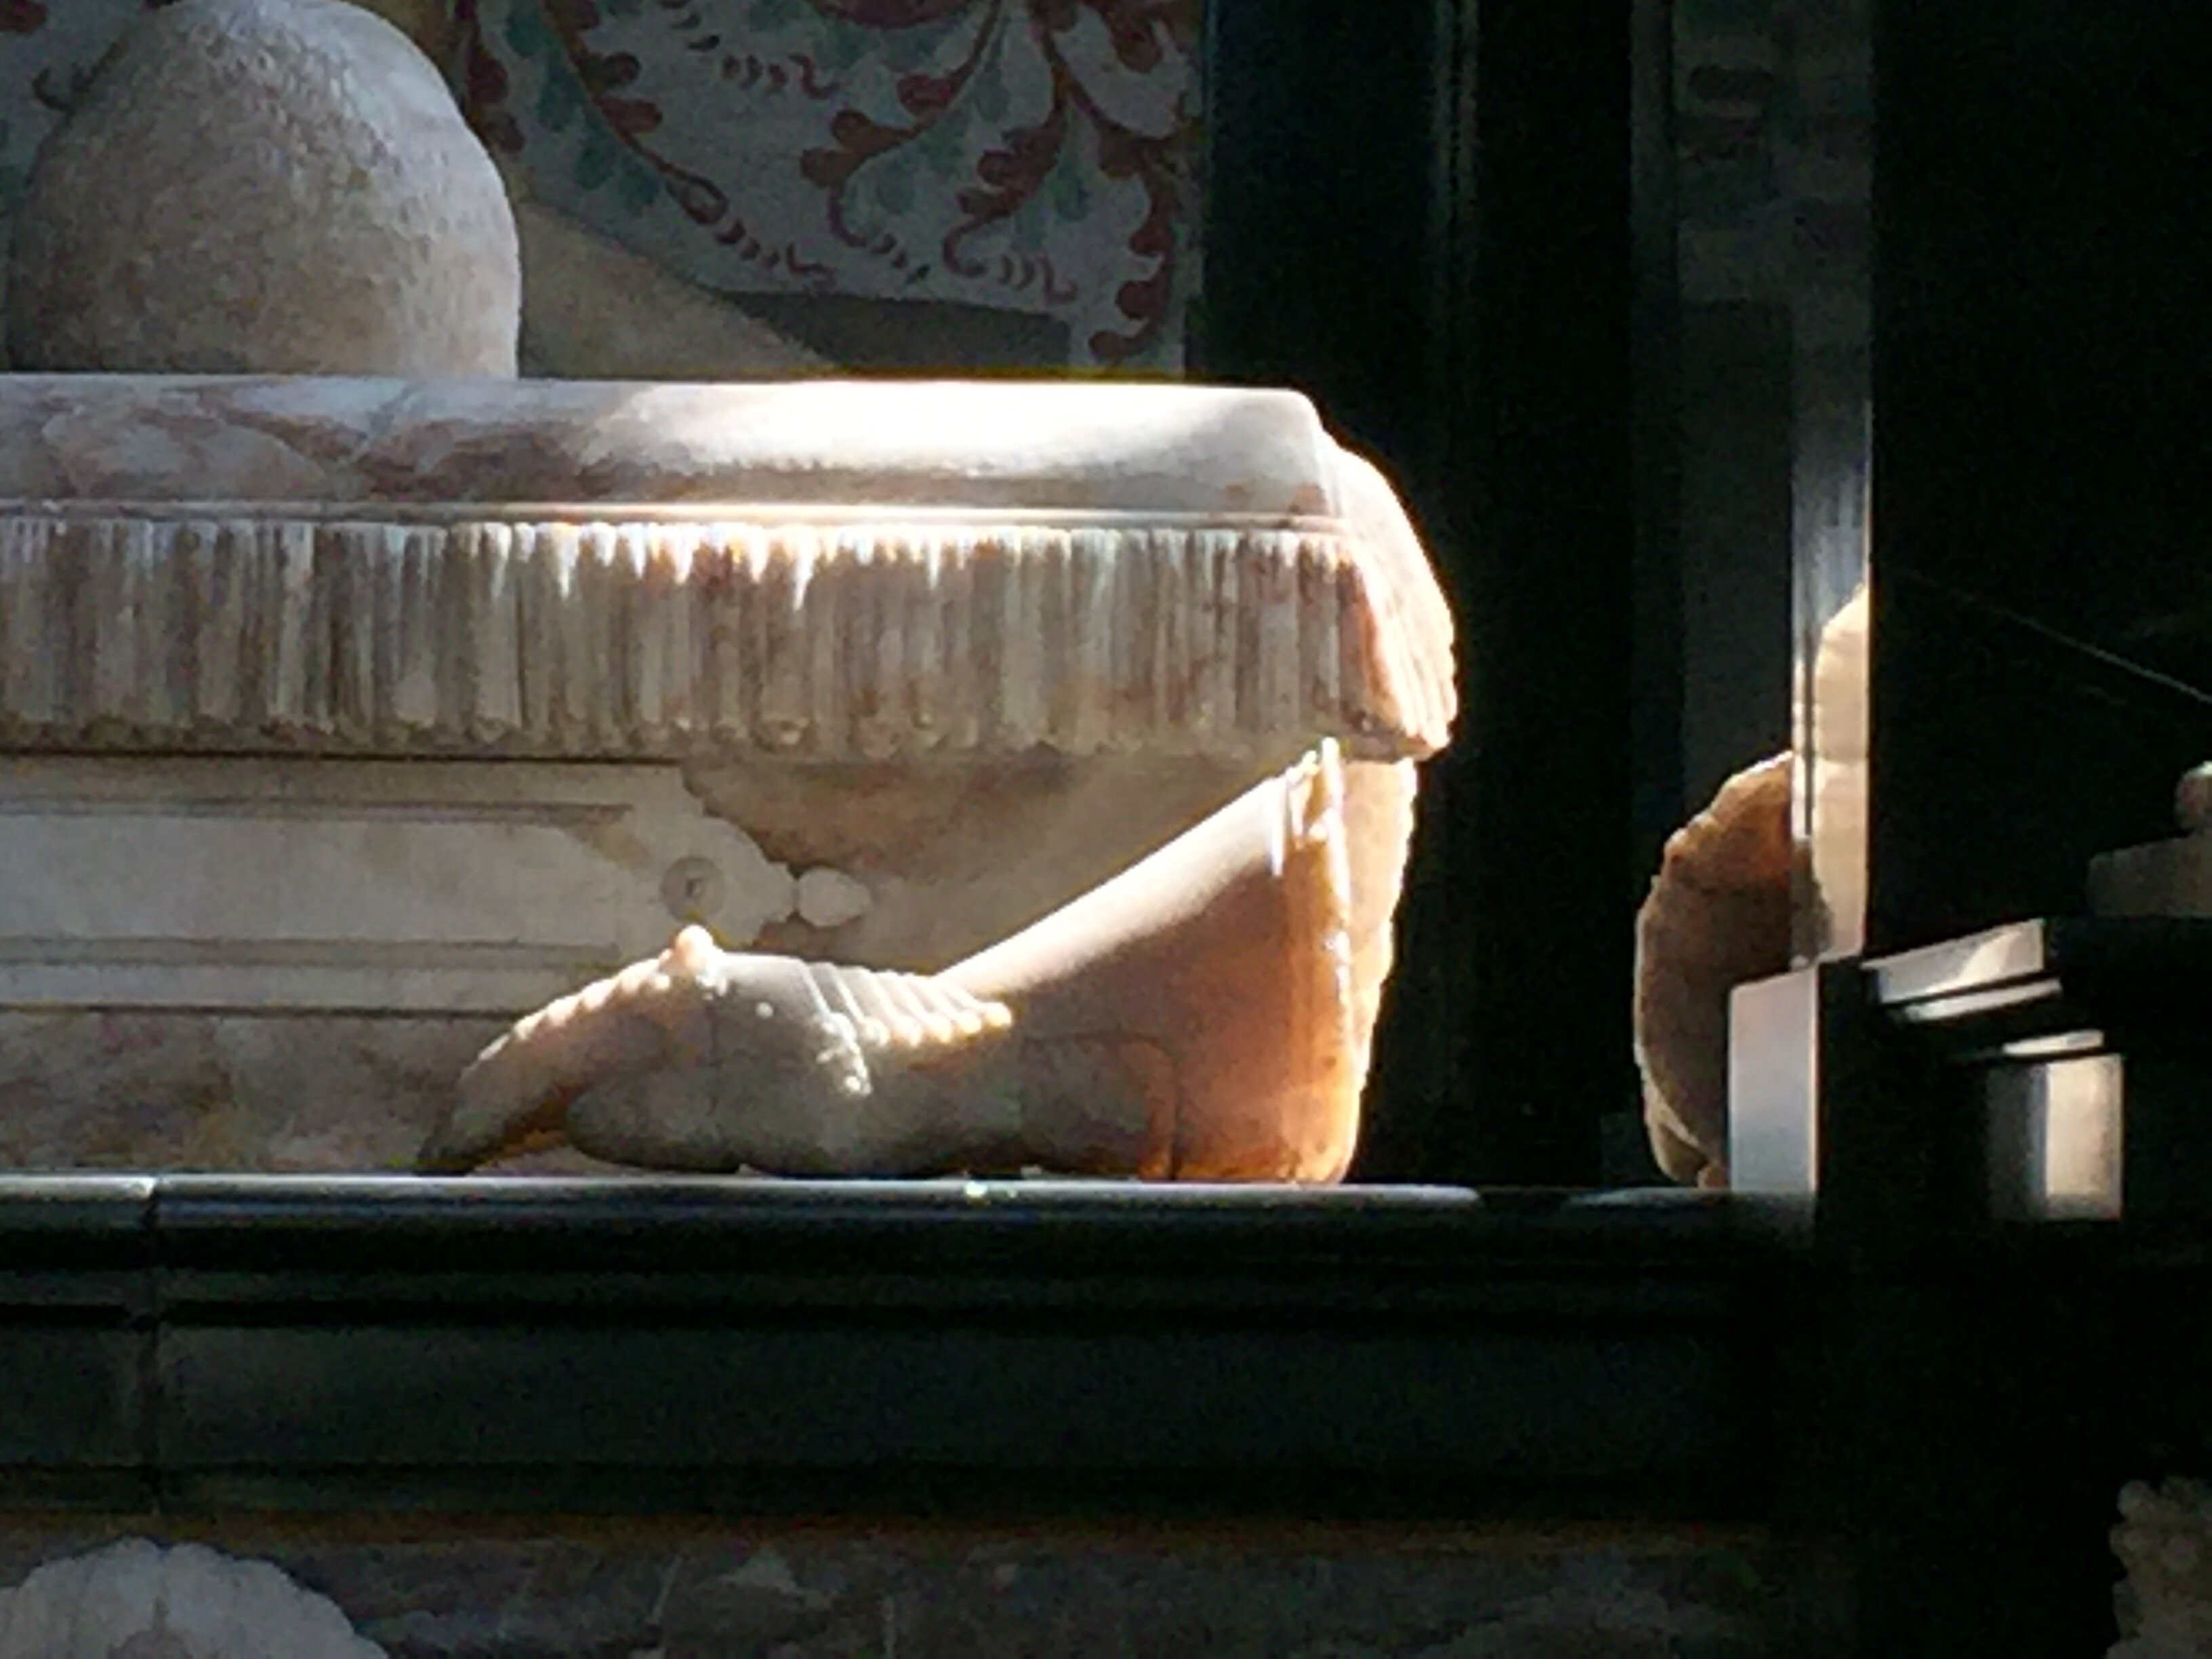
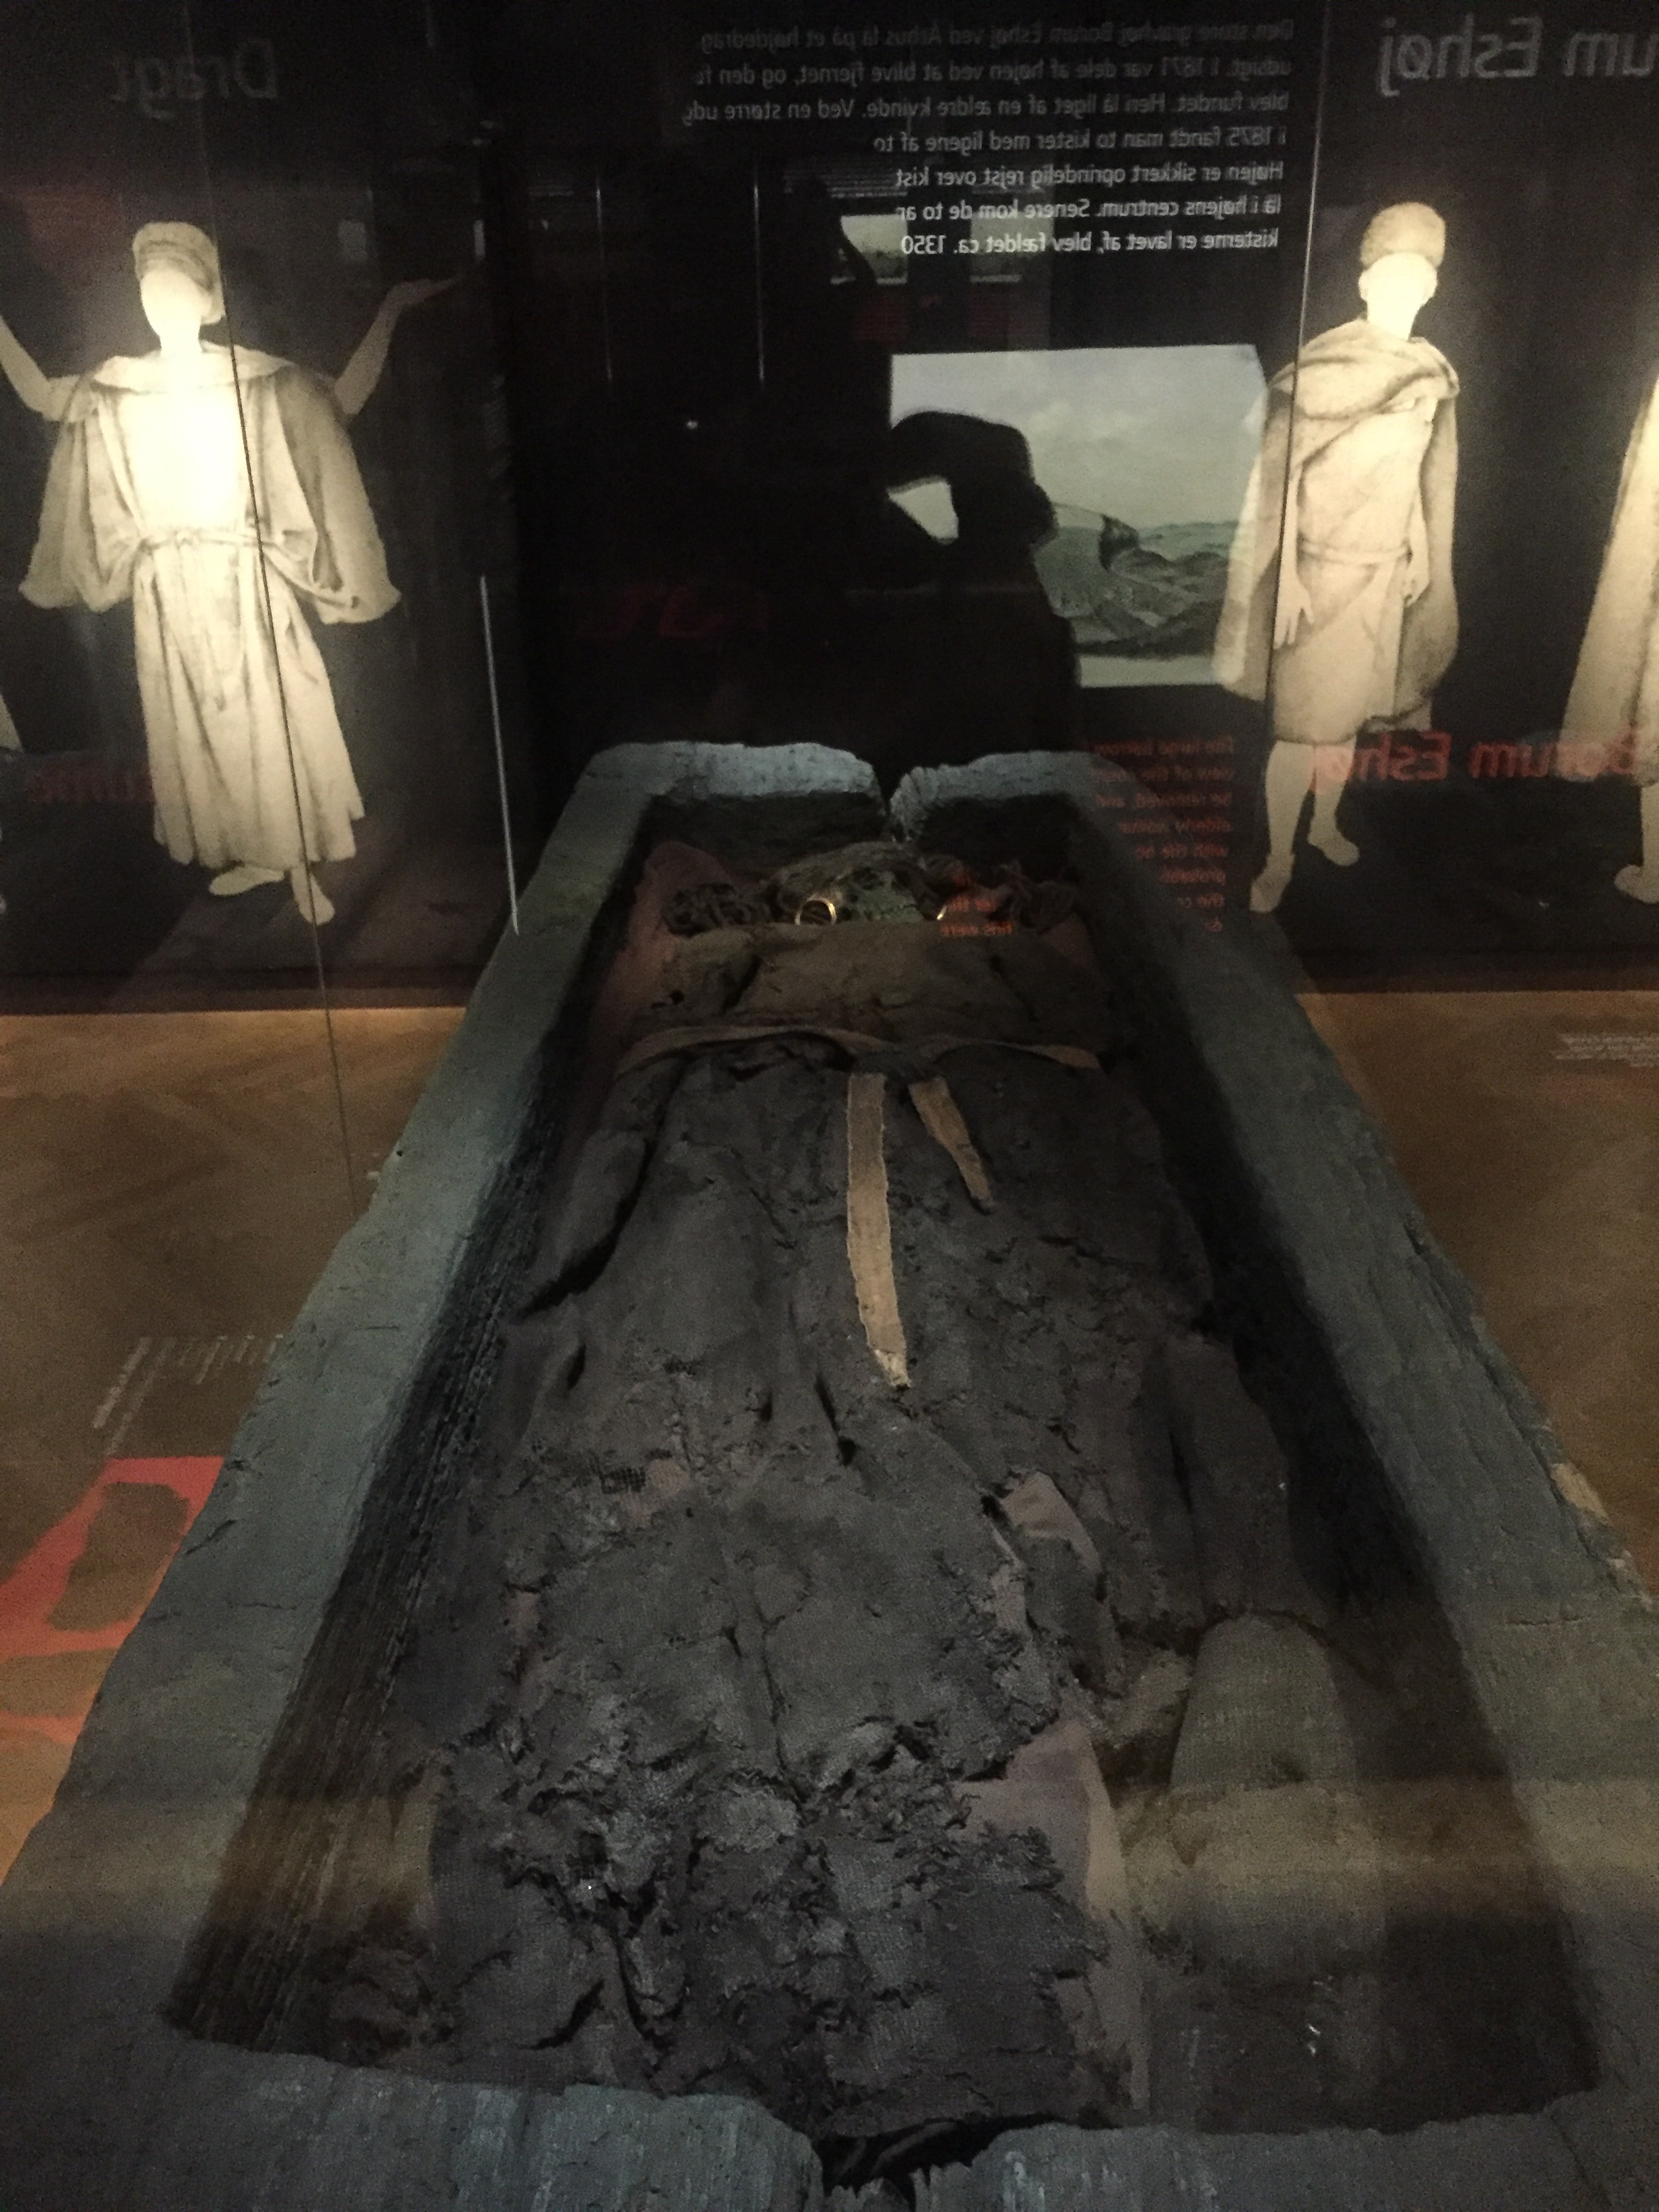
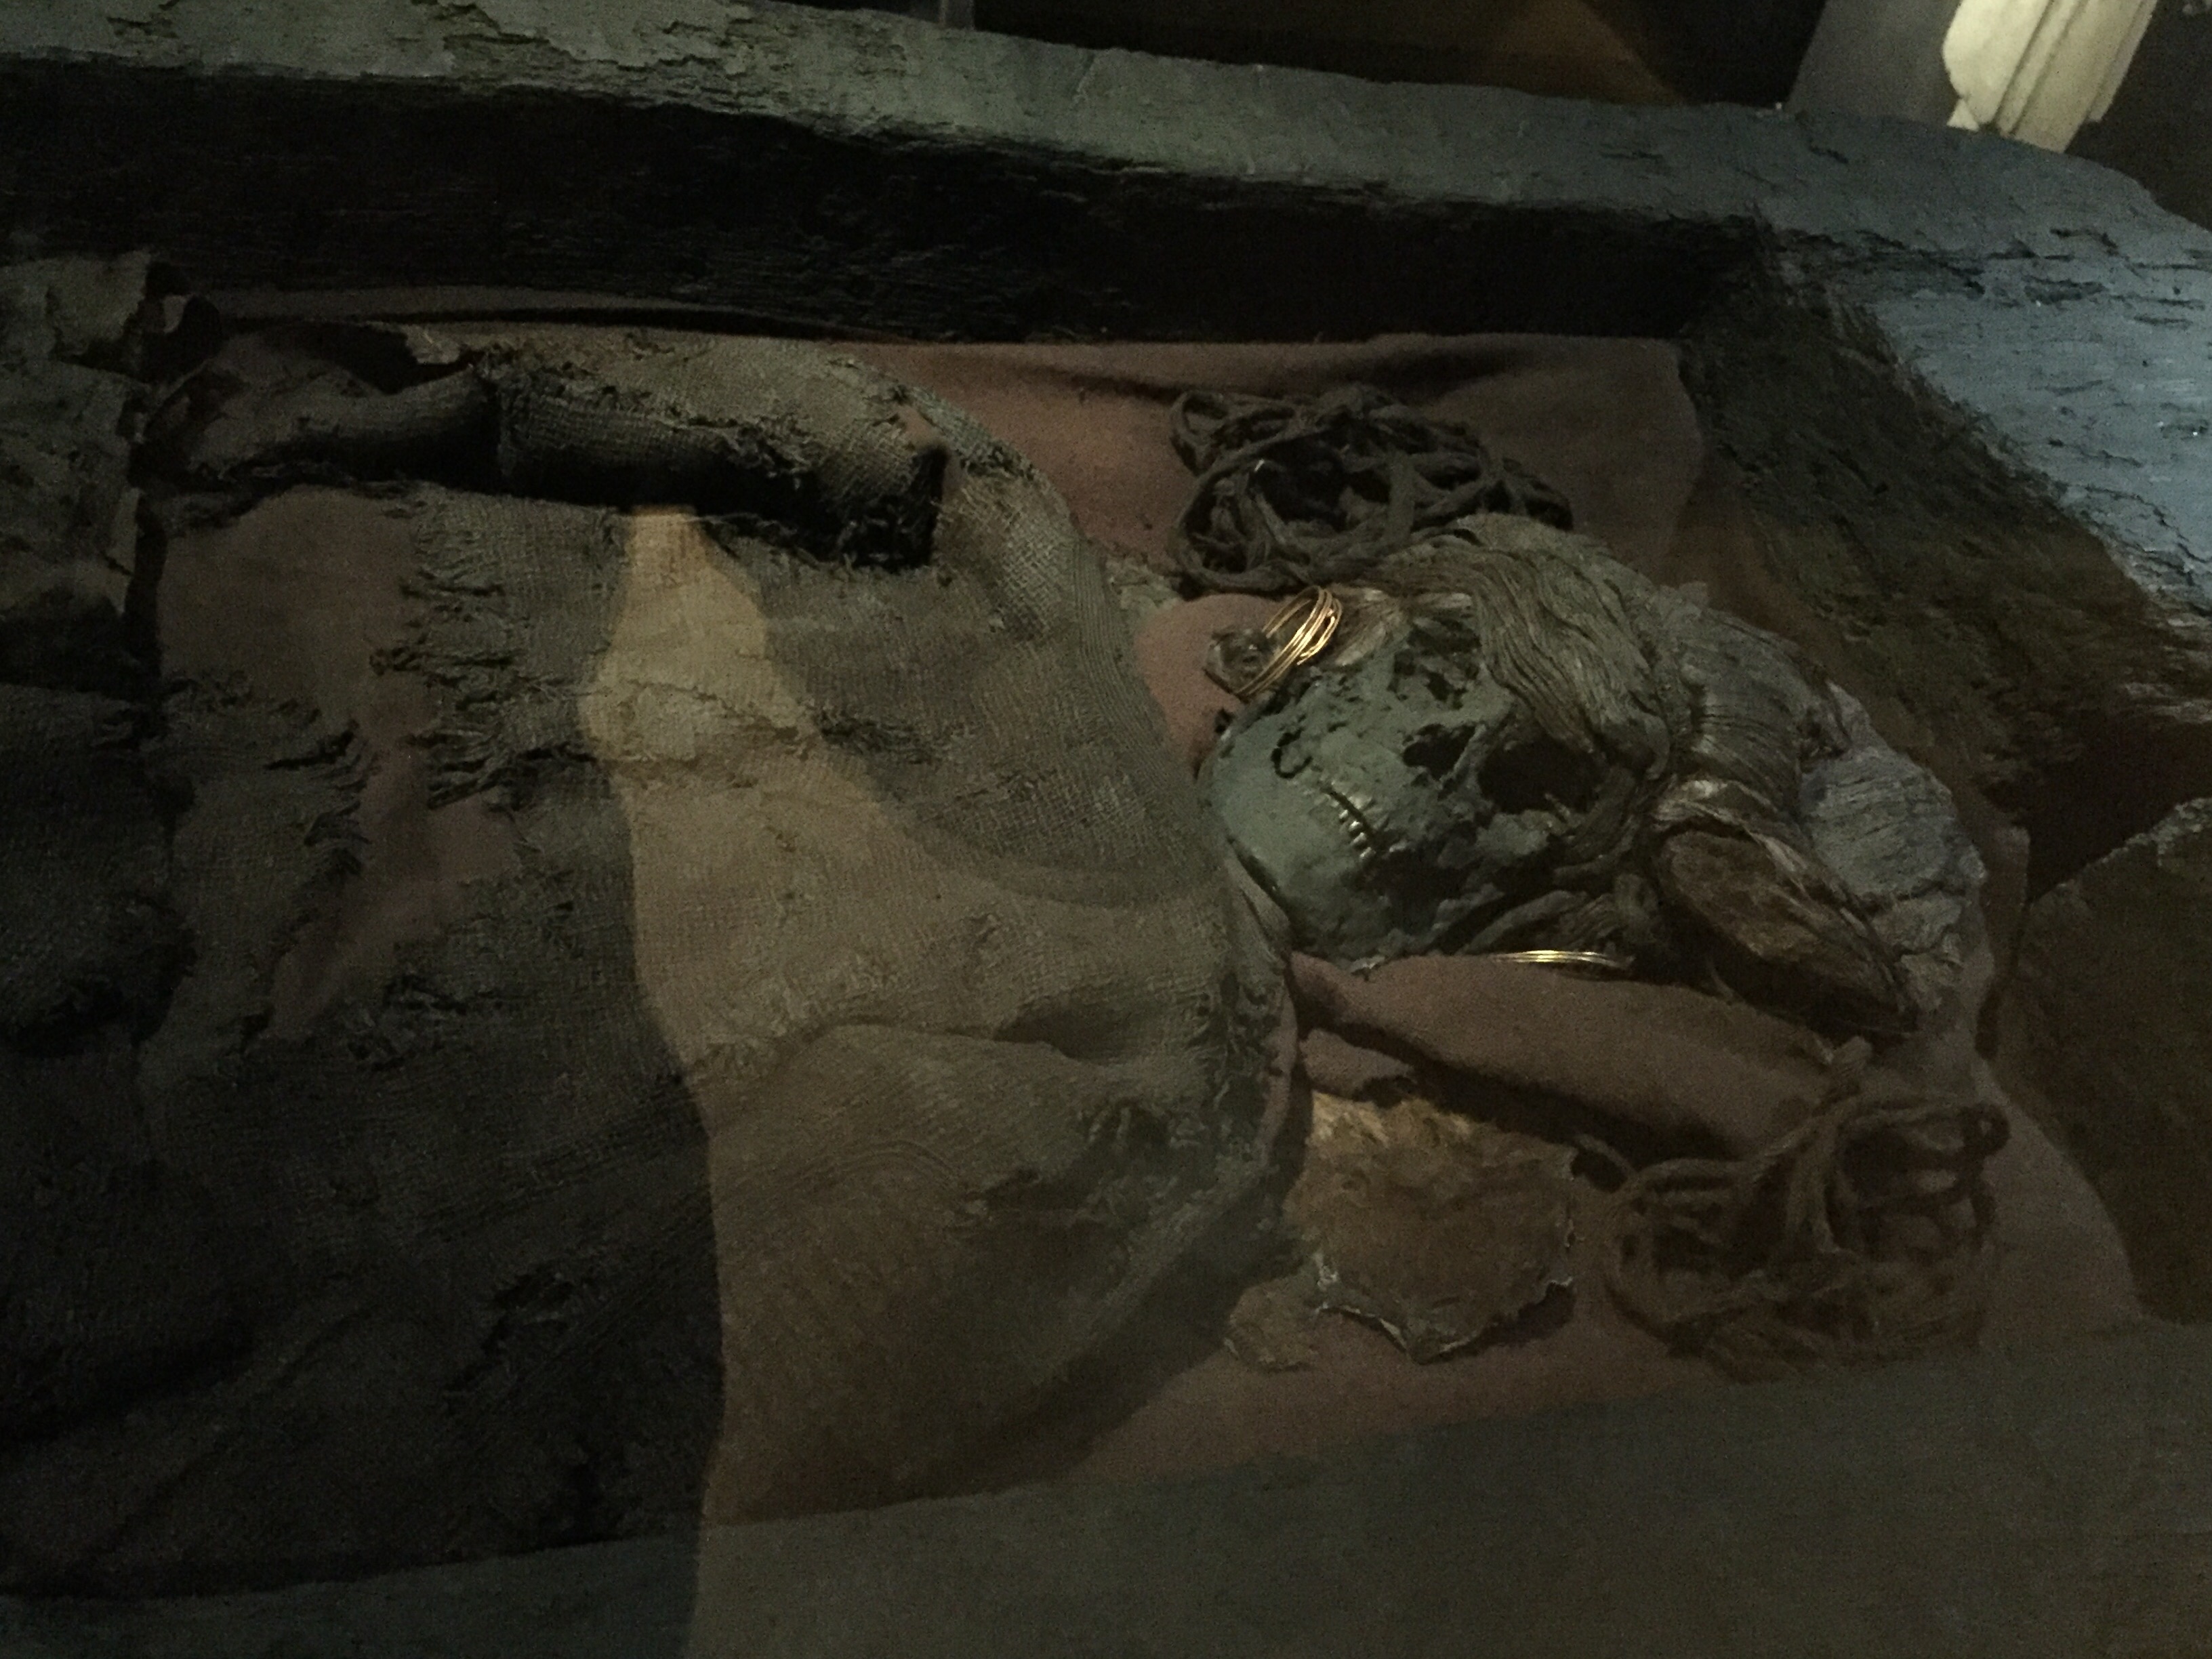
The chapel containing the monuments to Christian 9 and Louise, Christian 10 and Alexandrine, and Frederik 9 and Ingrid is stunning in its relative simplicity. Tombs of grey granites and marbles and white marble statues (the ‘three sisters of the Little Mermaid’: Grief, Memory and Love. The sculptor Edvard Eriksen’s wife was the model for all four) are bathed in light from the dome, reflecting off the white walls. It’s Northern and beautiful, and too busy for a photo while we were there. 

The chapel of Frederic 5 has a similar feel but the neo-classicist style is more ornate.

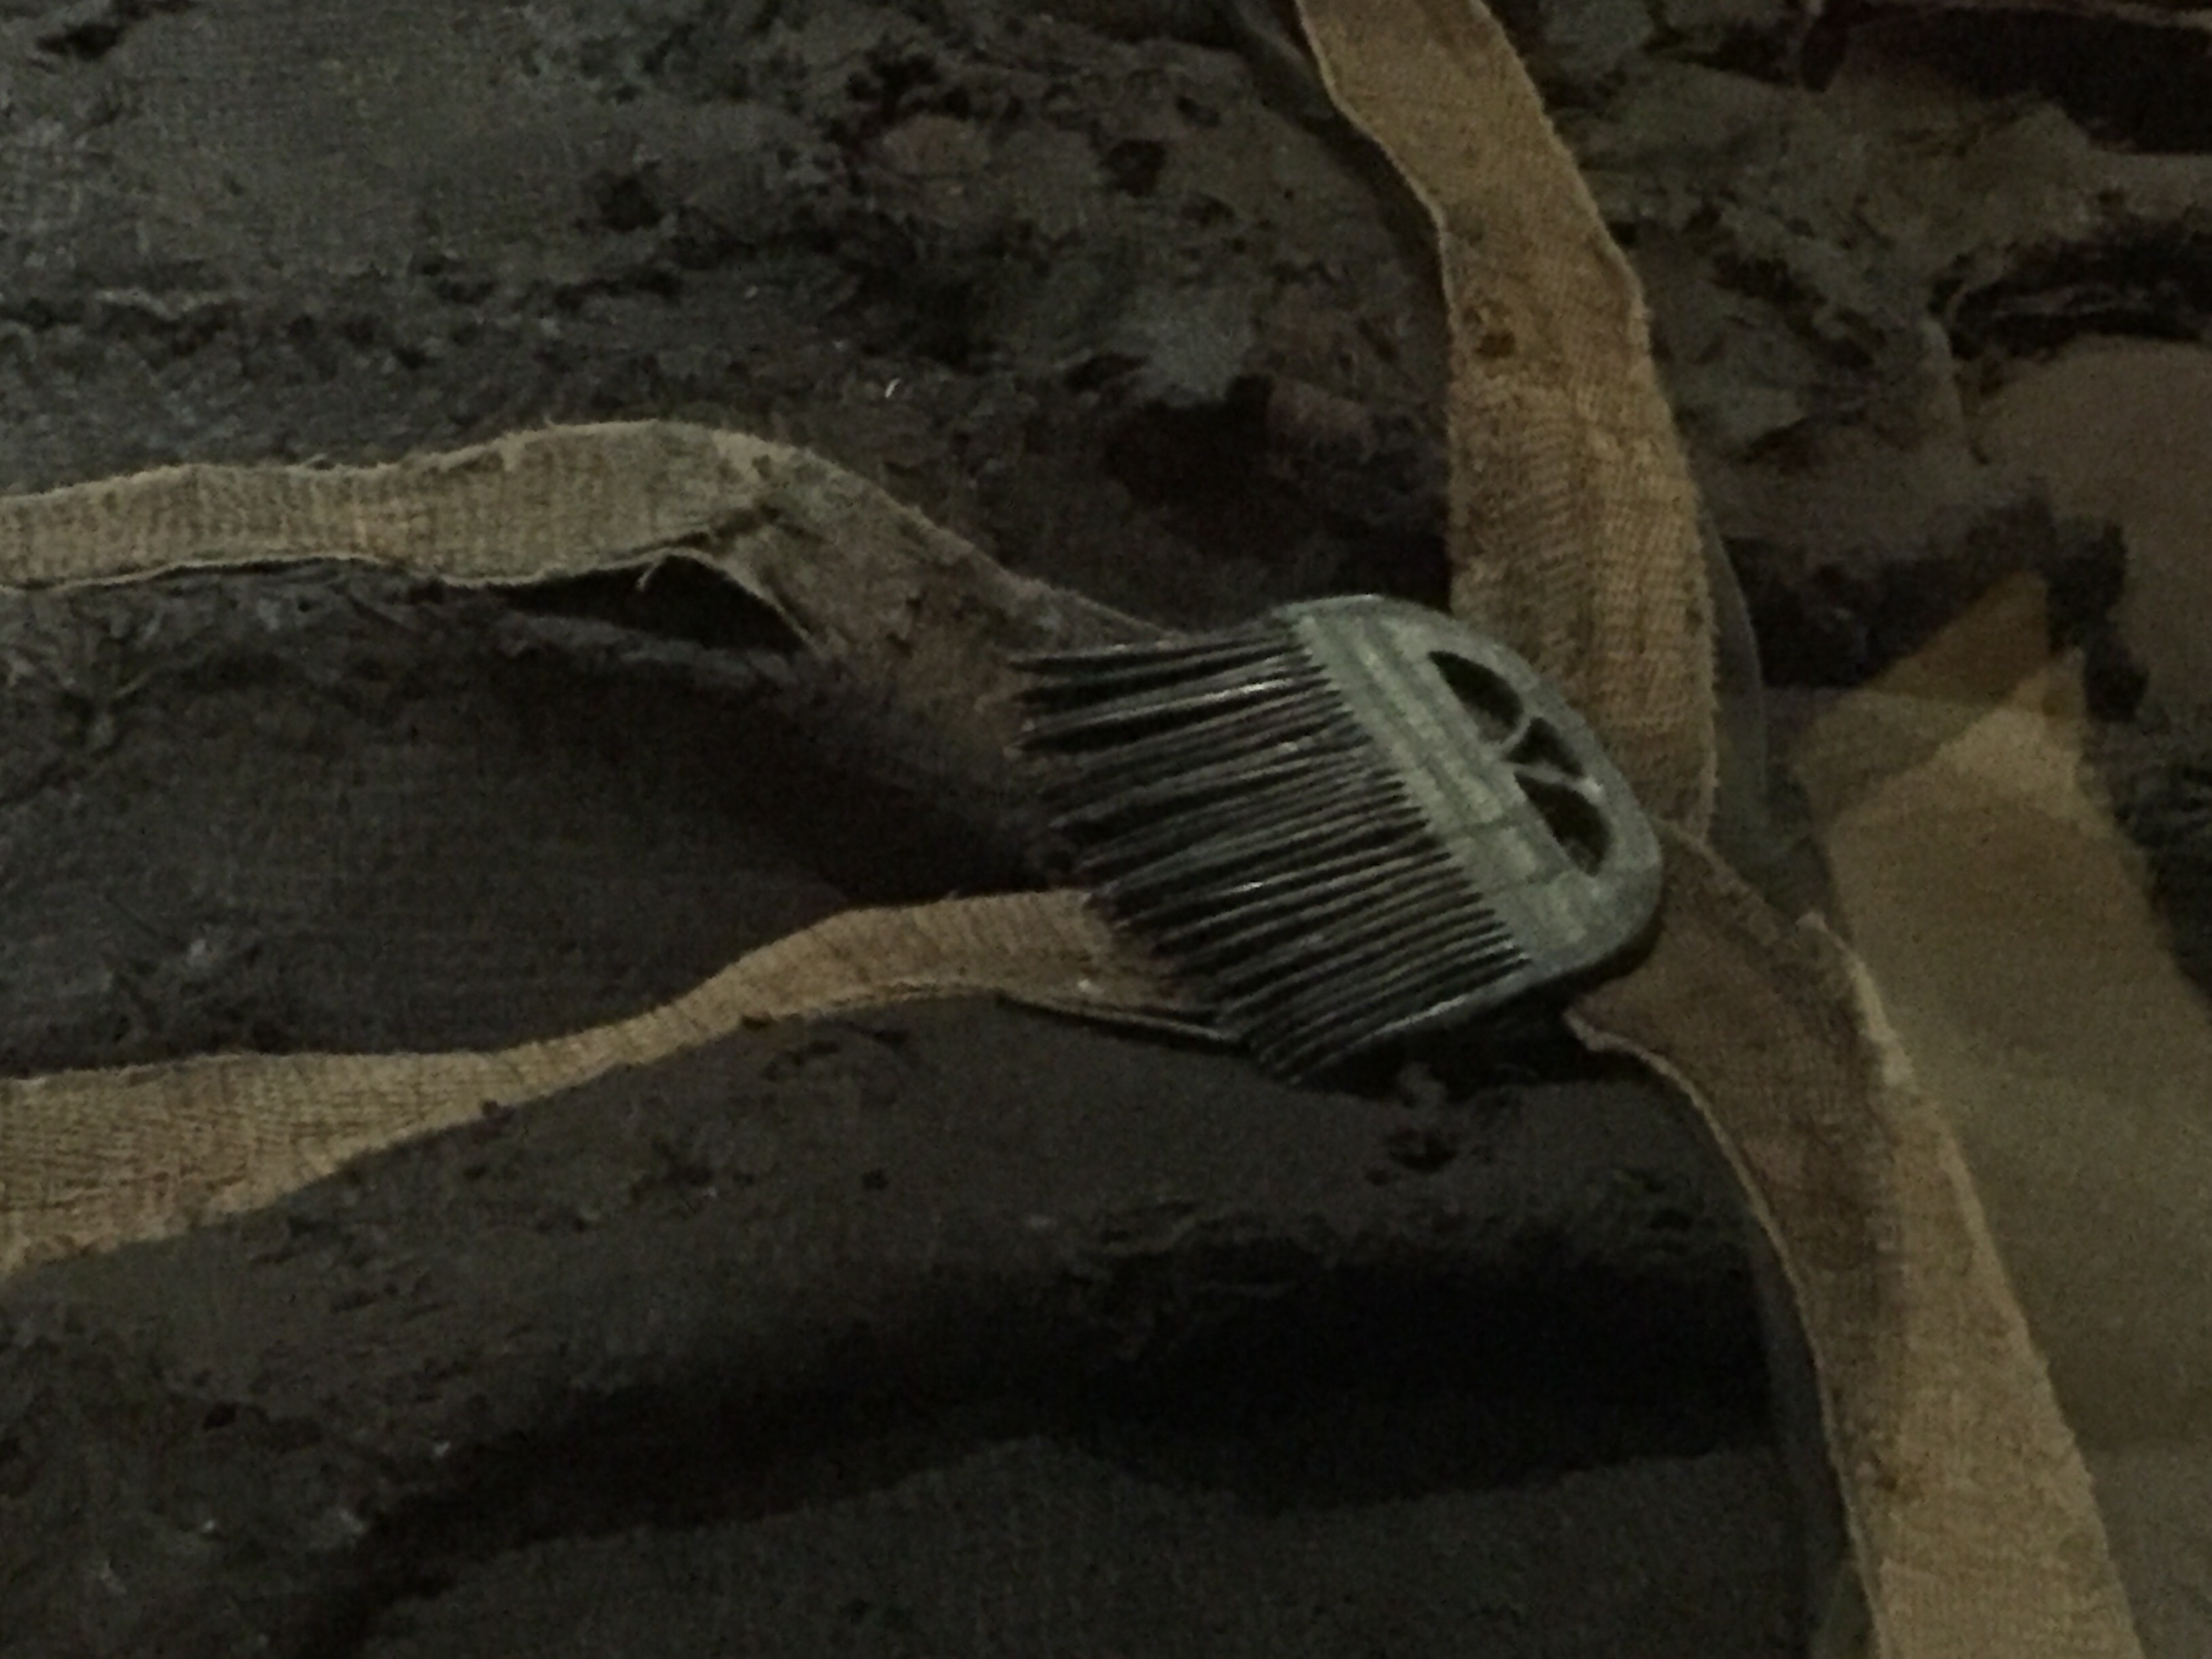
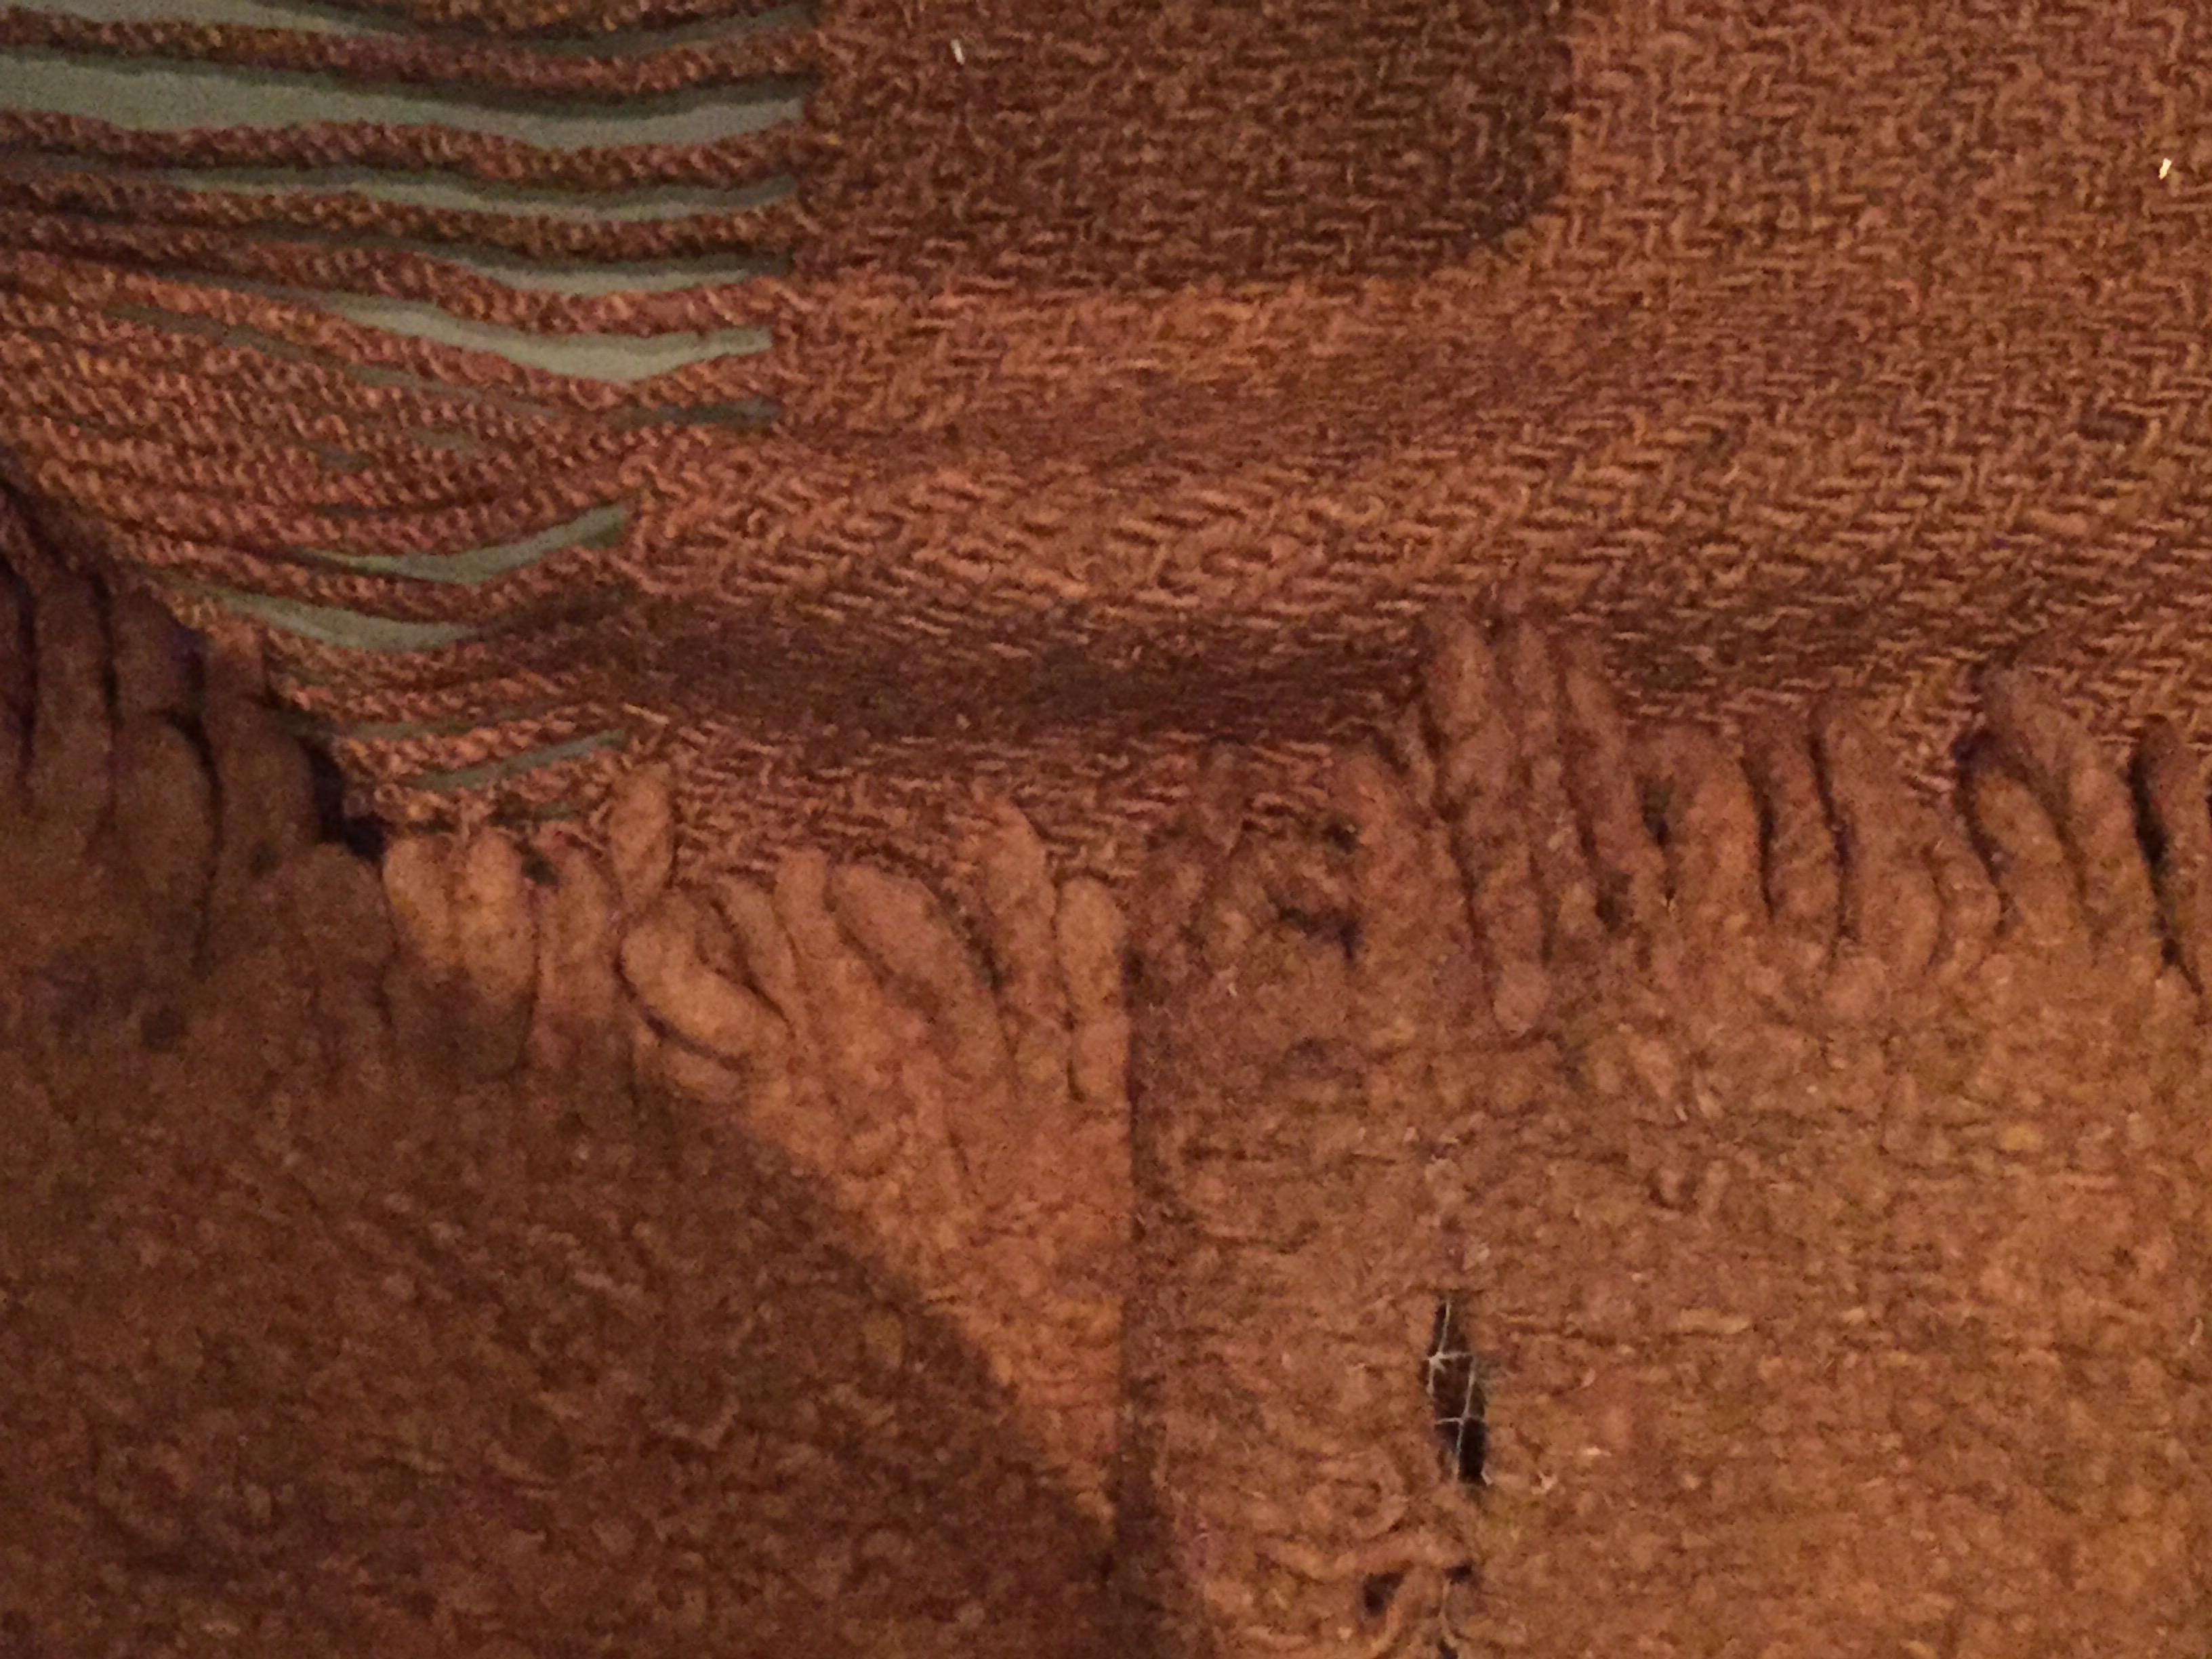
I was rather taken by the use of dead blacke velvet to cover some of the coffins. Intending no disrespect to Juliana Maria, my eye was caught by some of the gold trim … It looks very like brocaded tablet weaving.

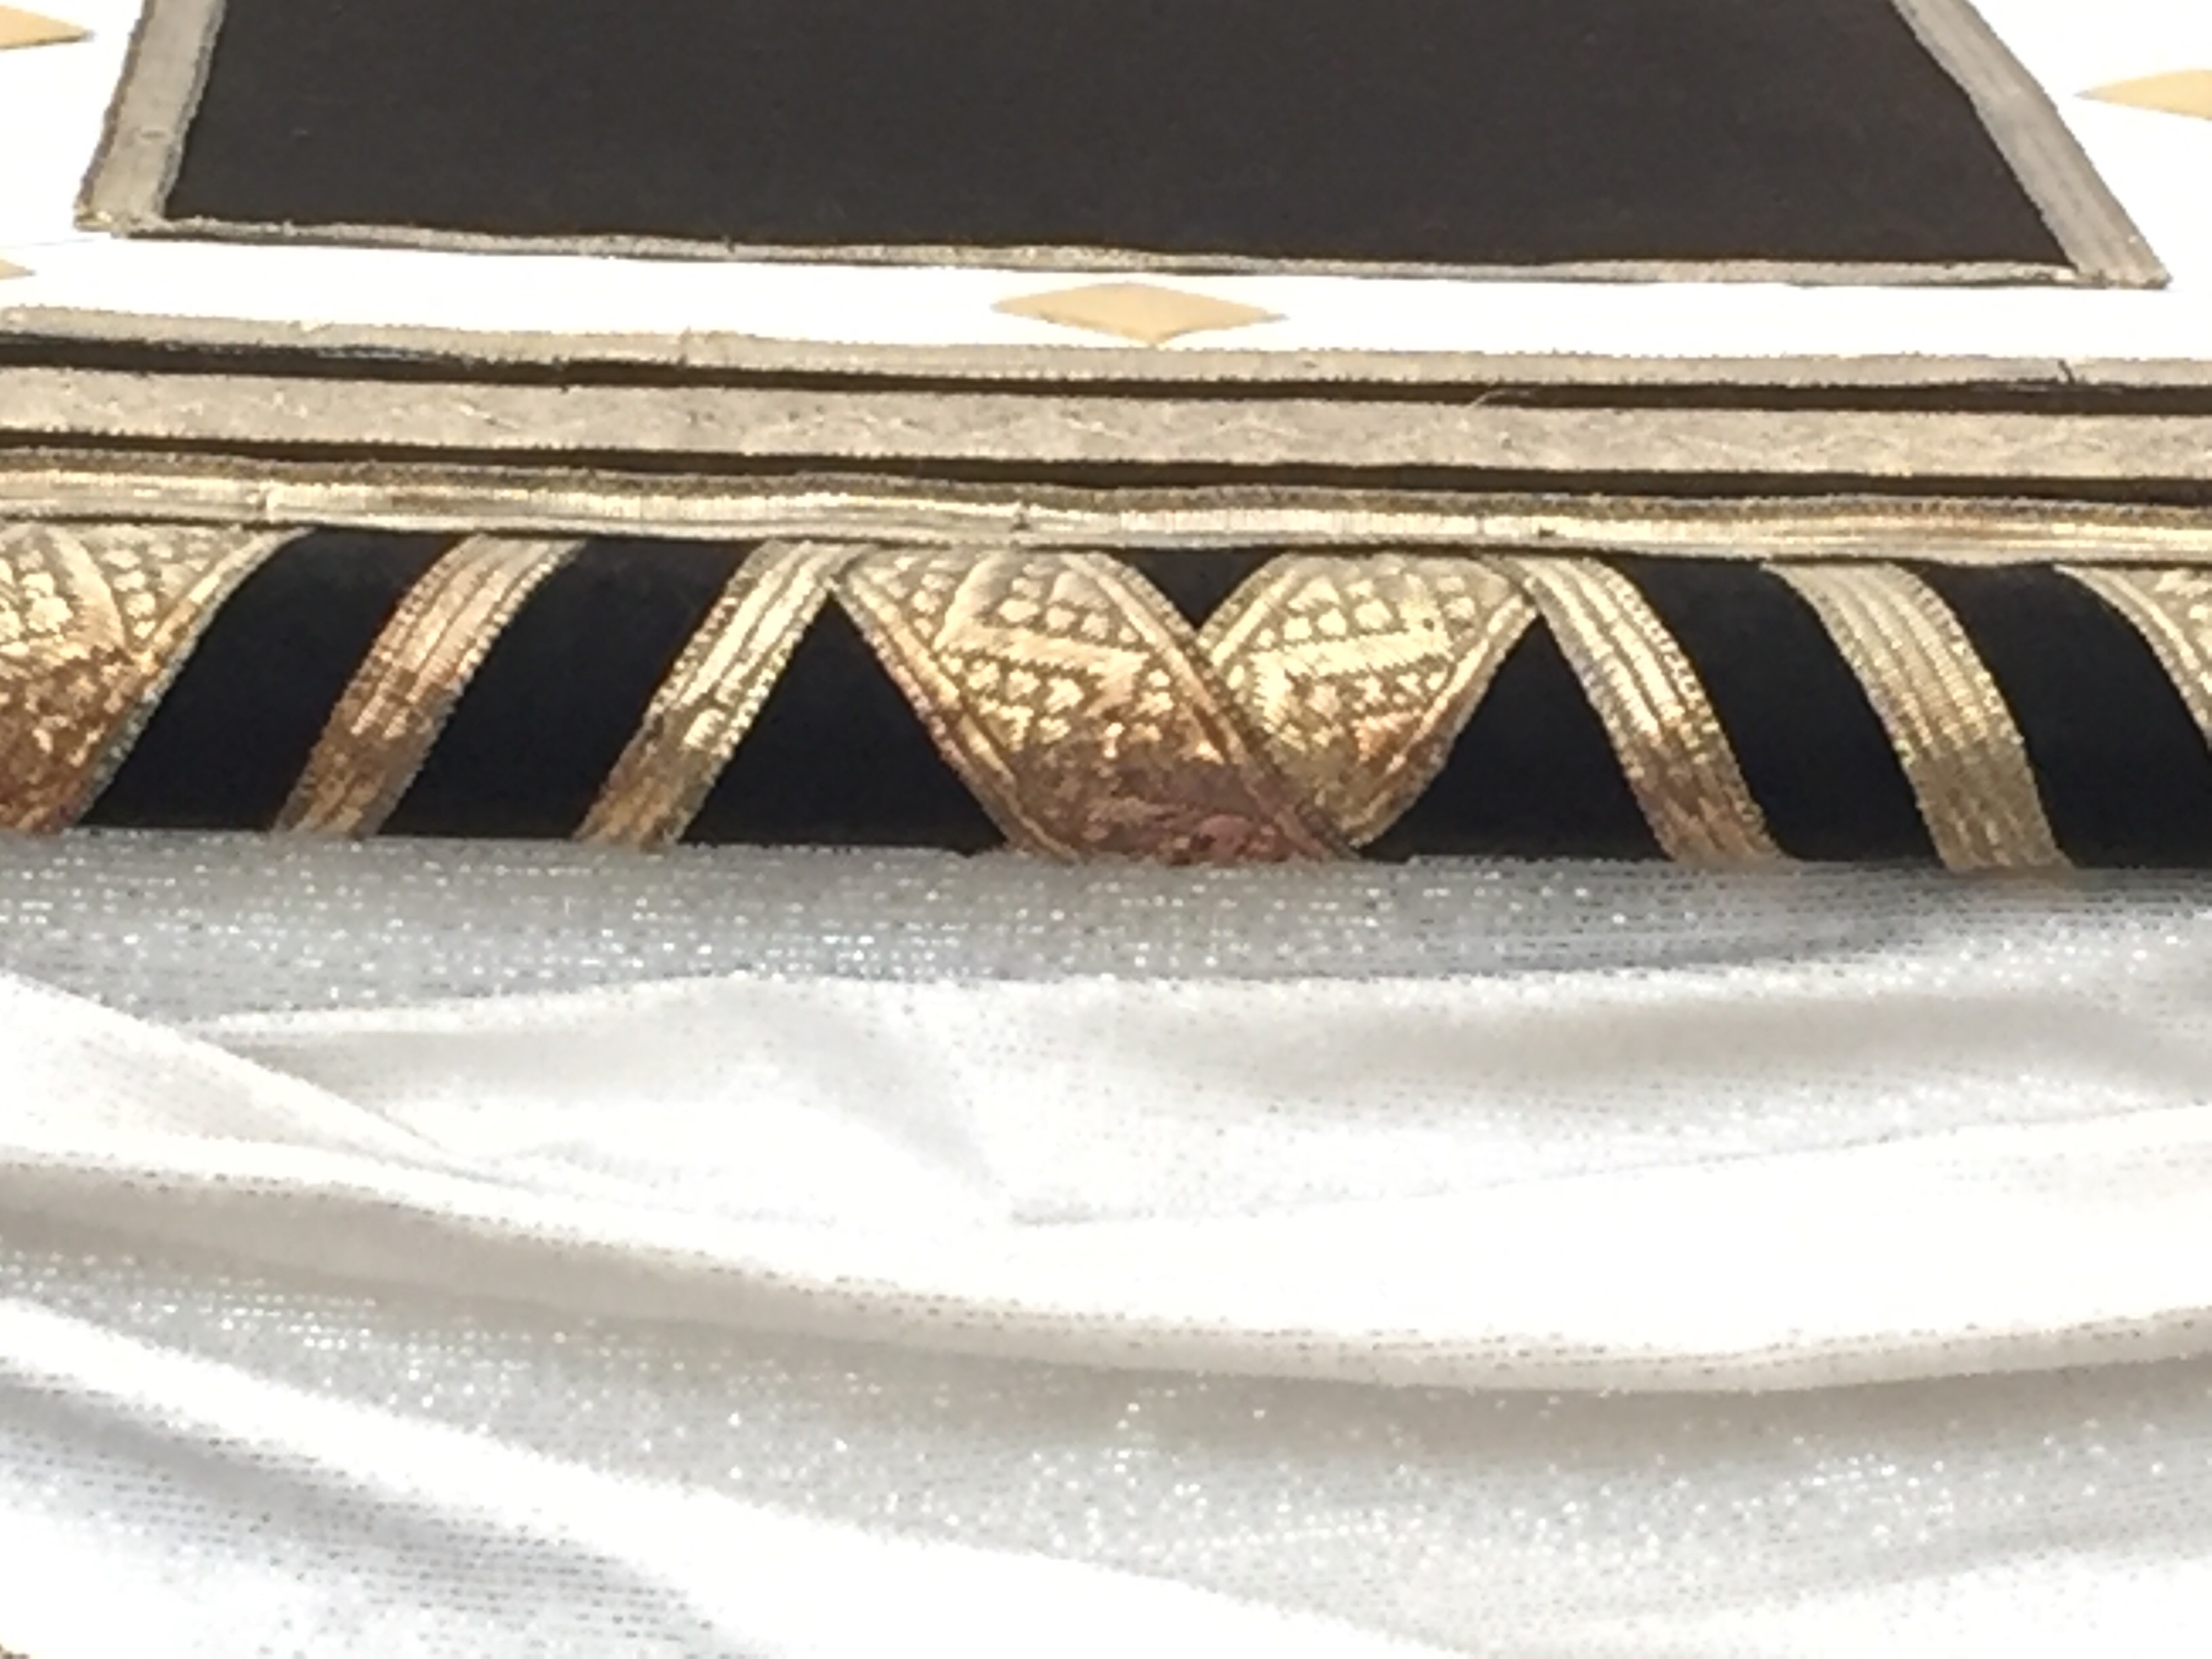
Christian 1’s chapel is also richly painted with frescoes from the second half of the 1400s.

It’s worth several hours.

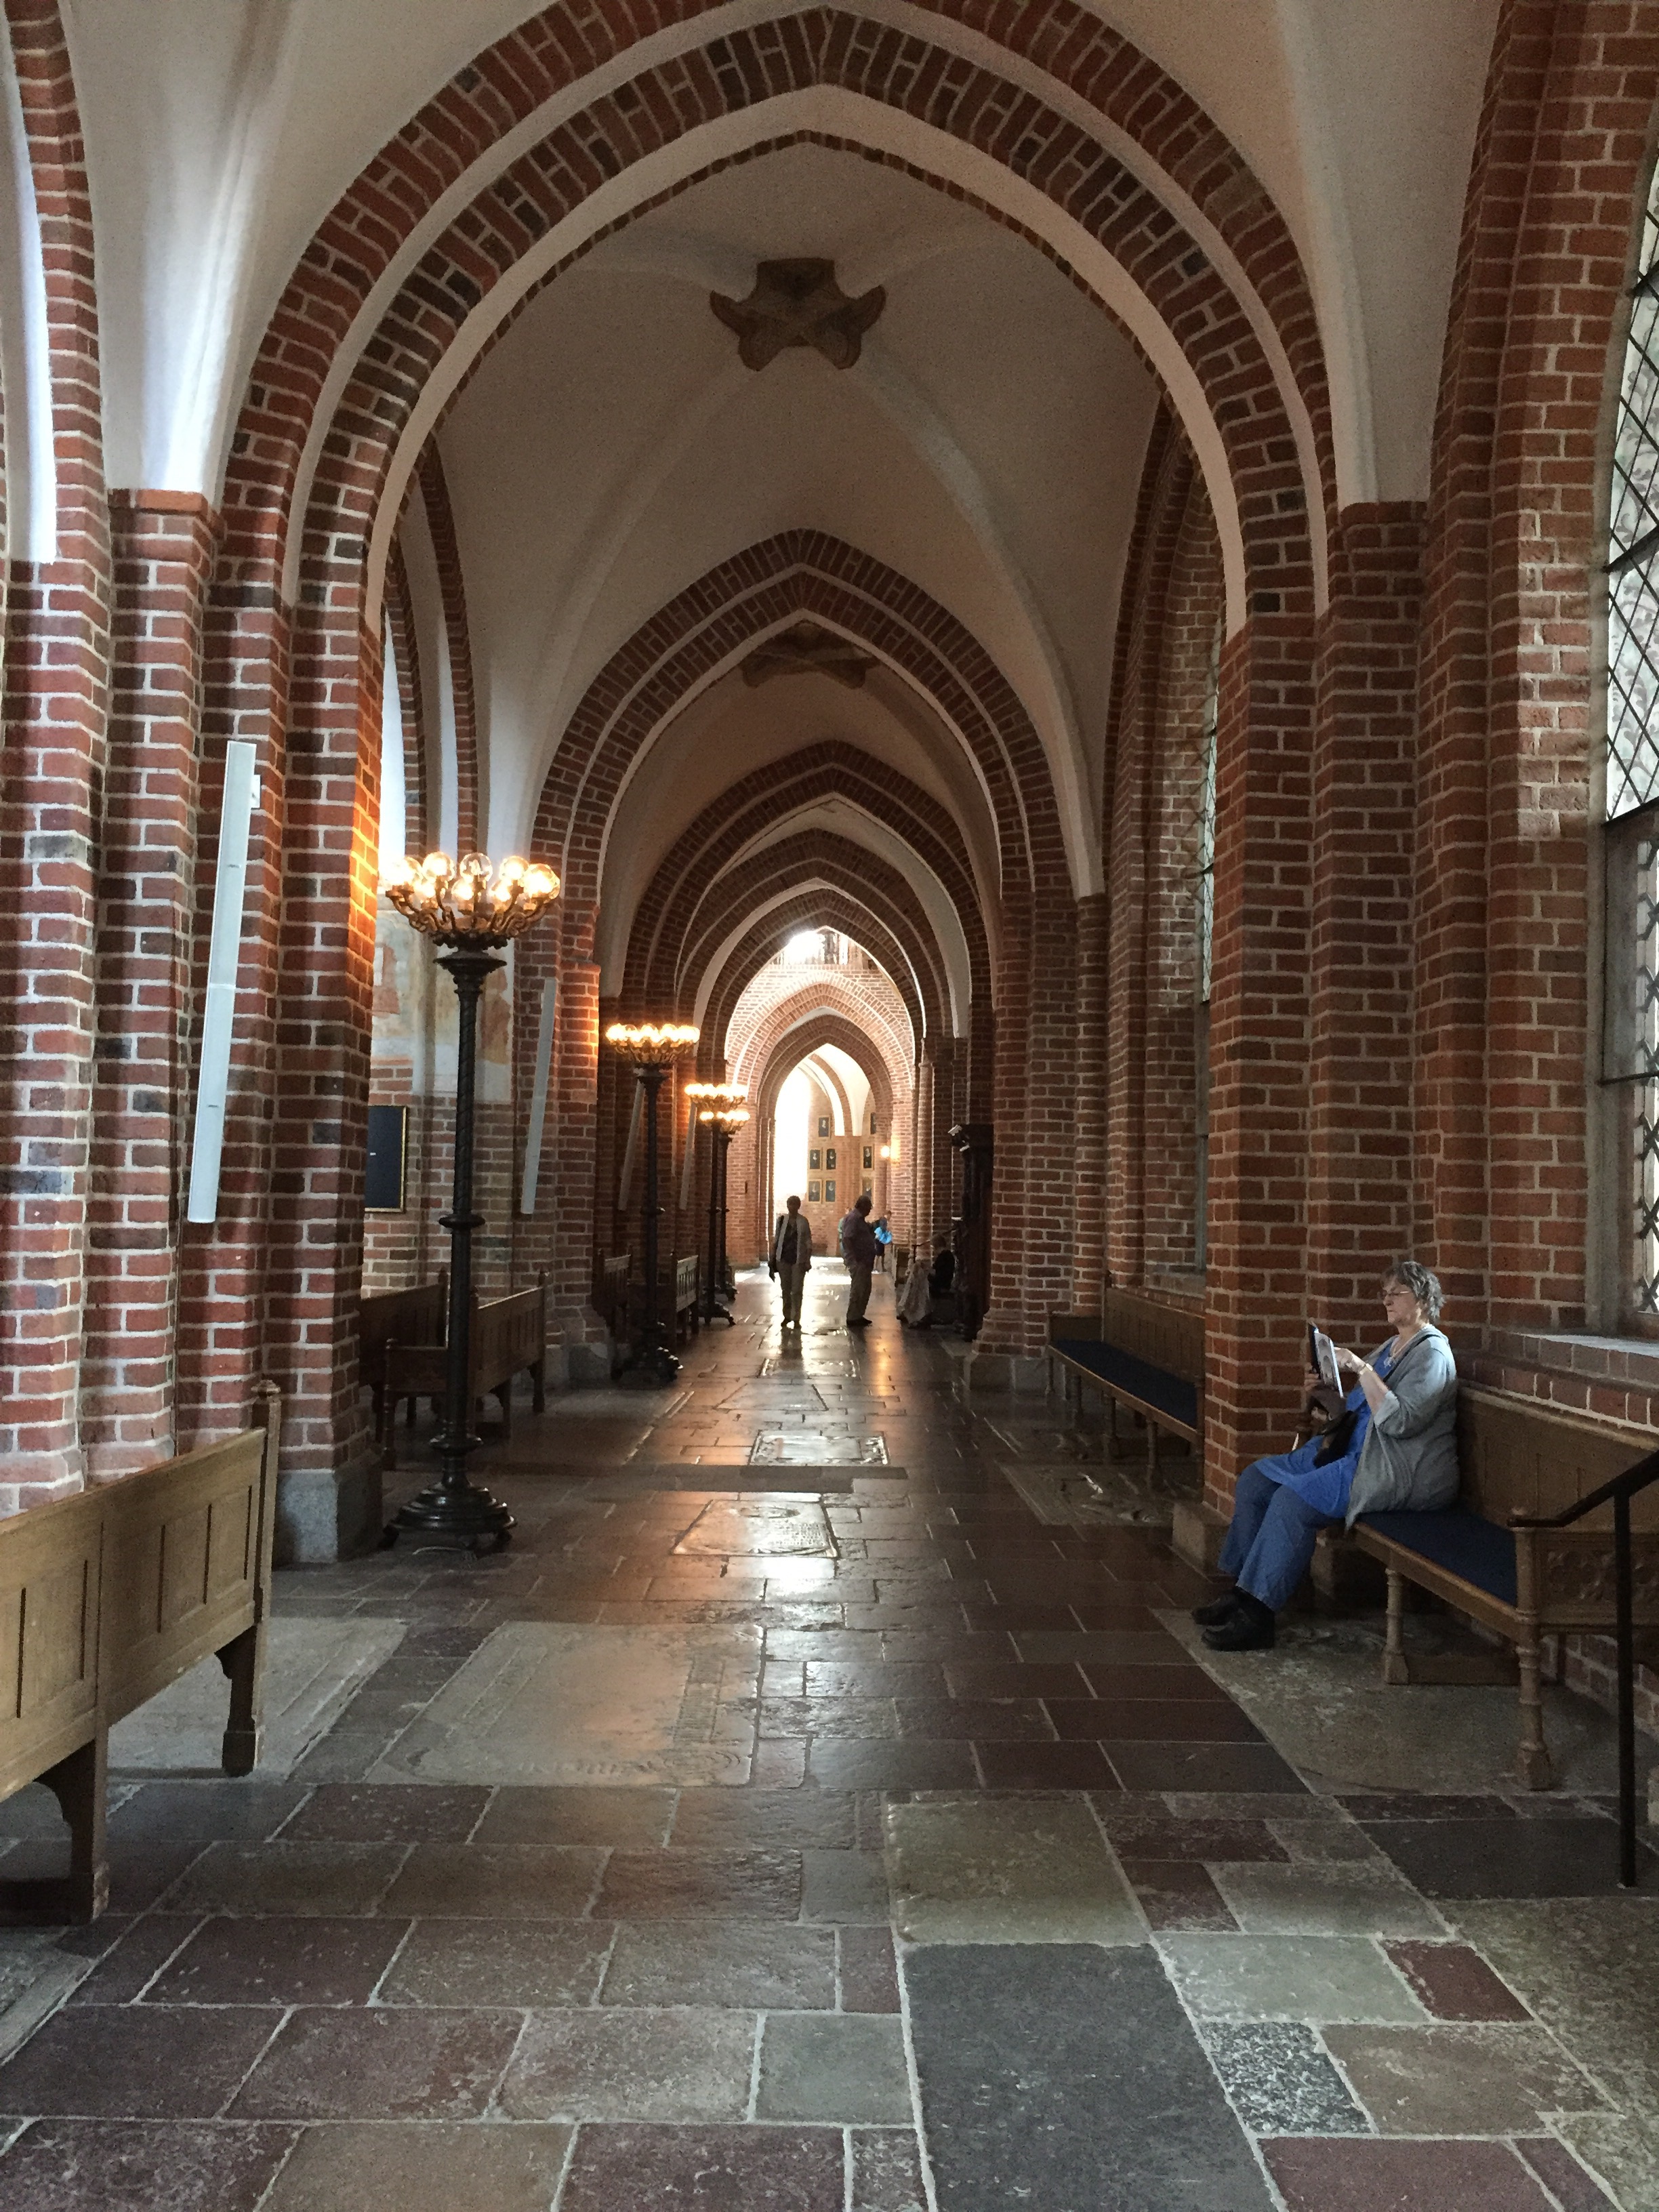
Follow the signs, walk down the hill to the harbor, and we’re there.

The café serves good food and information

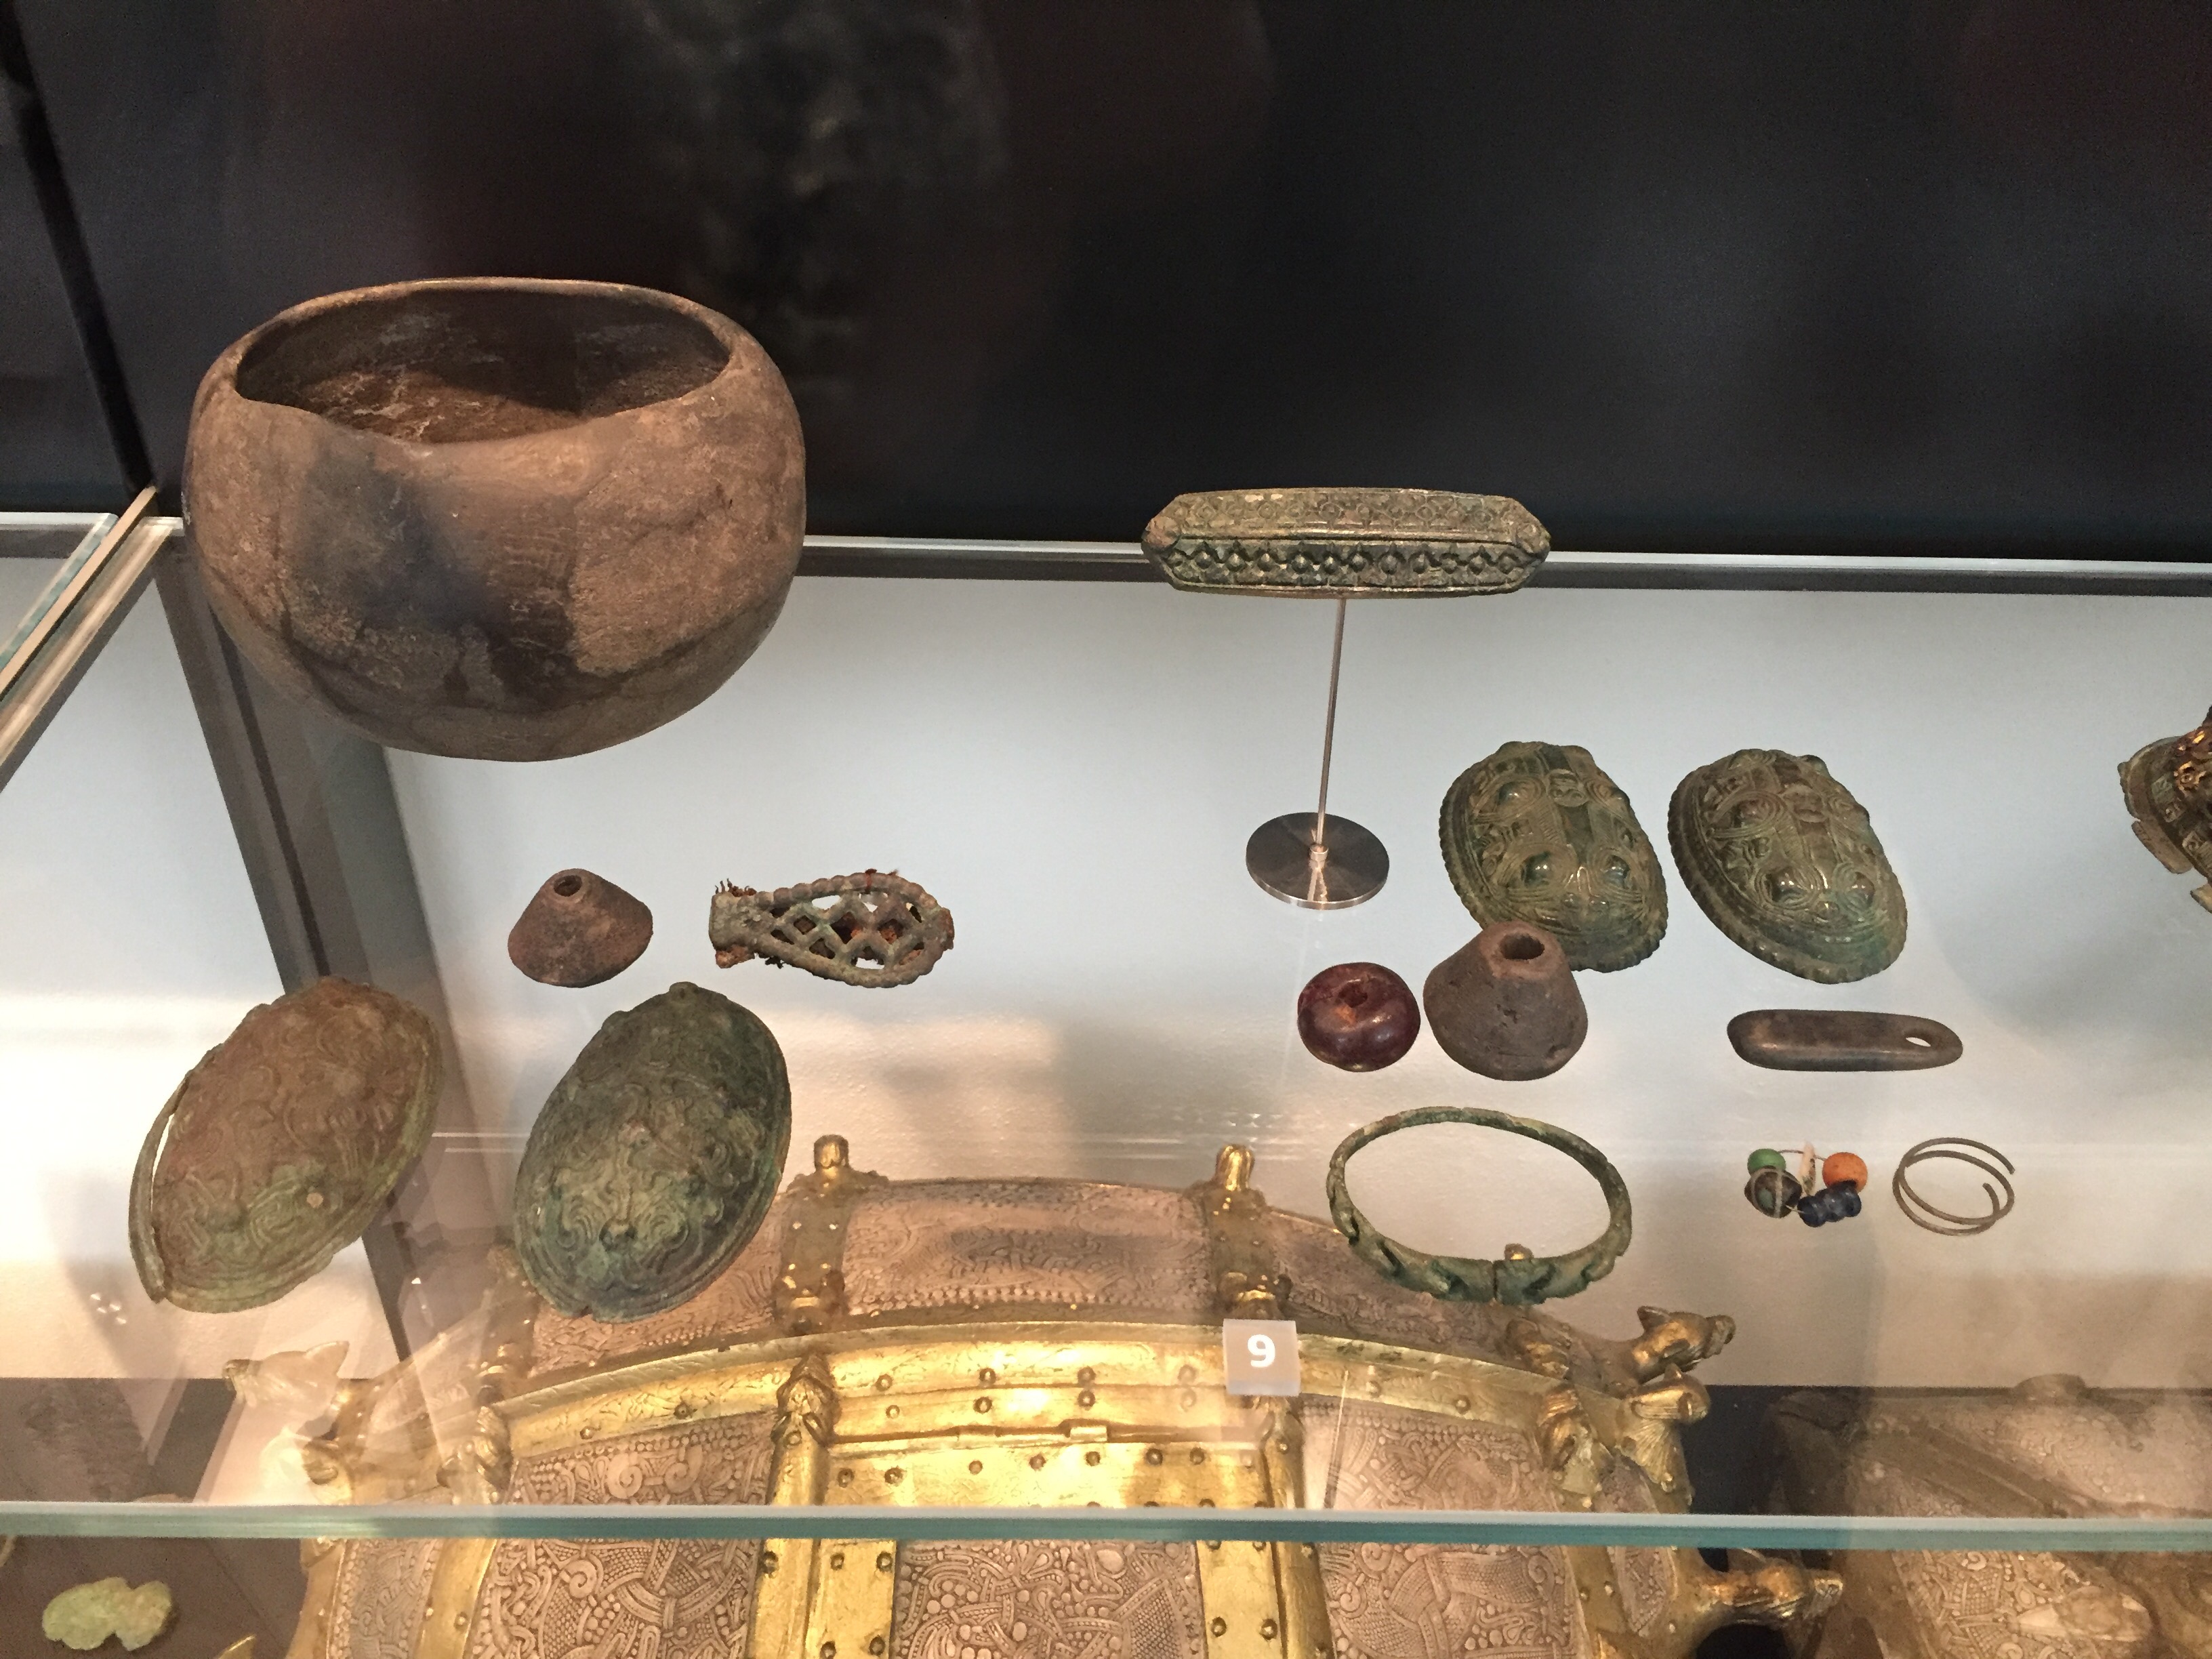
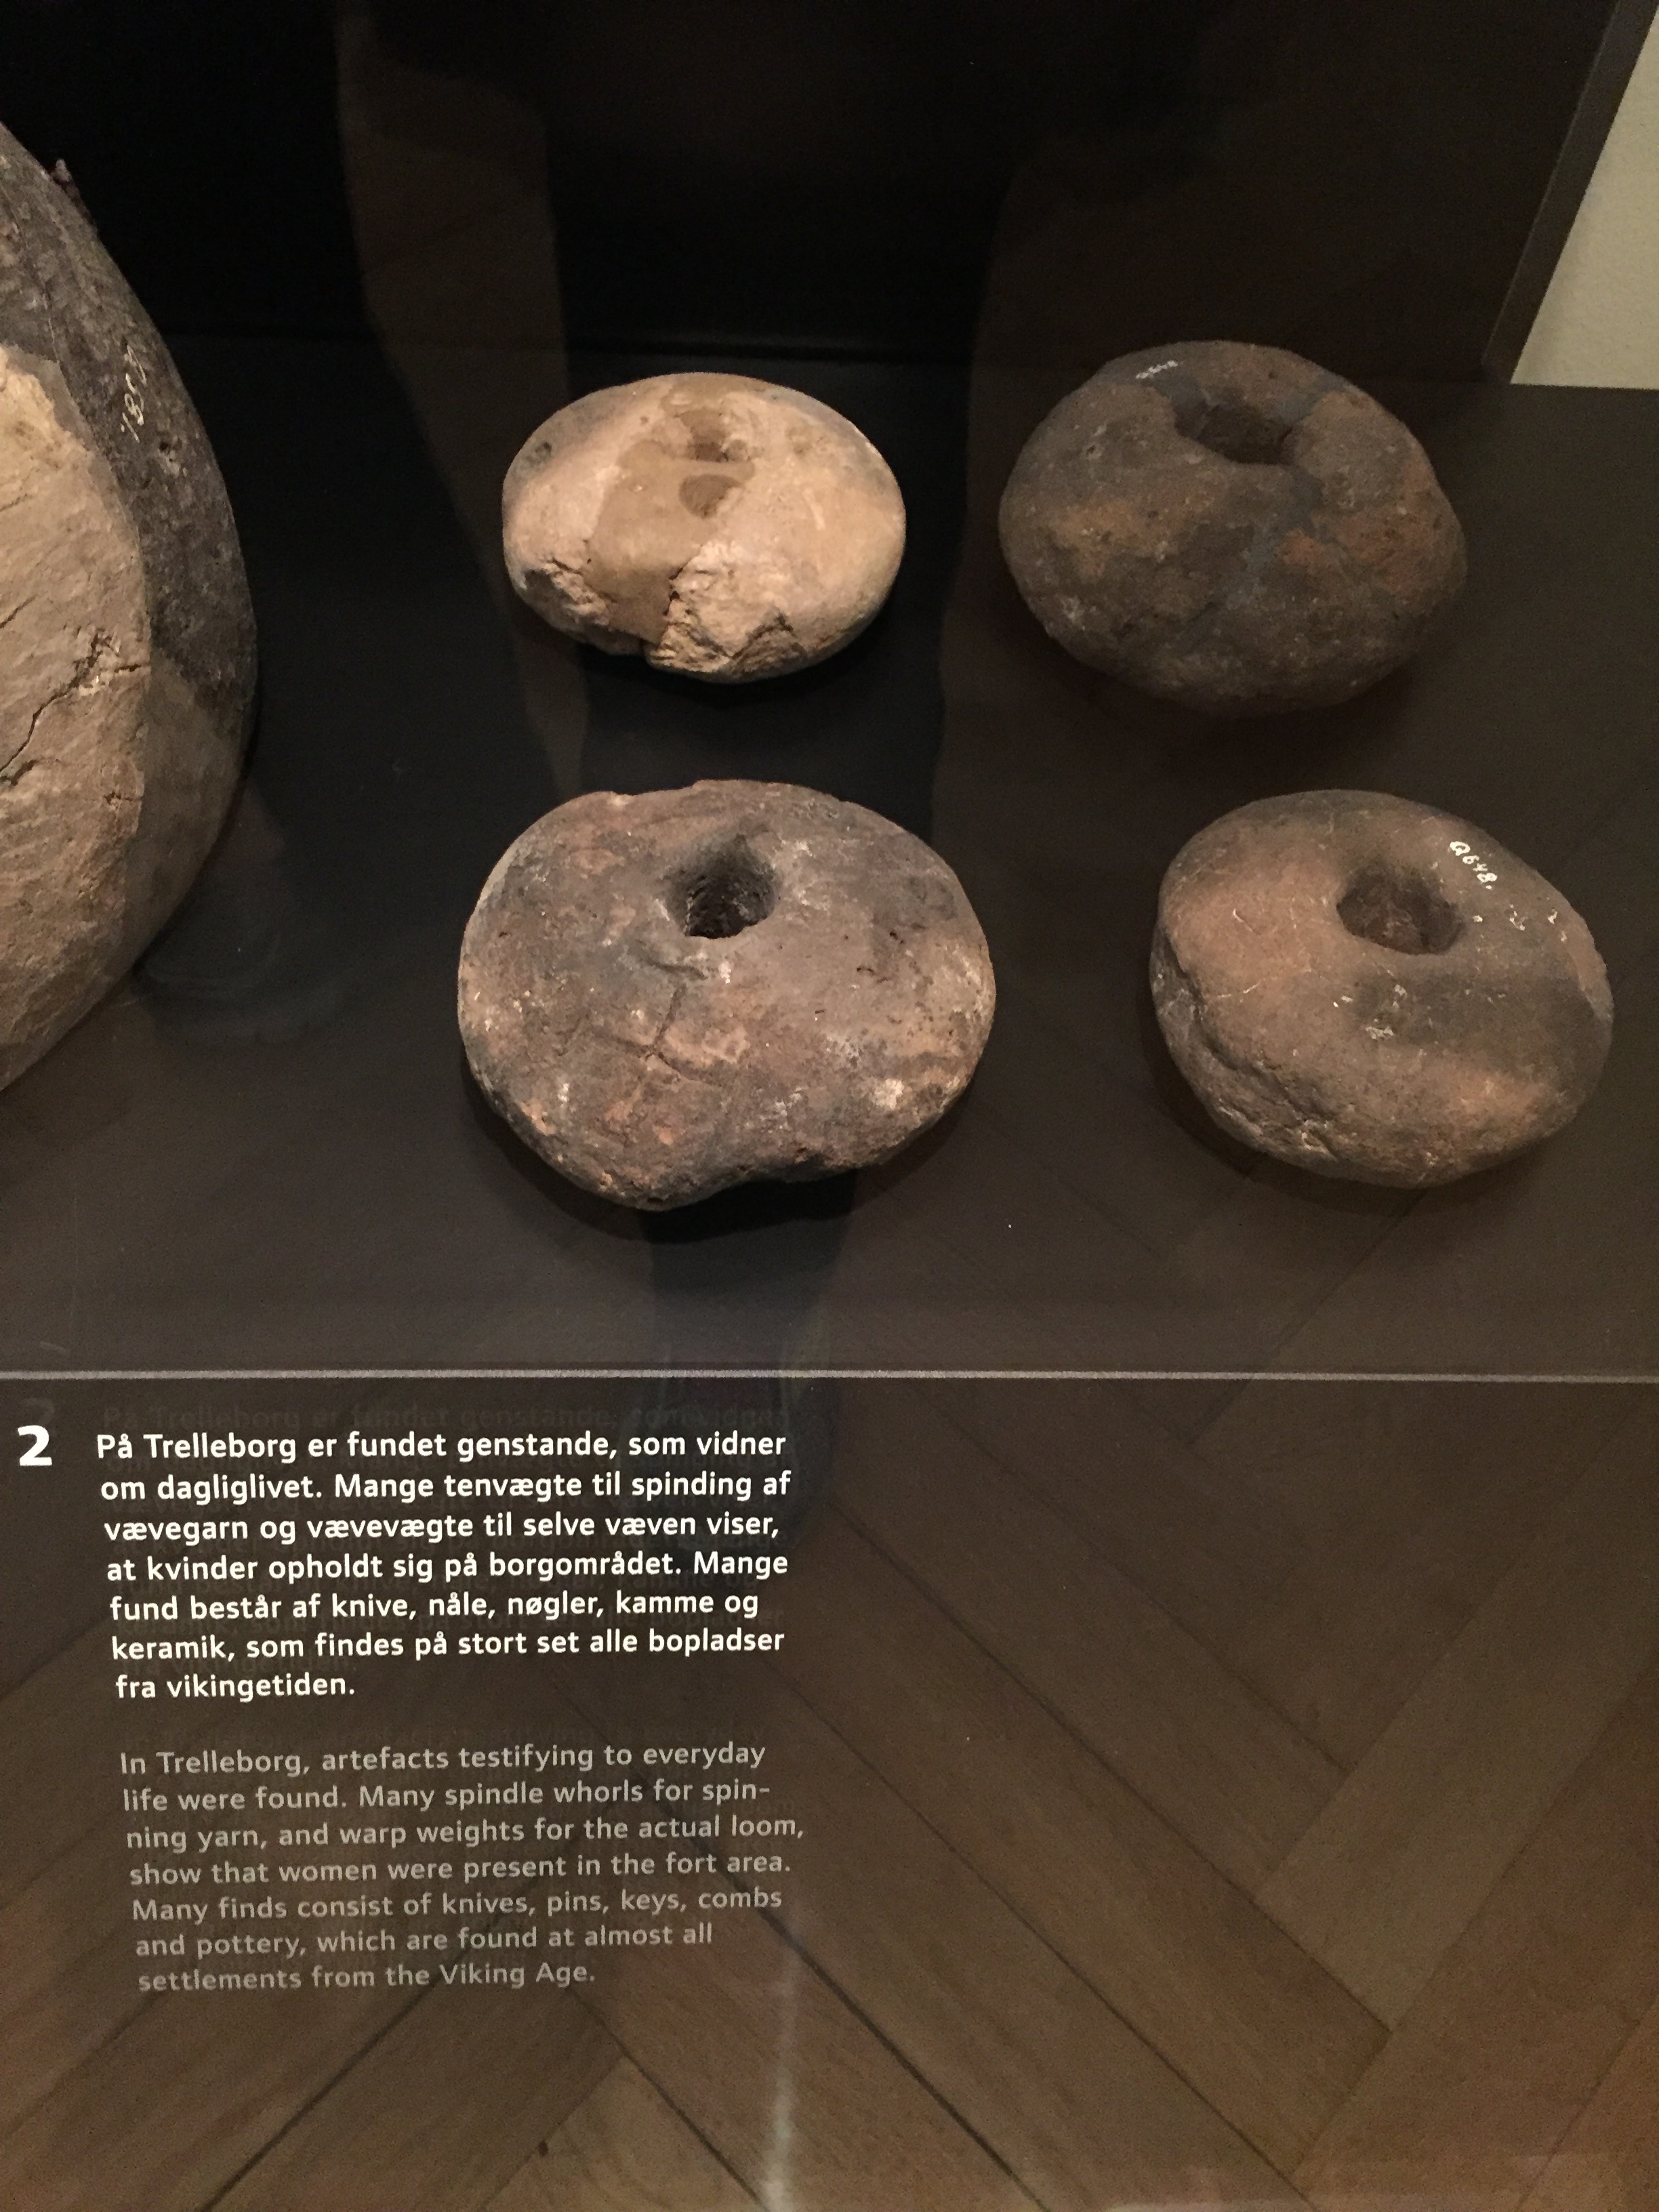
While we waited for our lunch (it had been a long morning and would be a longer evening), i bounced around the workshops in the yard. Especially this one: the rope maker. He was at lunch, but the materials – and a counter covered with sample ropes were there to be admired. Look closely at the cones of hemp yarn visible at right: that’s the last stock of hemp yarn tight-spun for  ropemaking in the world. If they want more they’ll have to commission it, and the minimum order is enough to rig an entire ship larger than any Roskilde have.

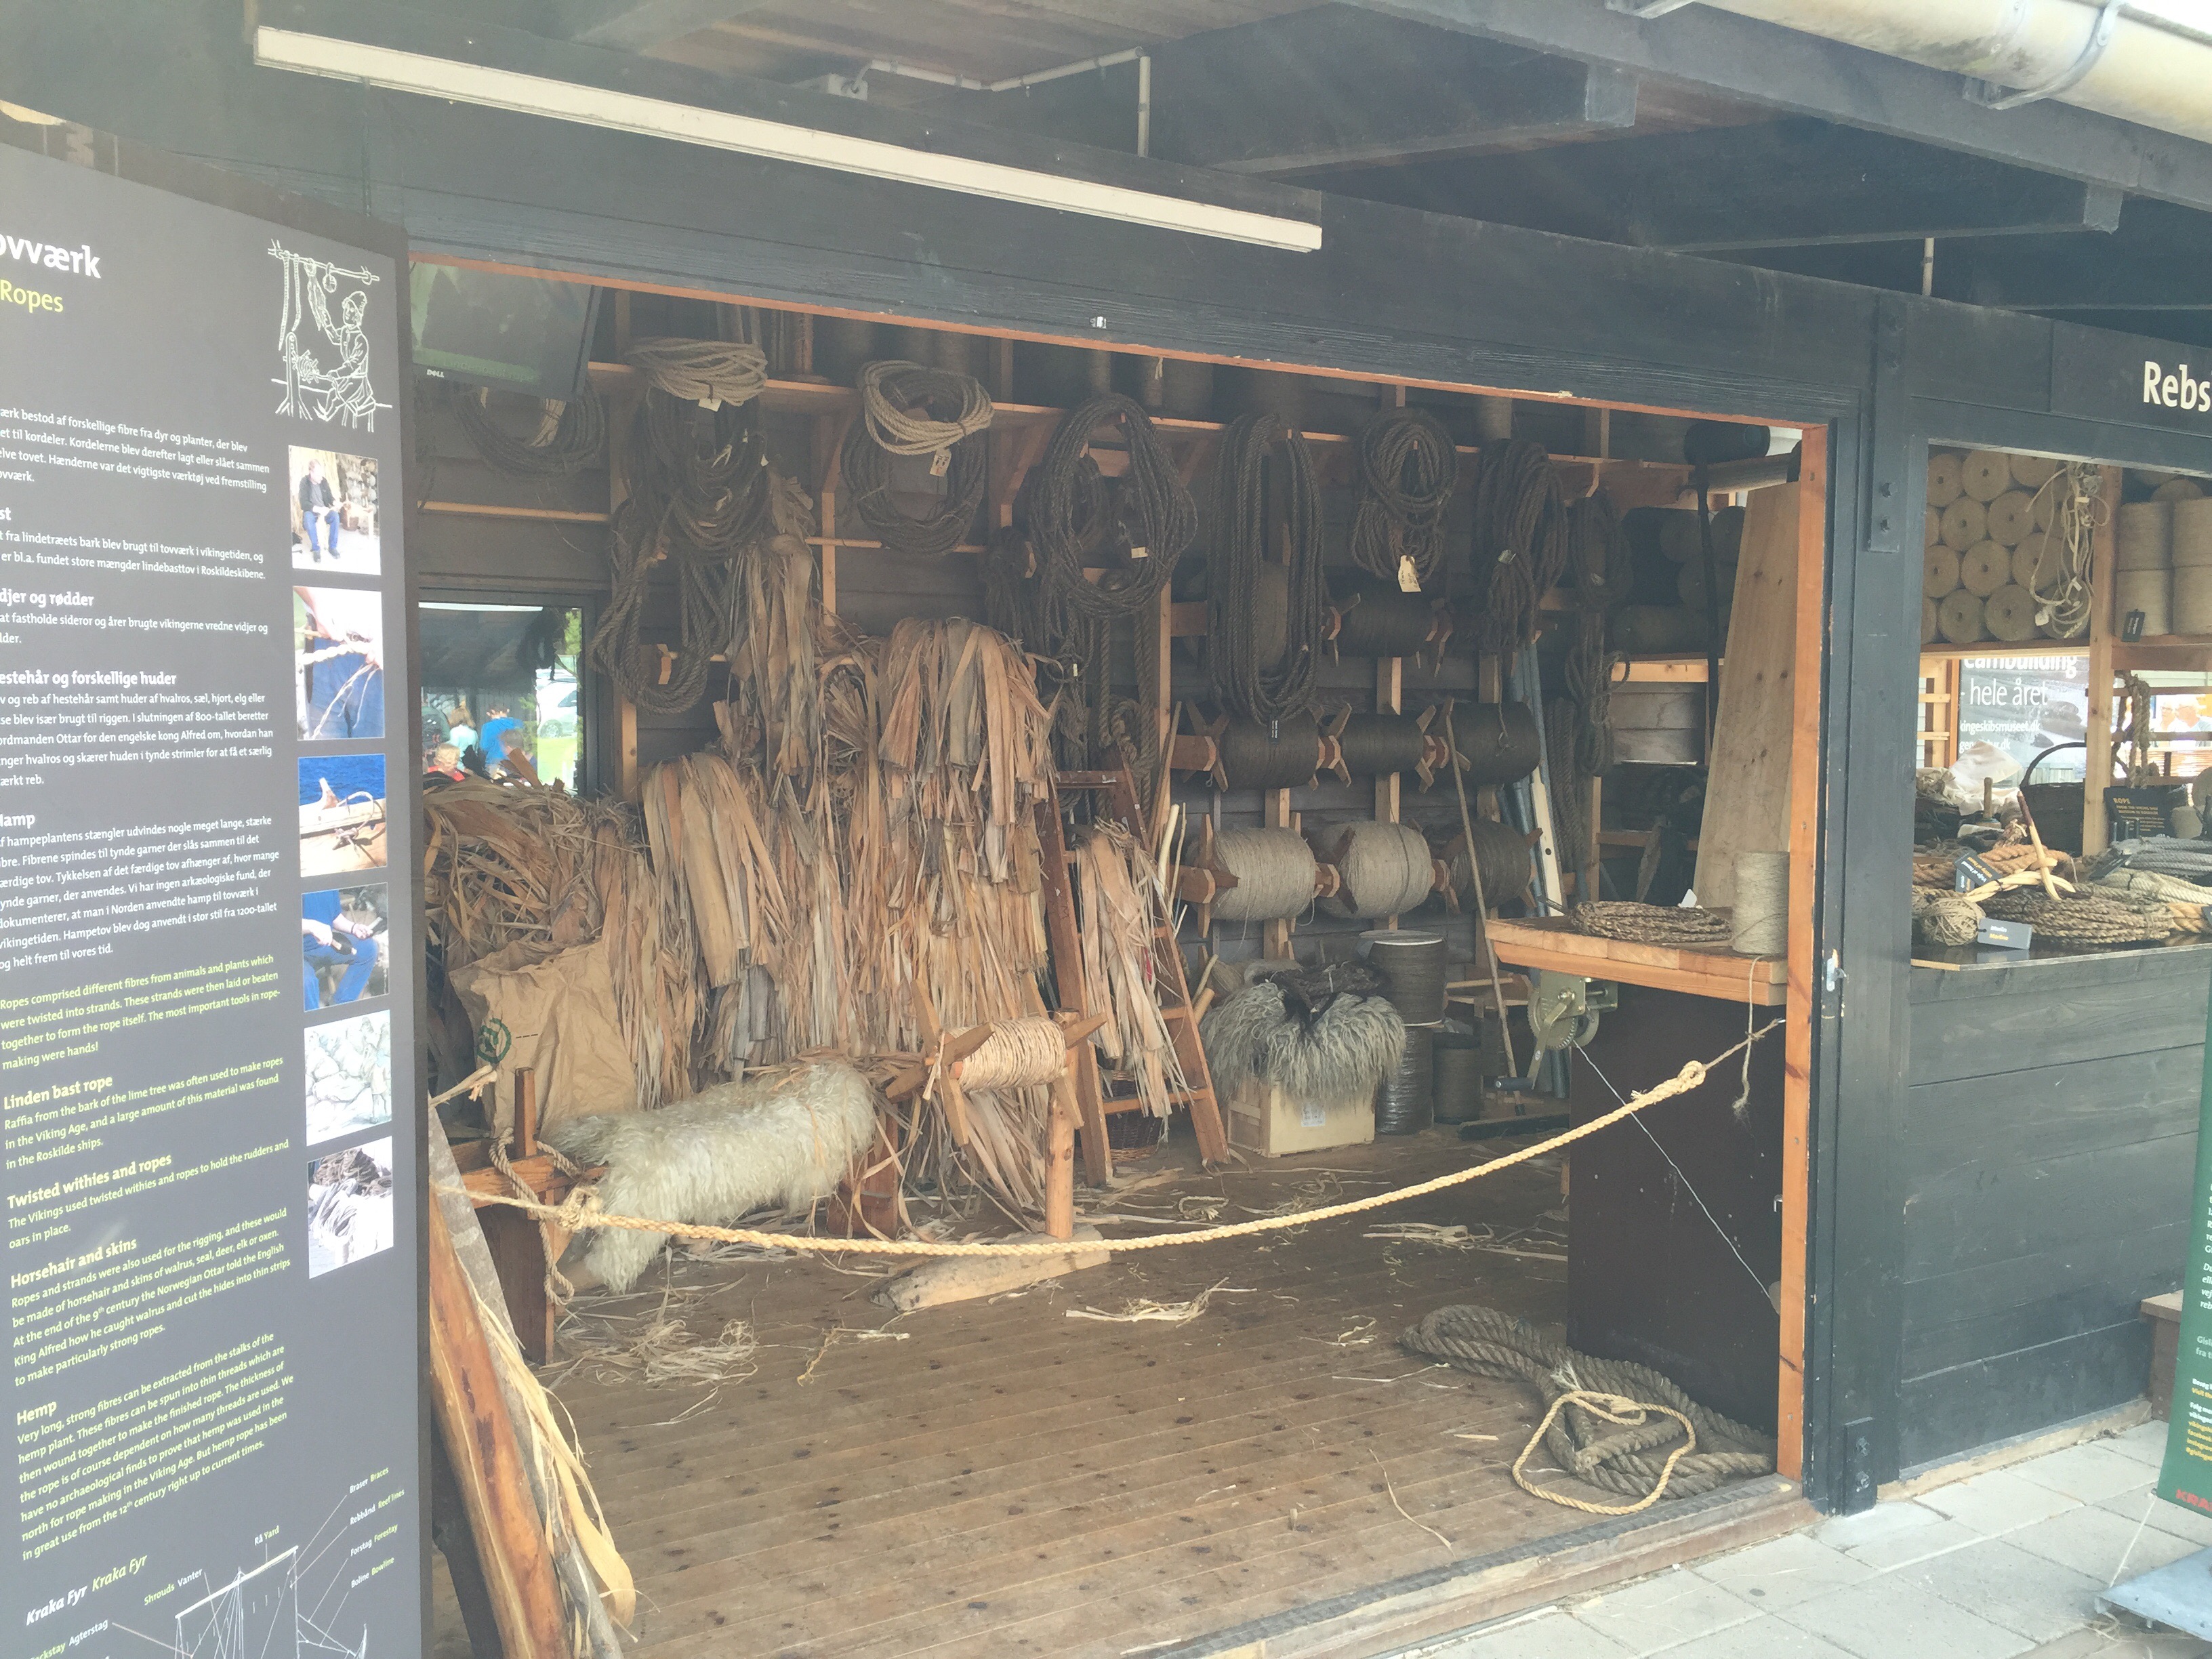
In addition to the ‘Viking’ boats, the ship museum builds and maintains a collection of traditional working boats. They’re building another take of the Gislinge boat, a working boat from c. 1130. She should be ready for the water some time in November 2016.

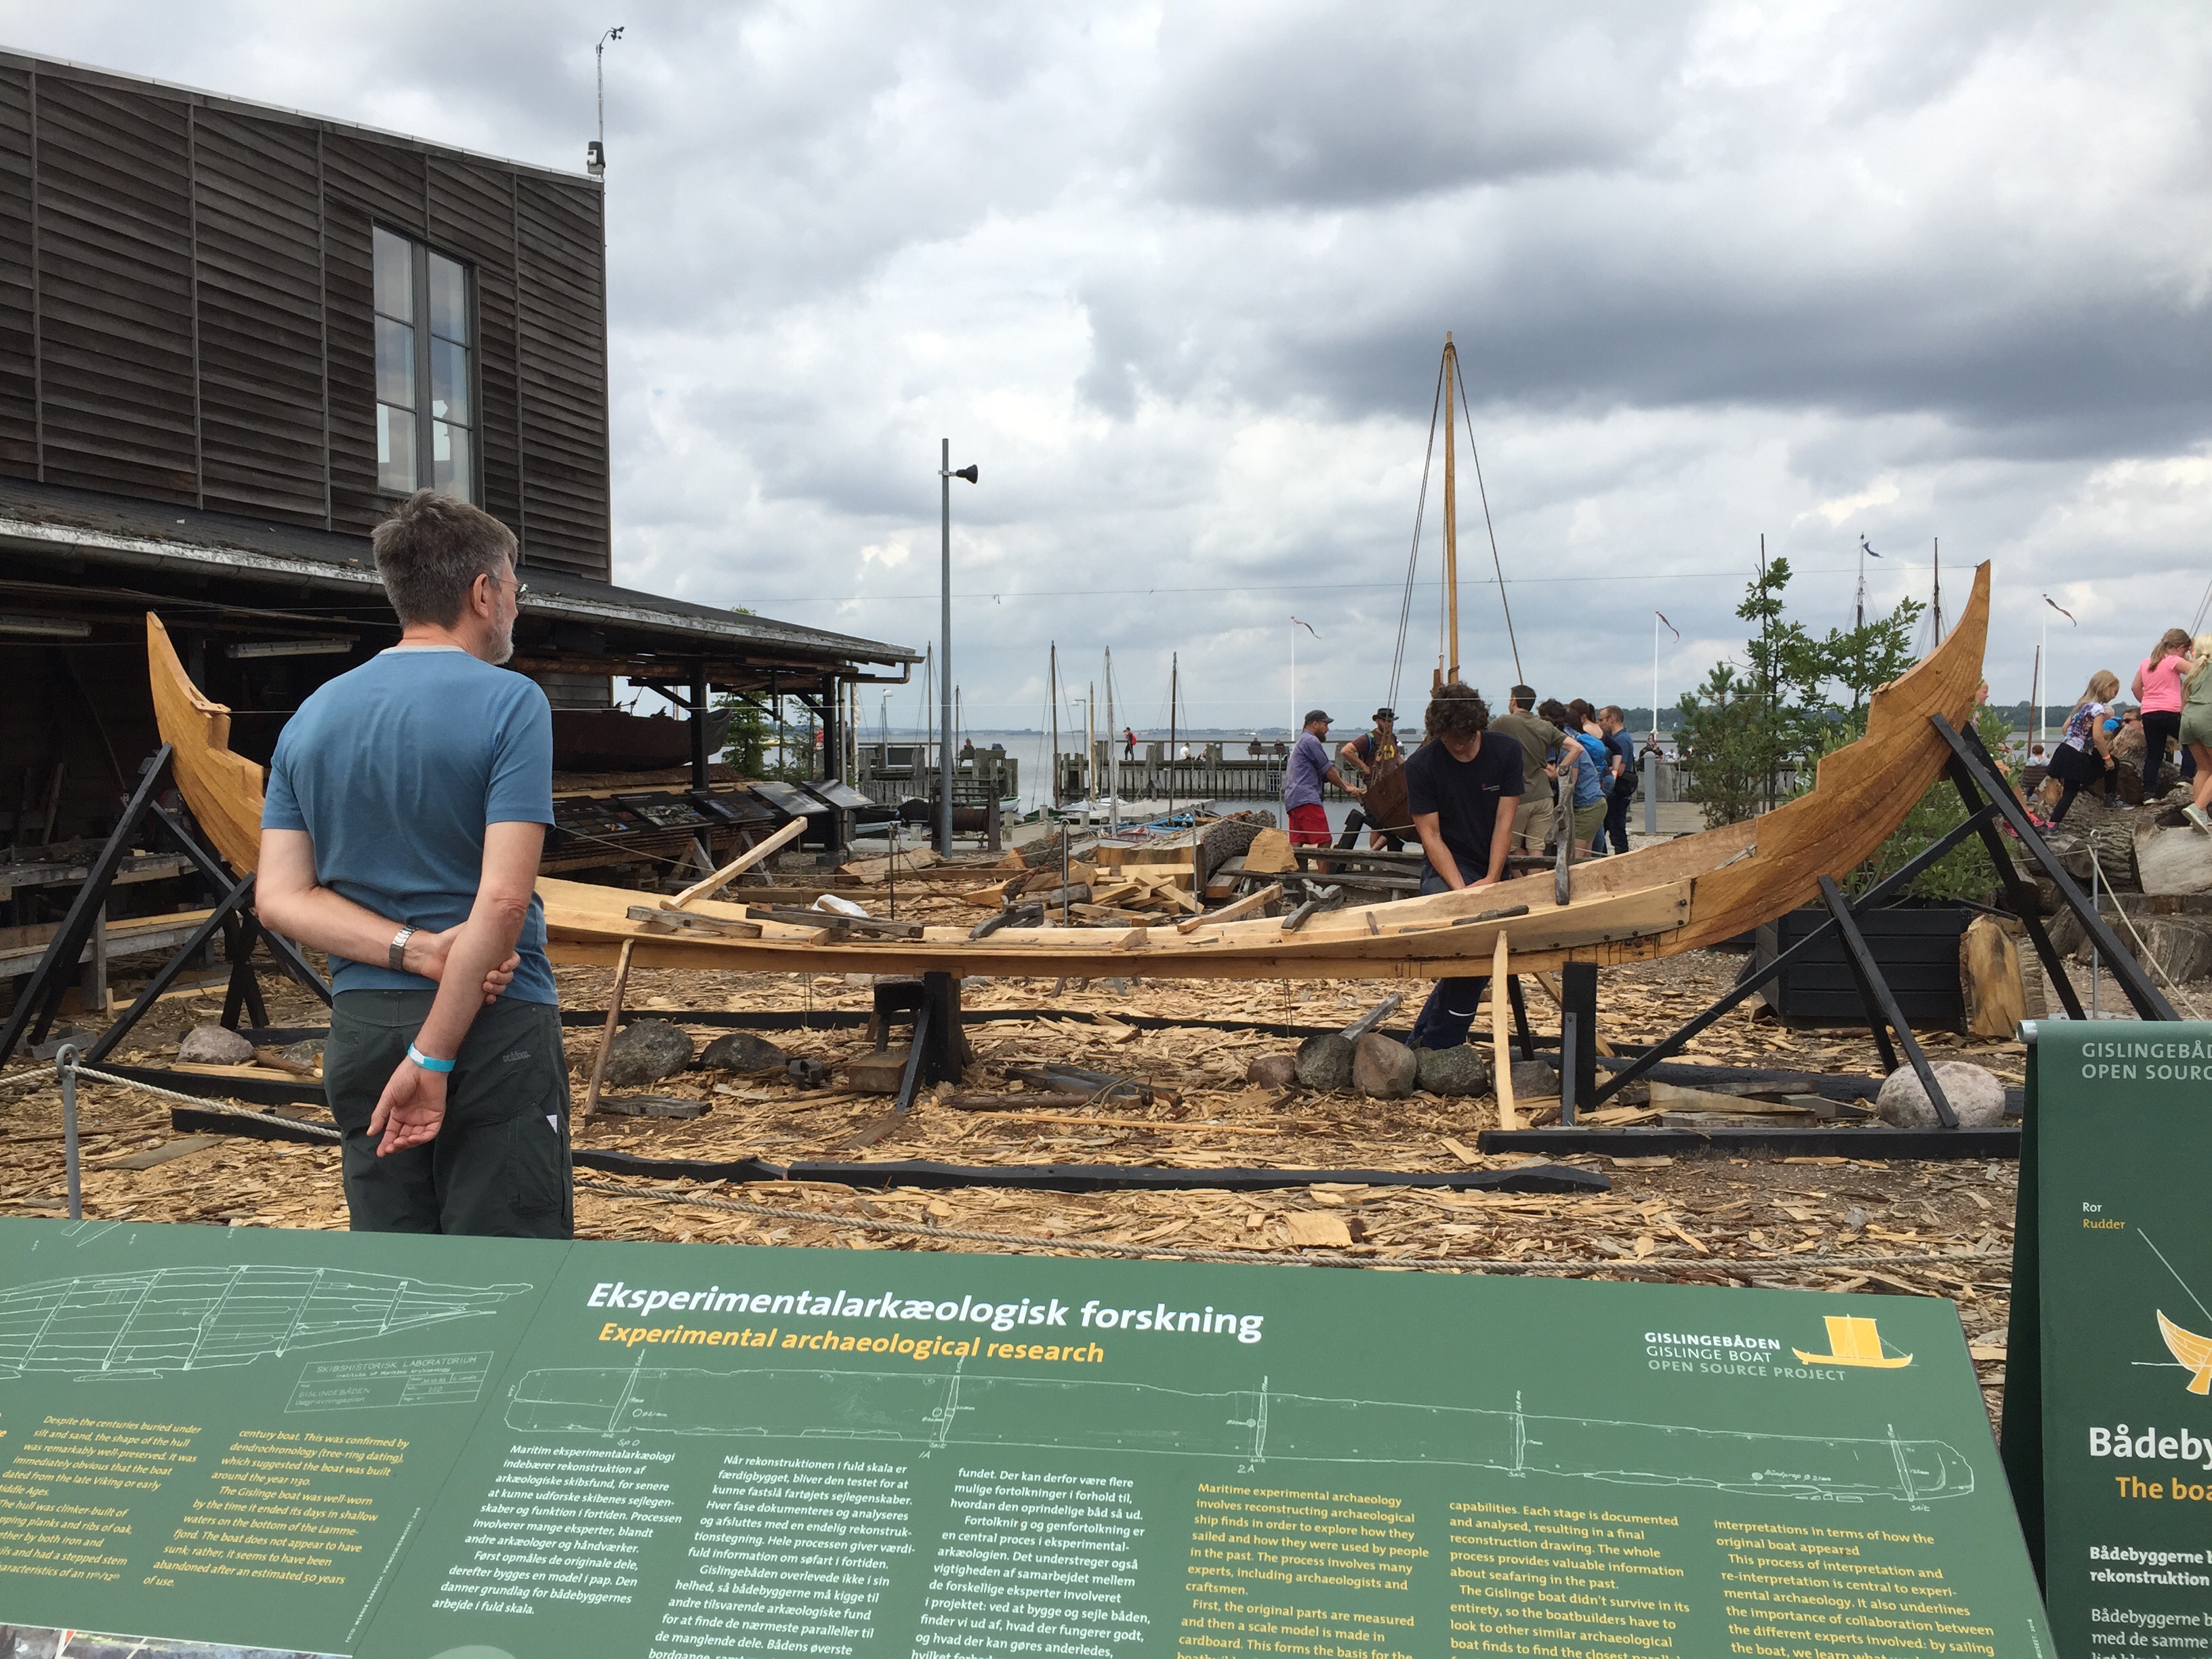
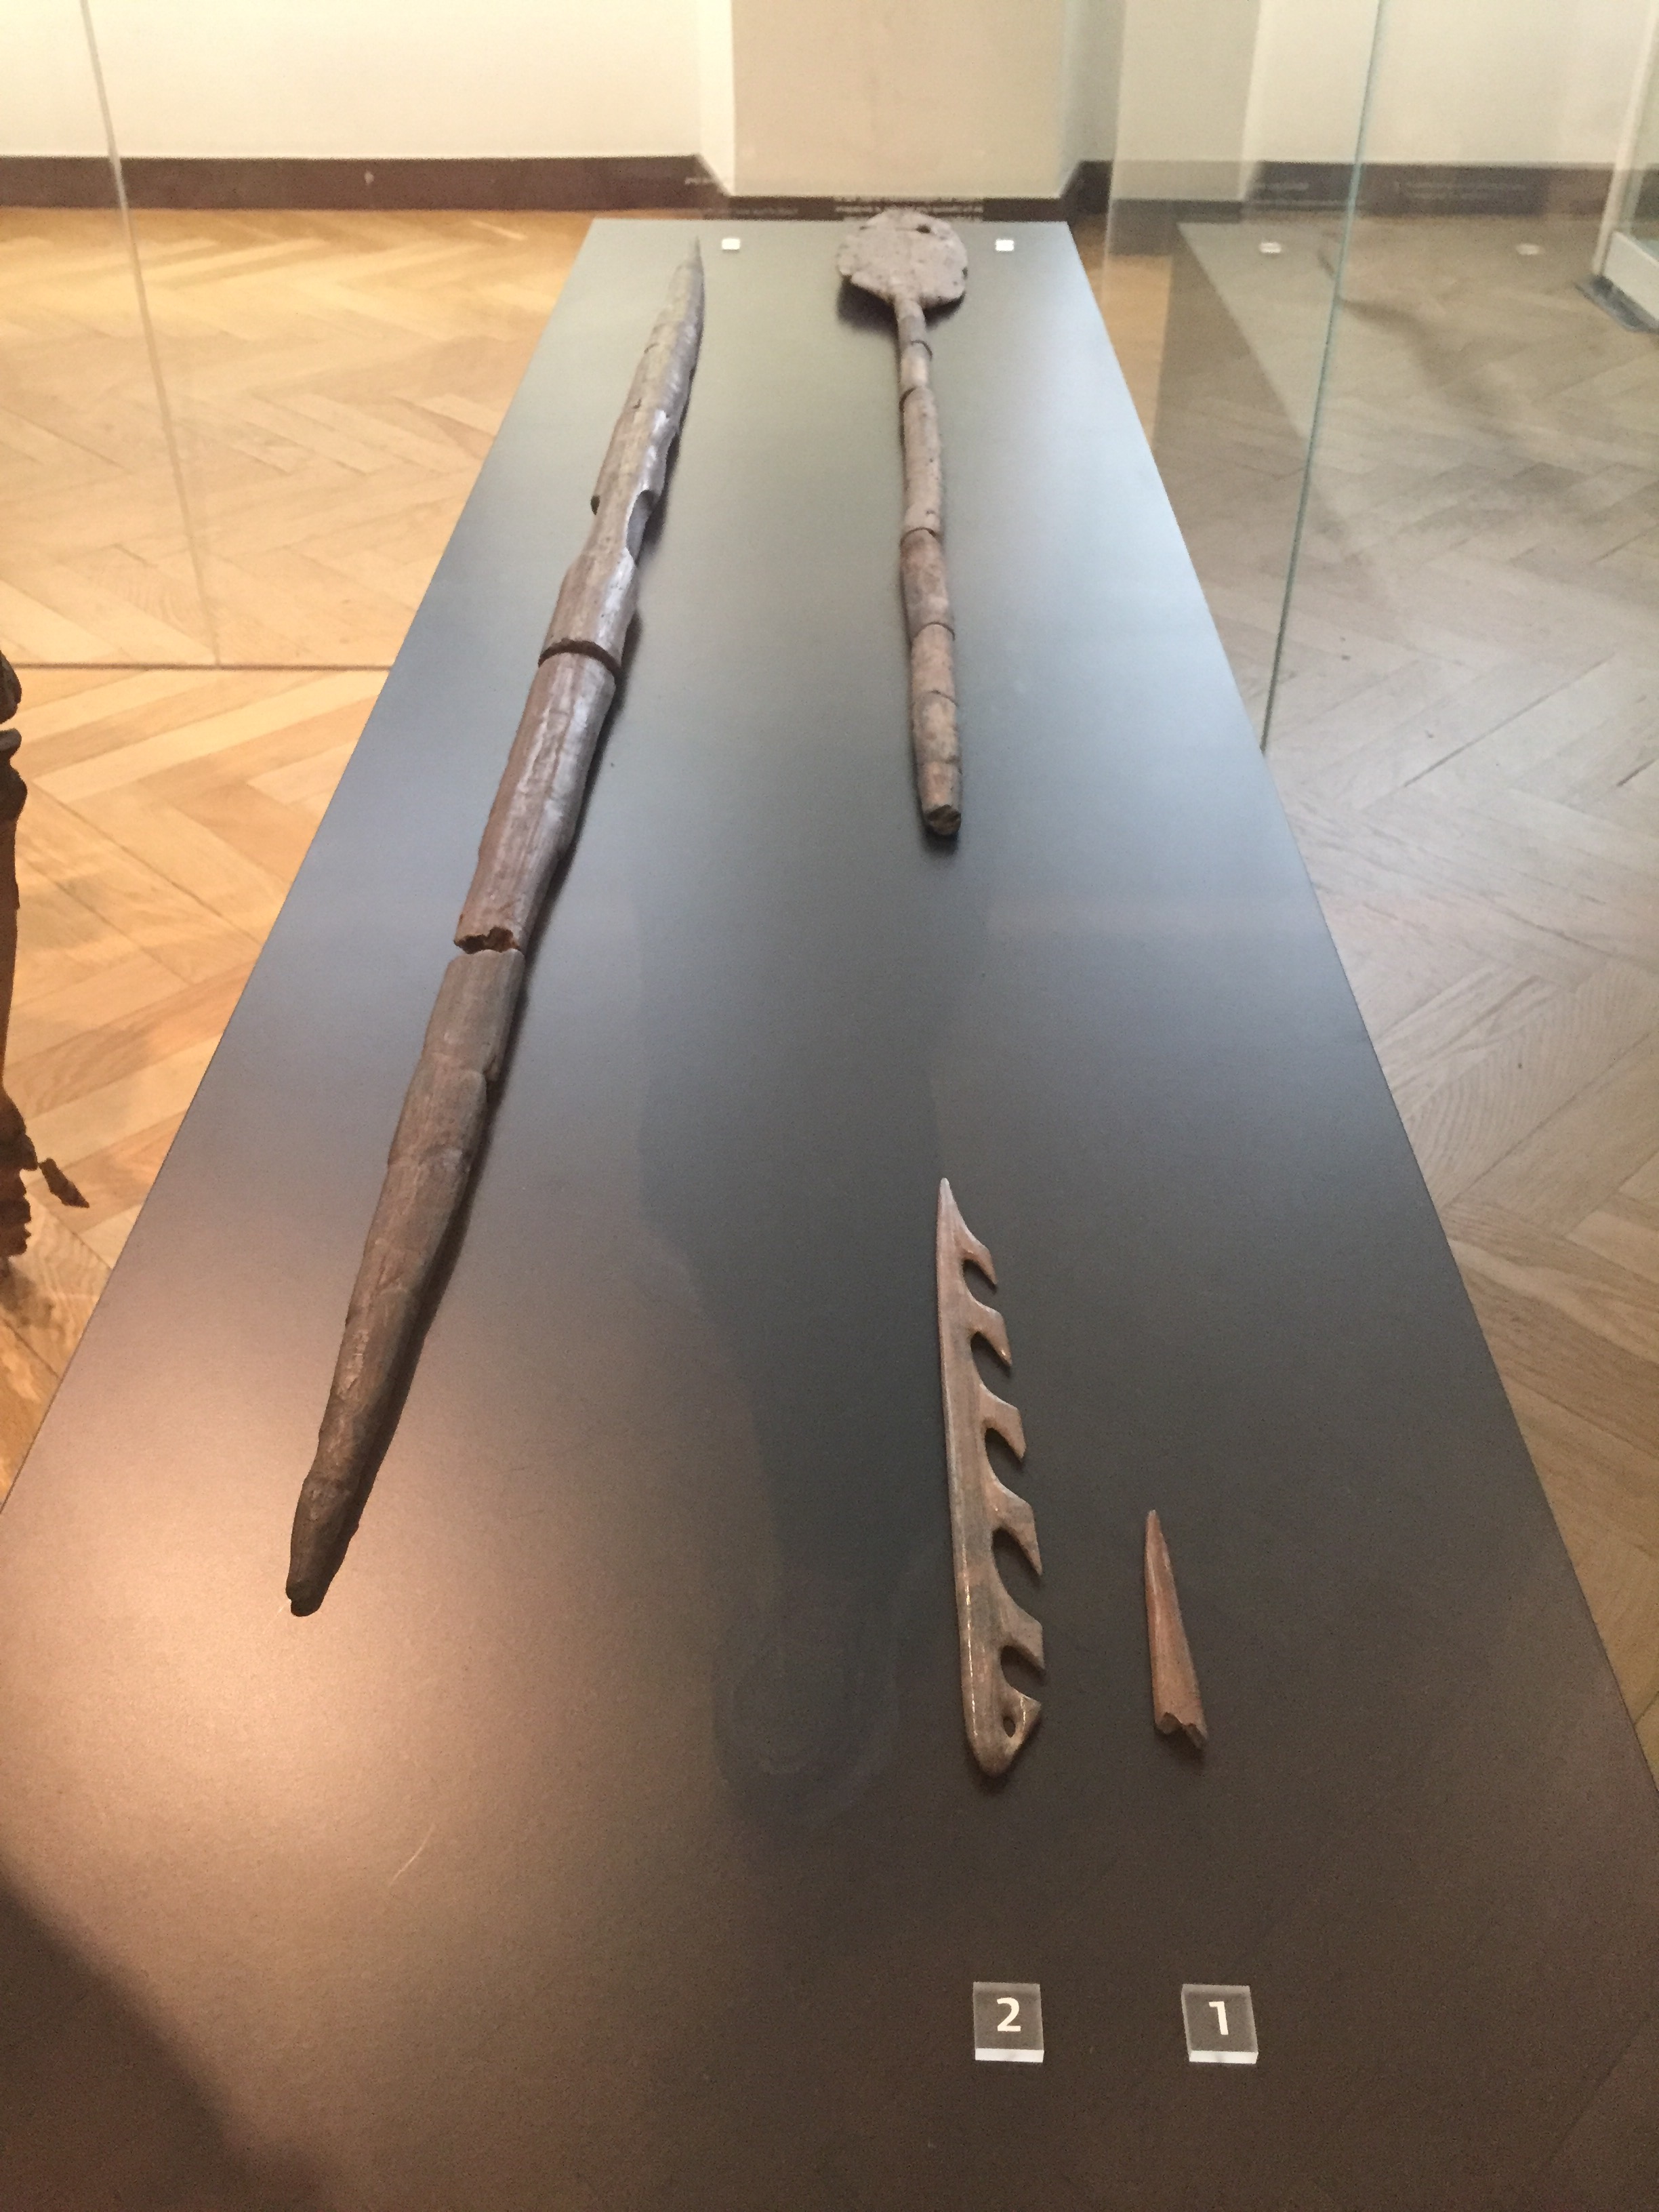
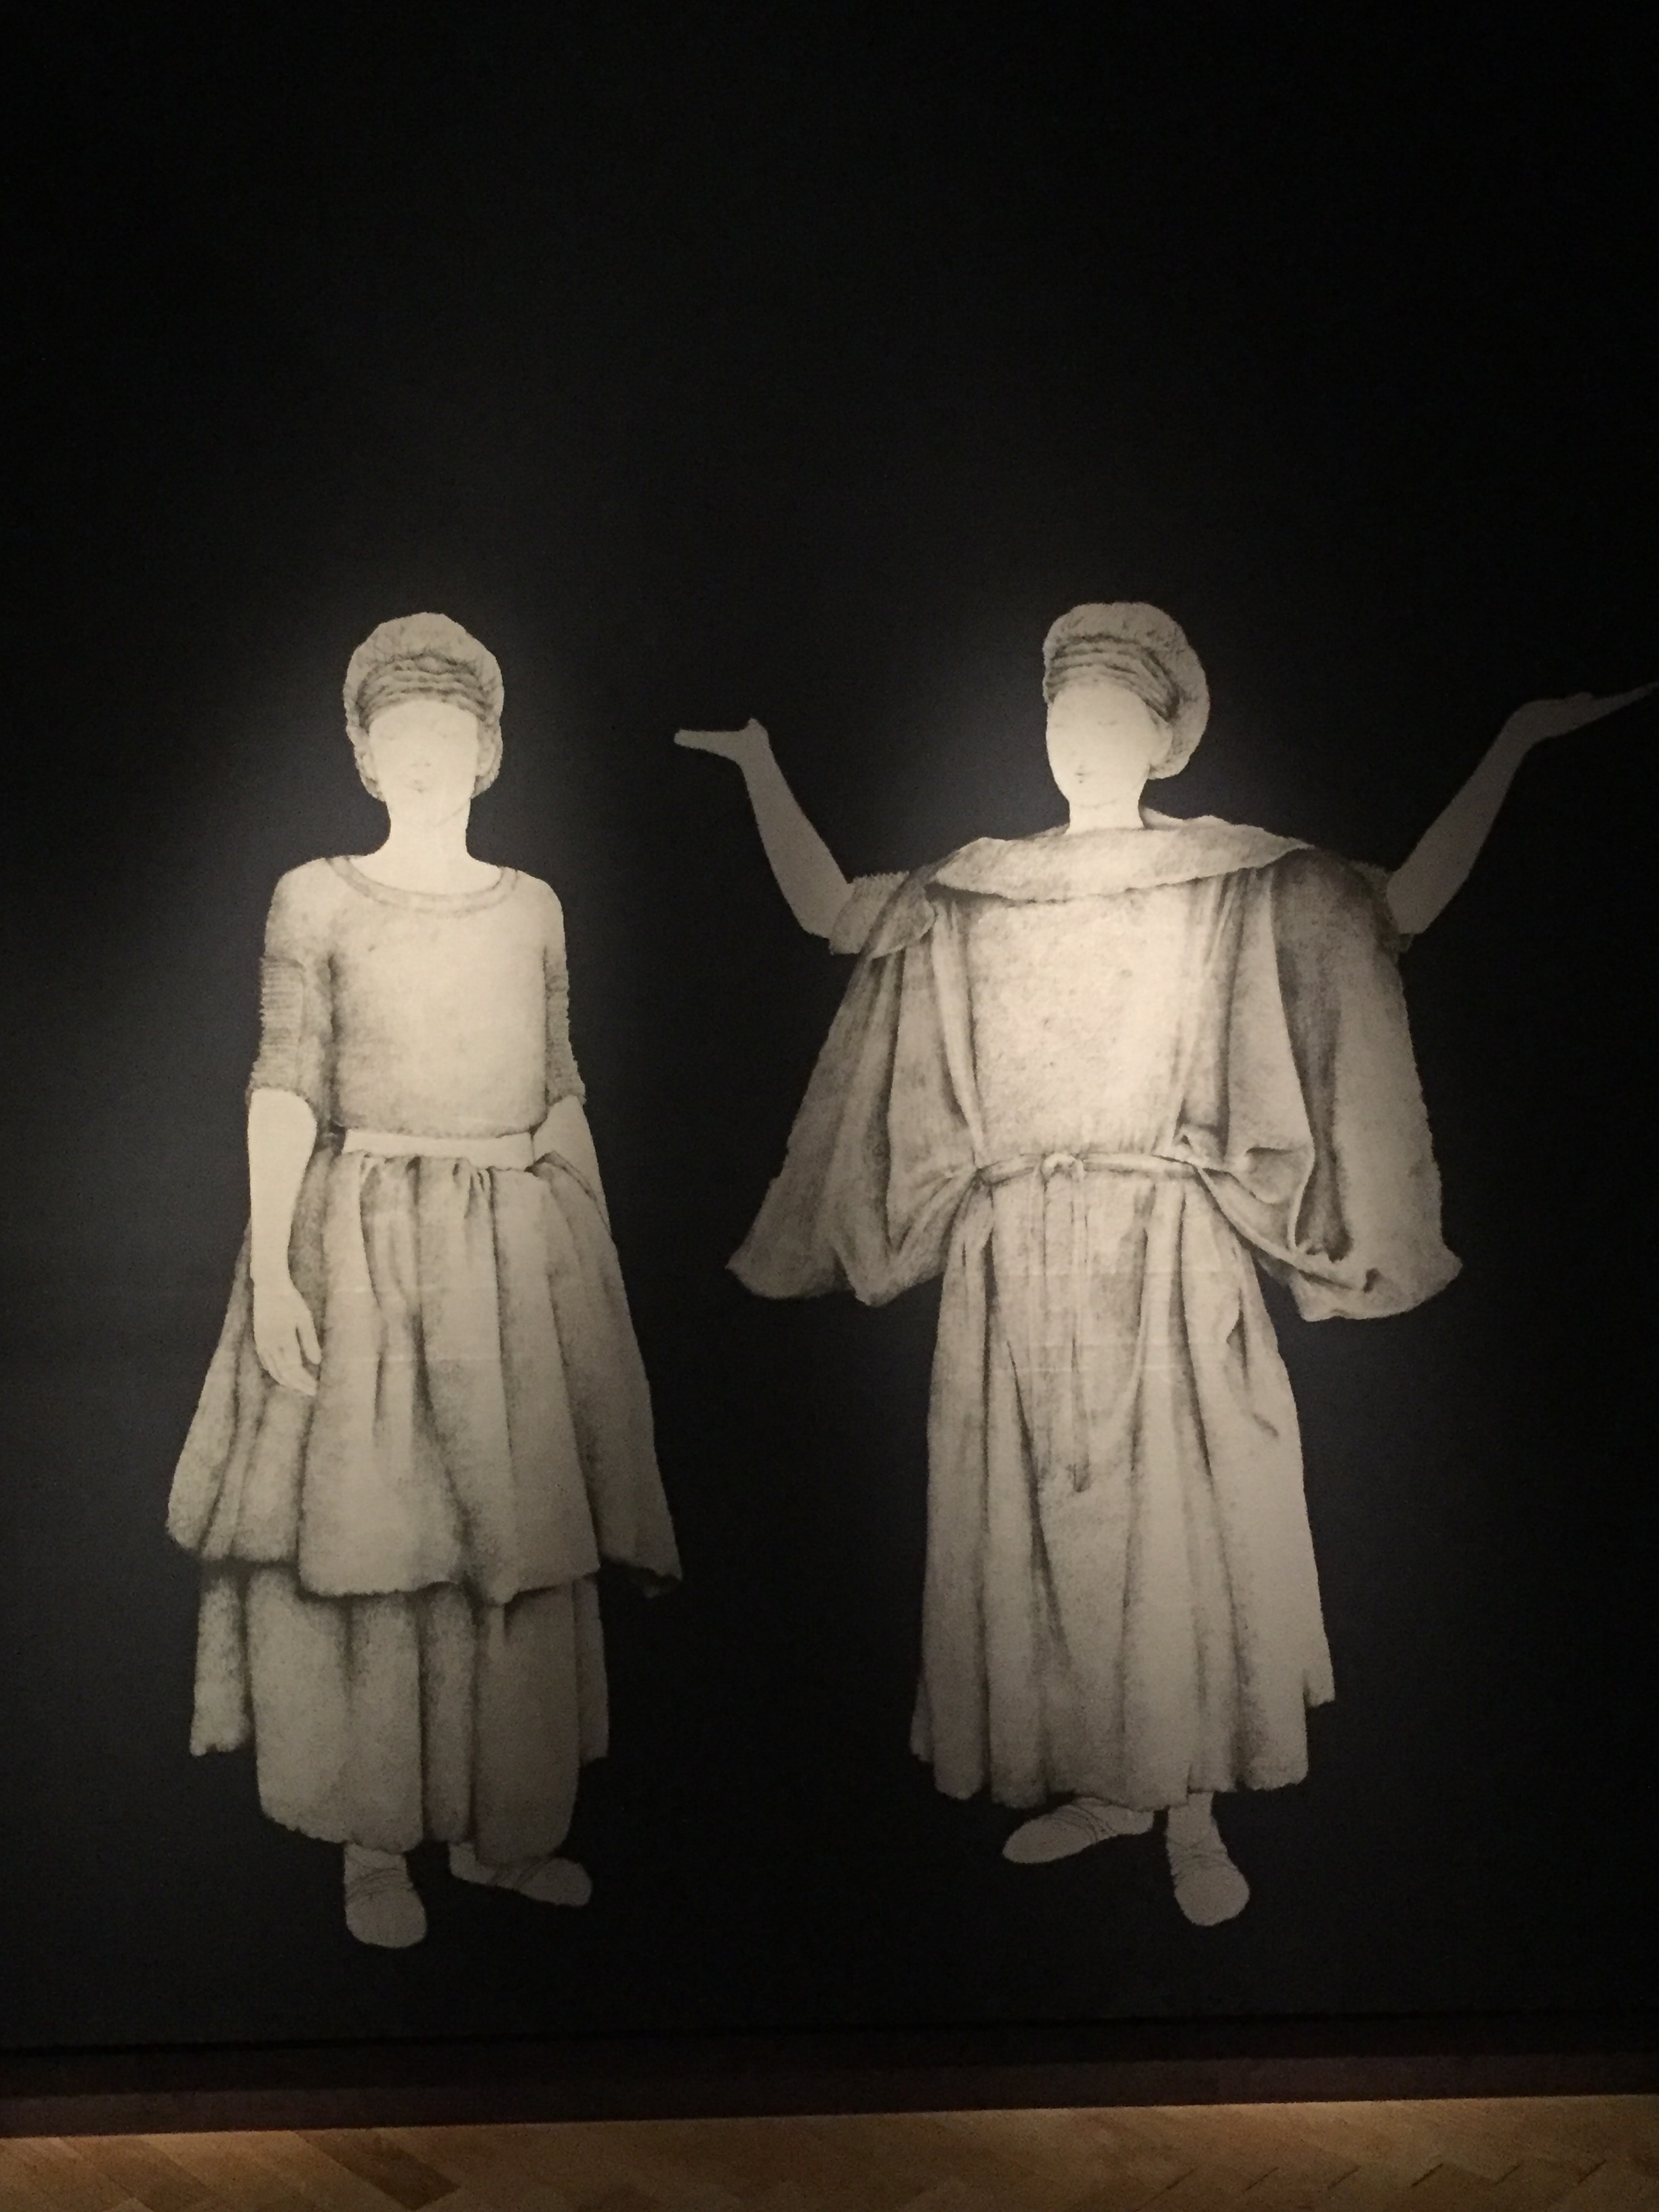
Early log boats (hollowed trees) were enlarged by adding boards to raise the side, sewn together with fir or spruce roots, or lime bast.

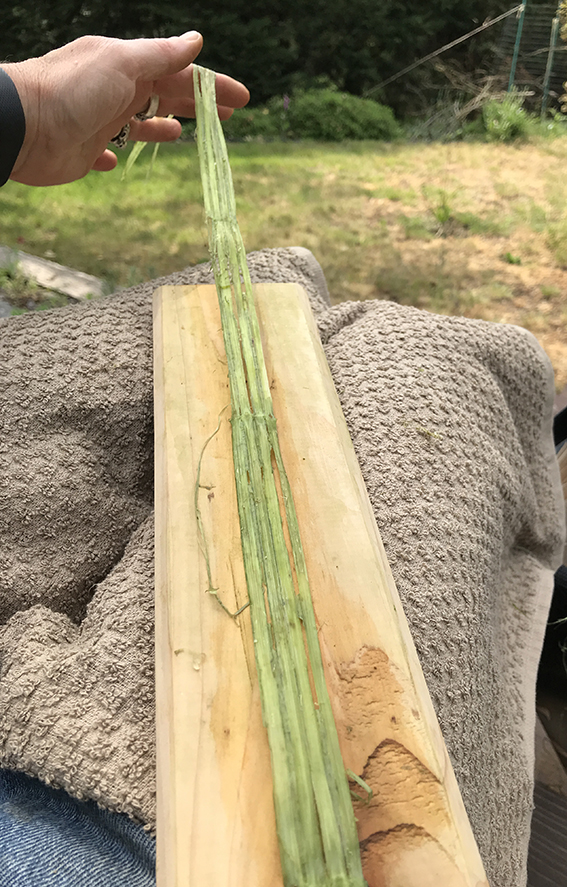
The rope maker was back! We talked about lime bast vs seal hide, and he showed me how to make rope from bast. I’ve studied Youtube to no avail, but now I think i understand.

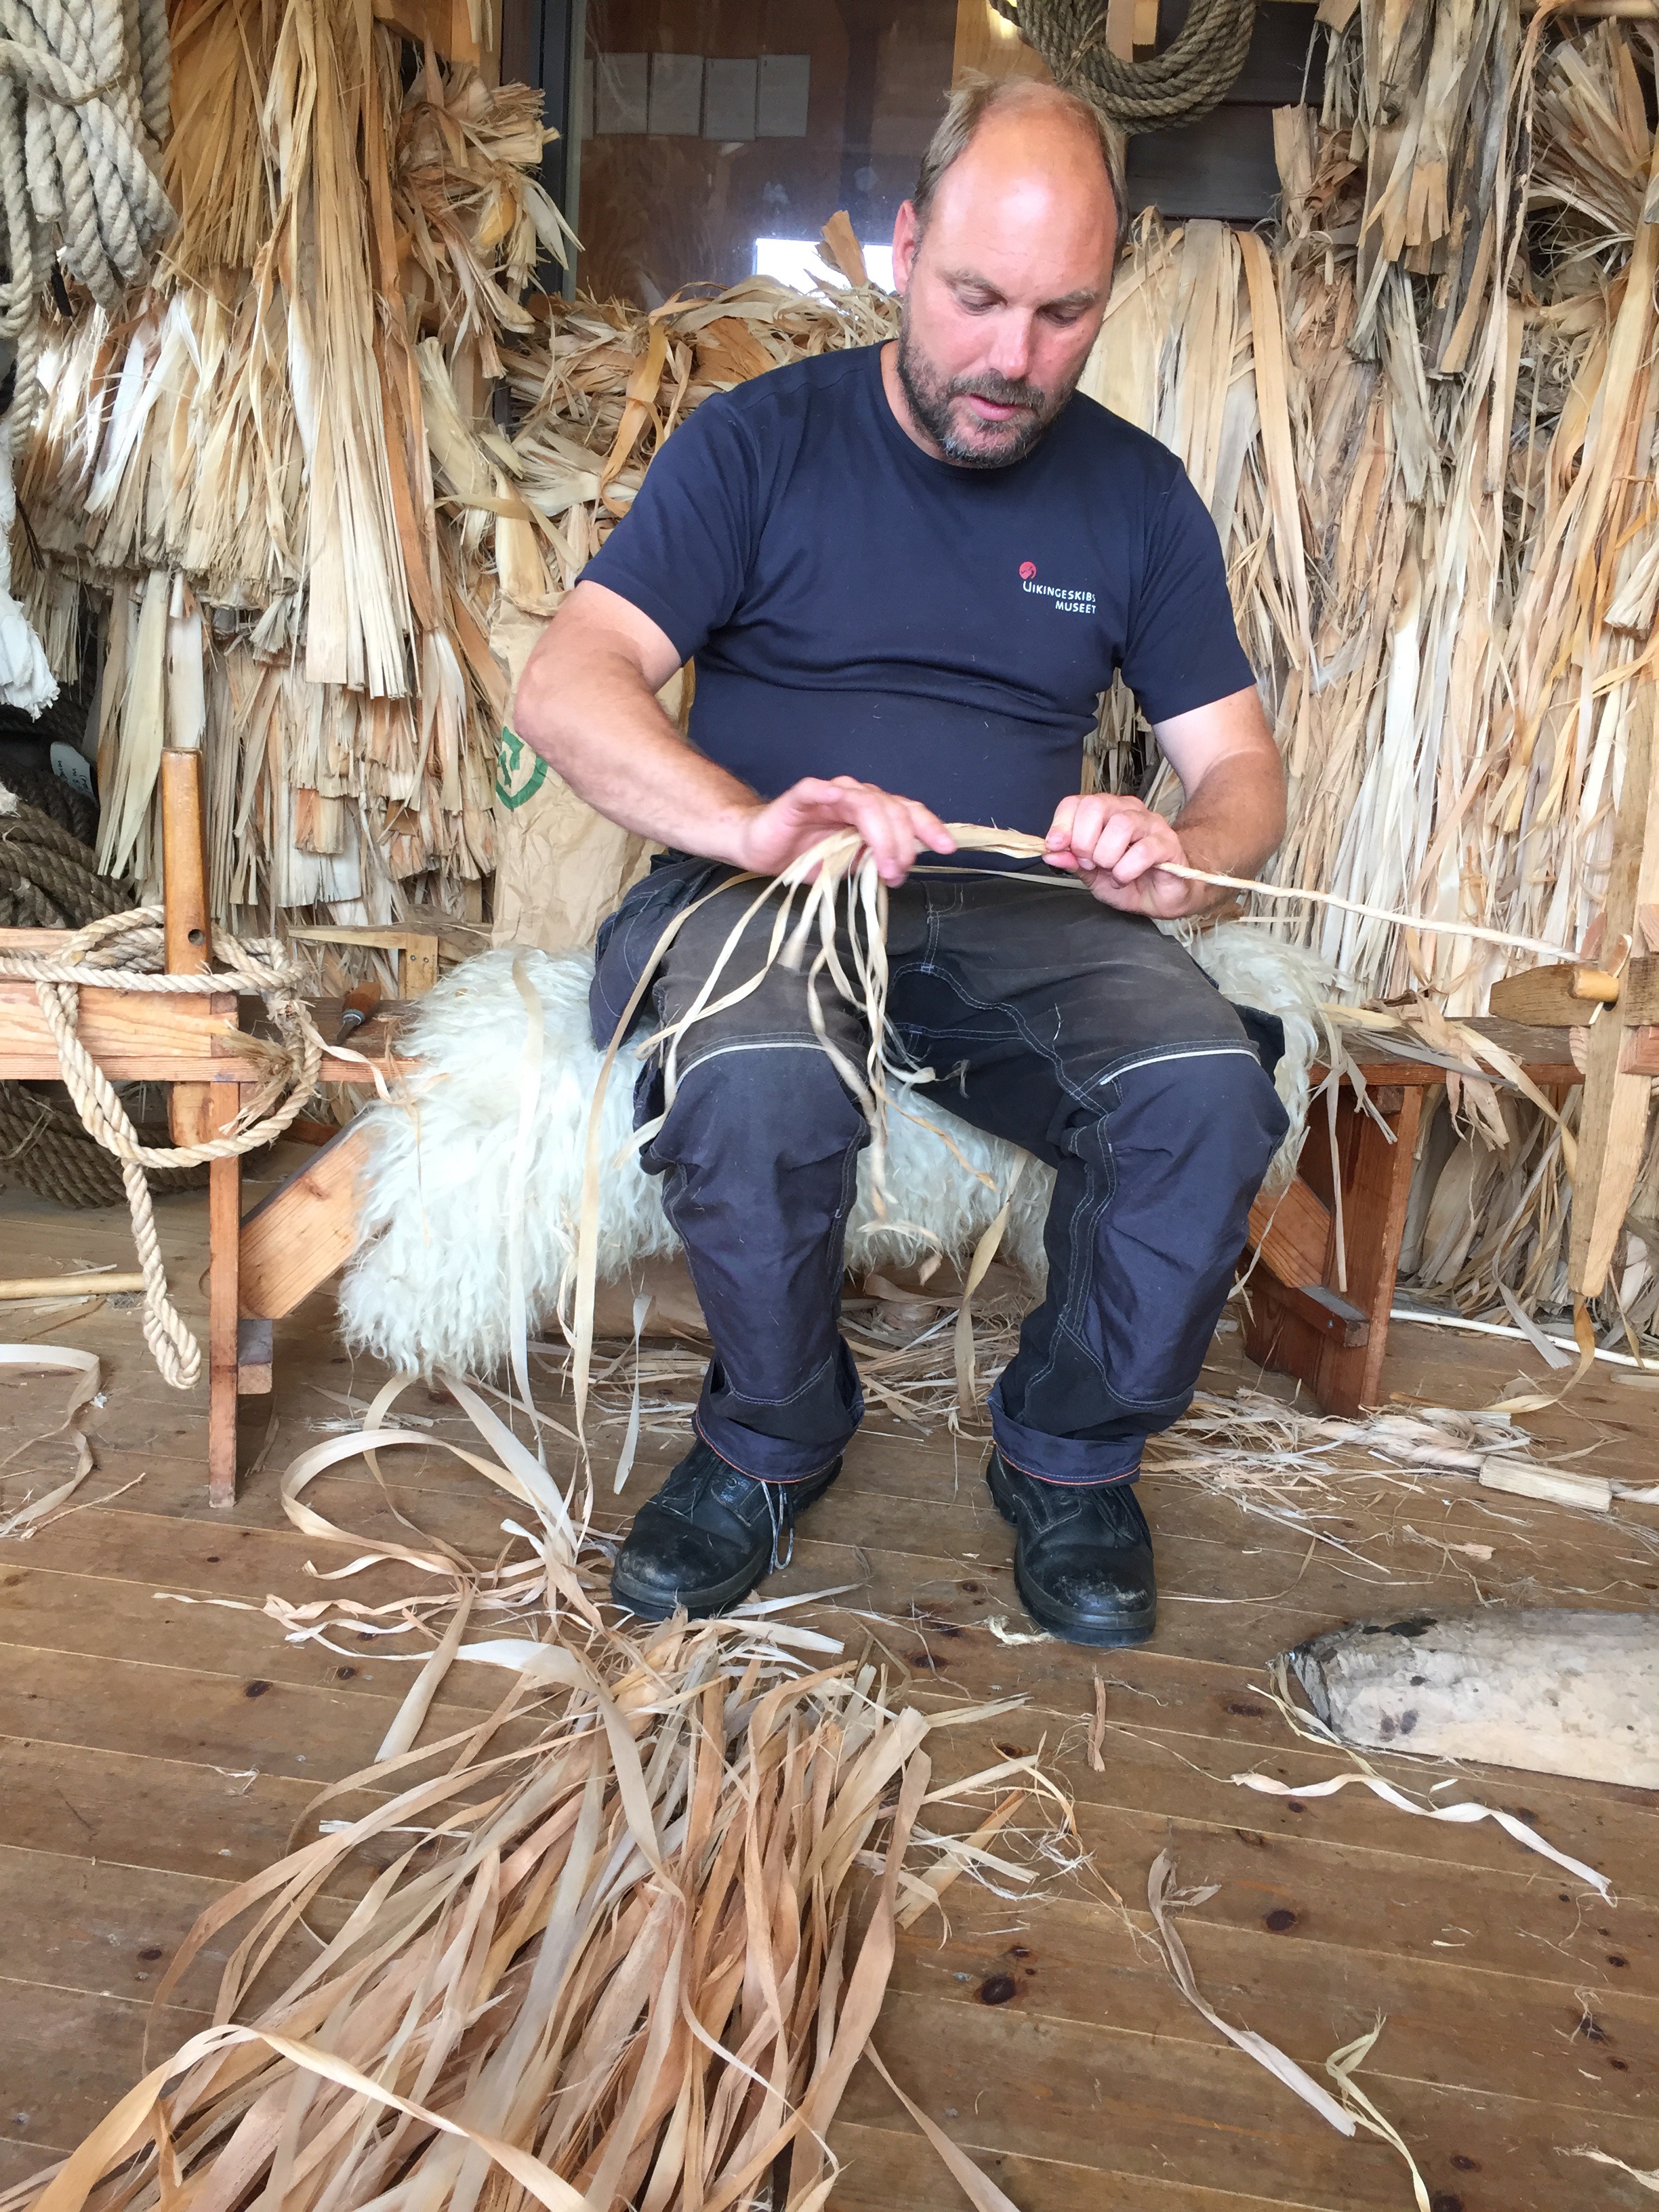
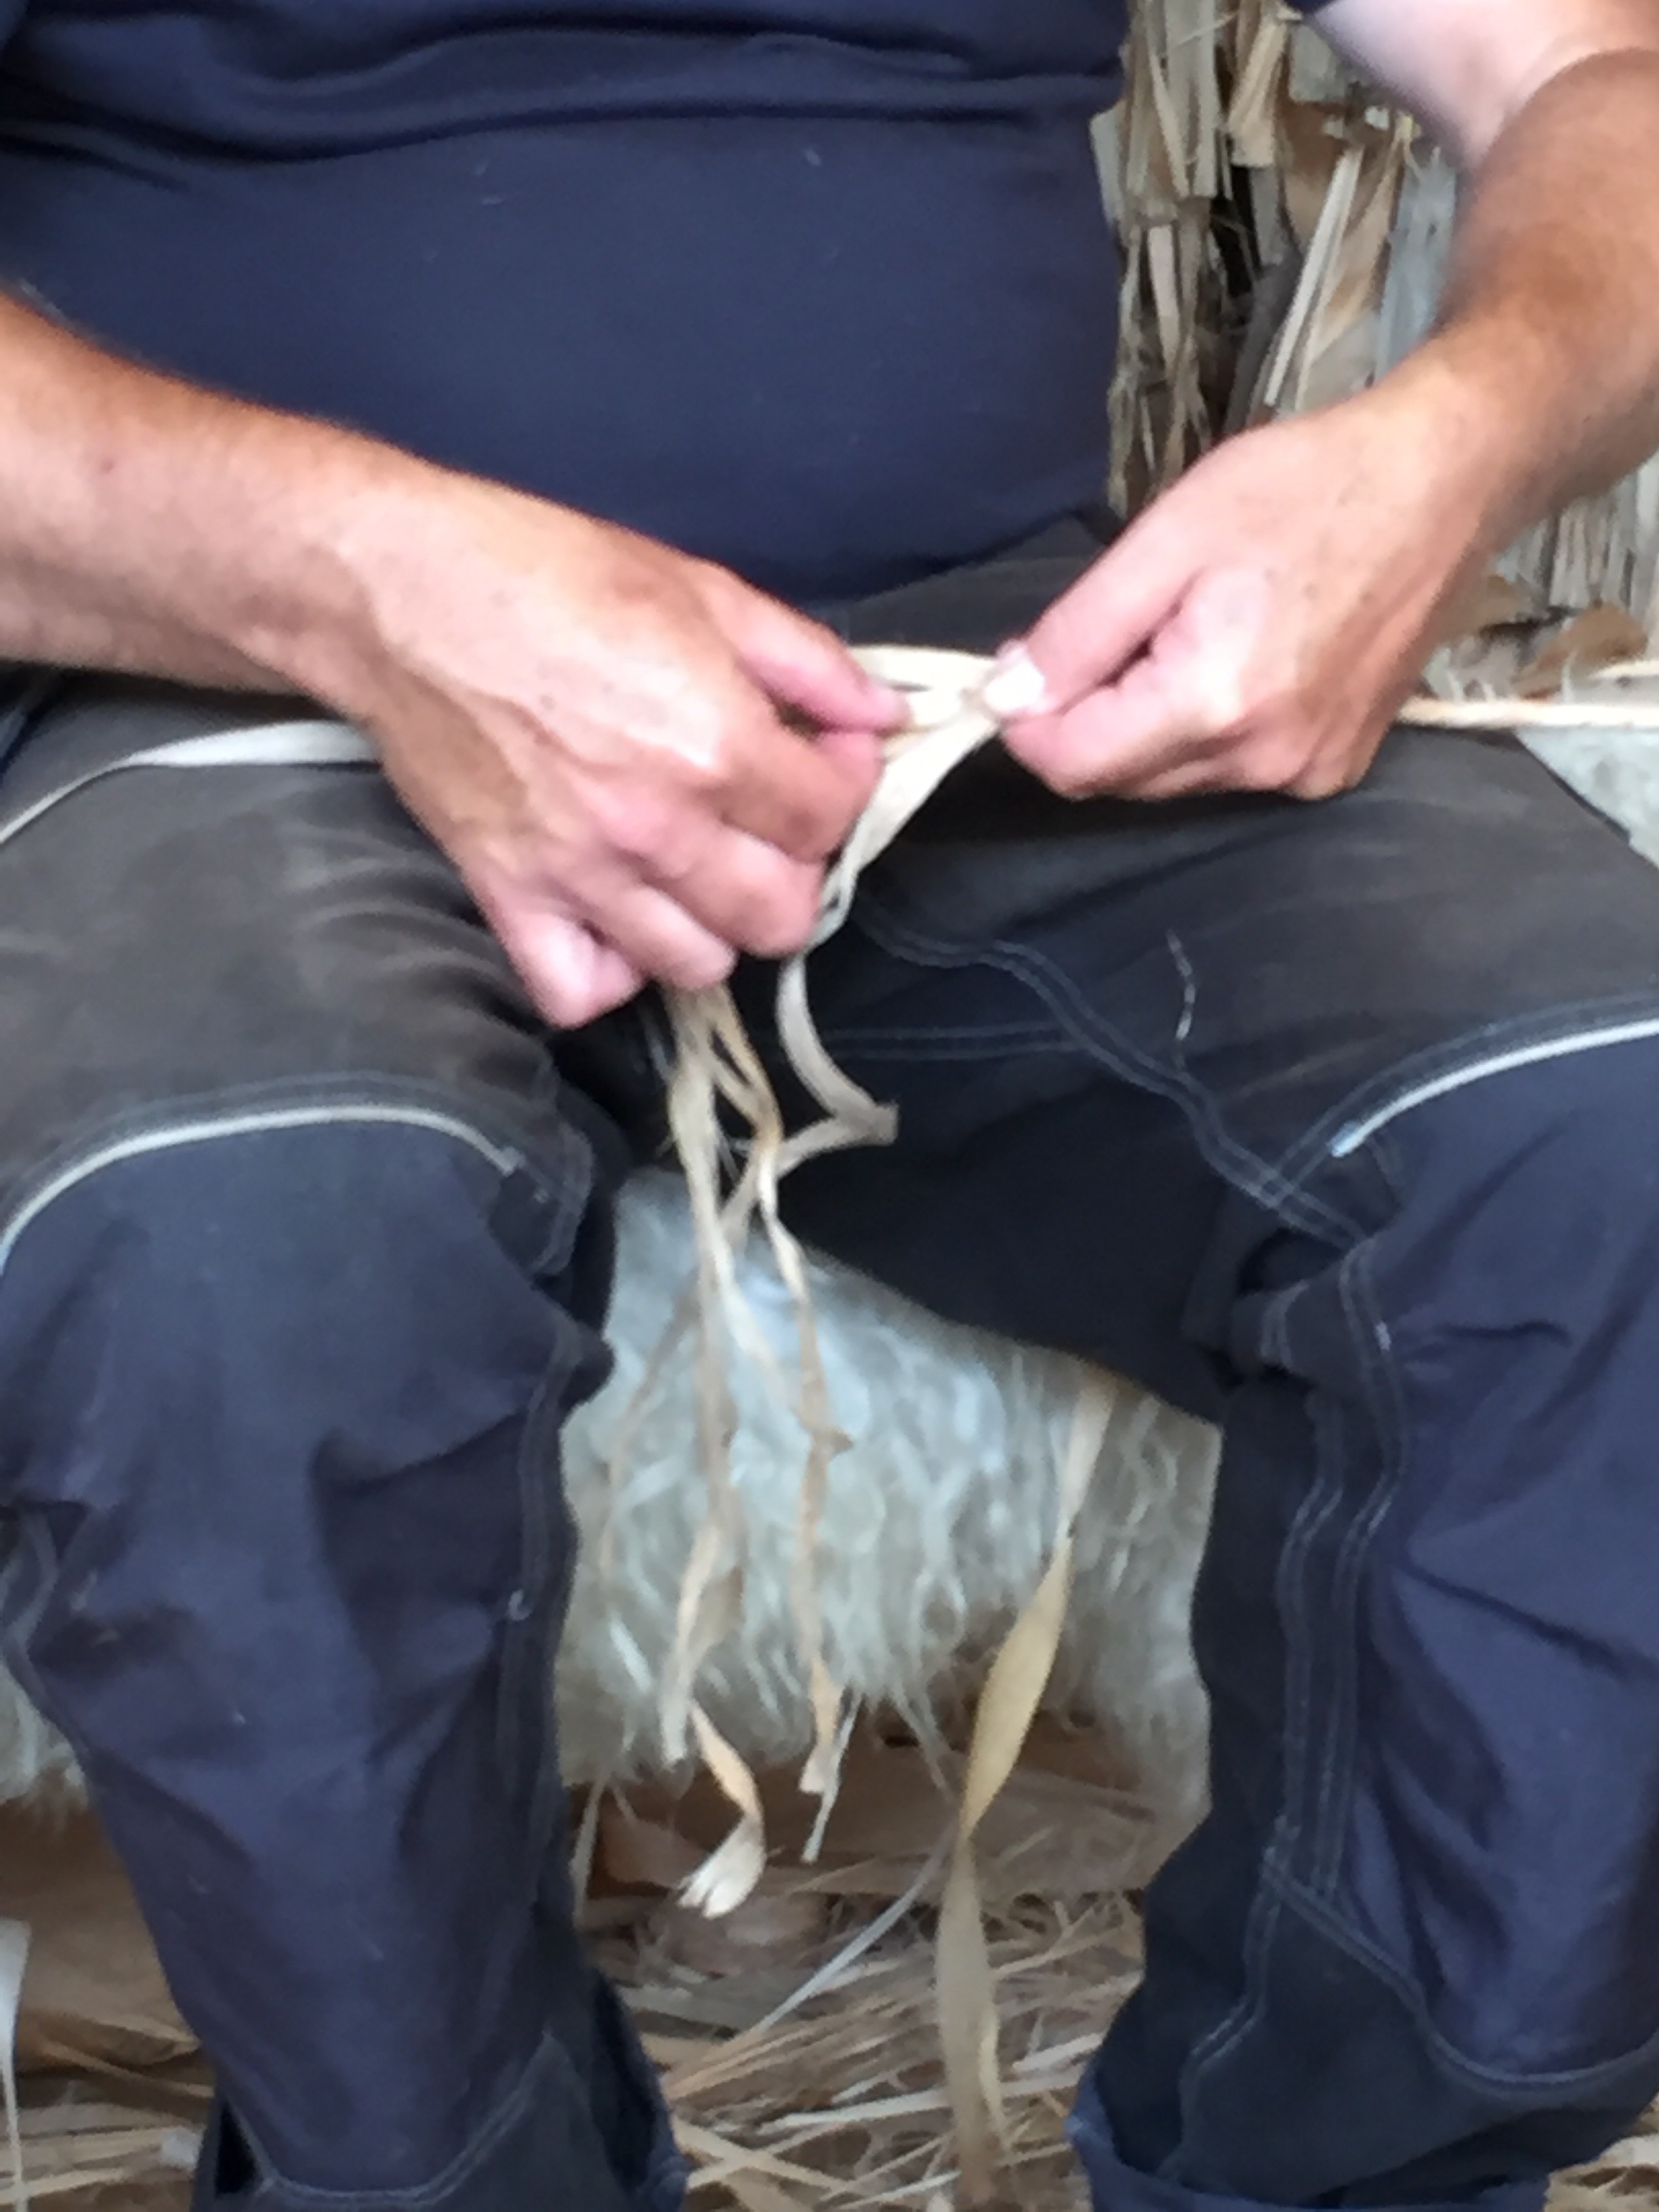
It’s more wrap than twist, although there is twist. The winder is used to add a little more twist.
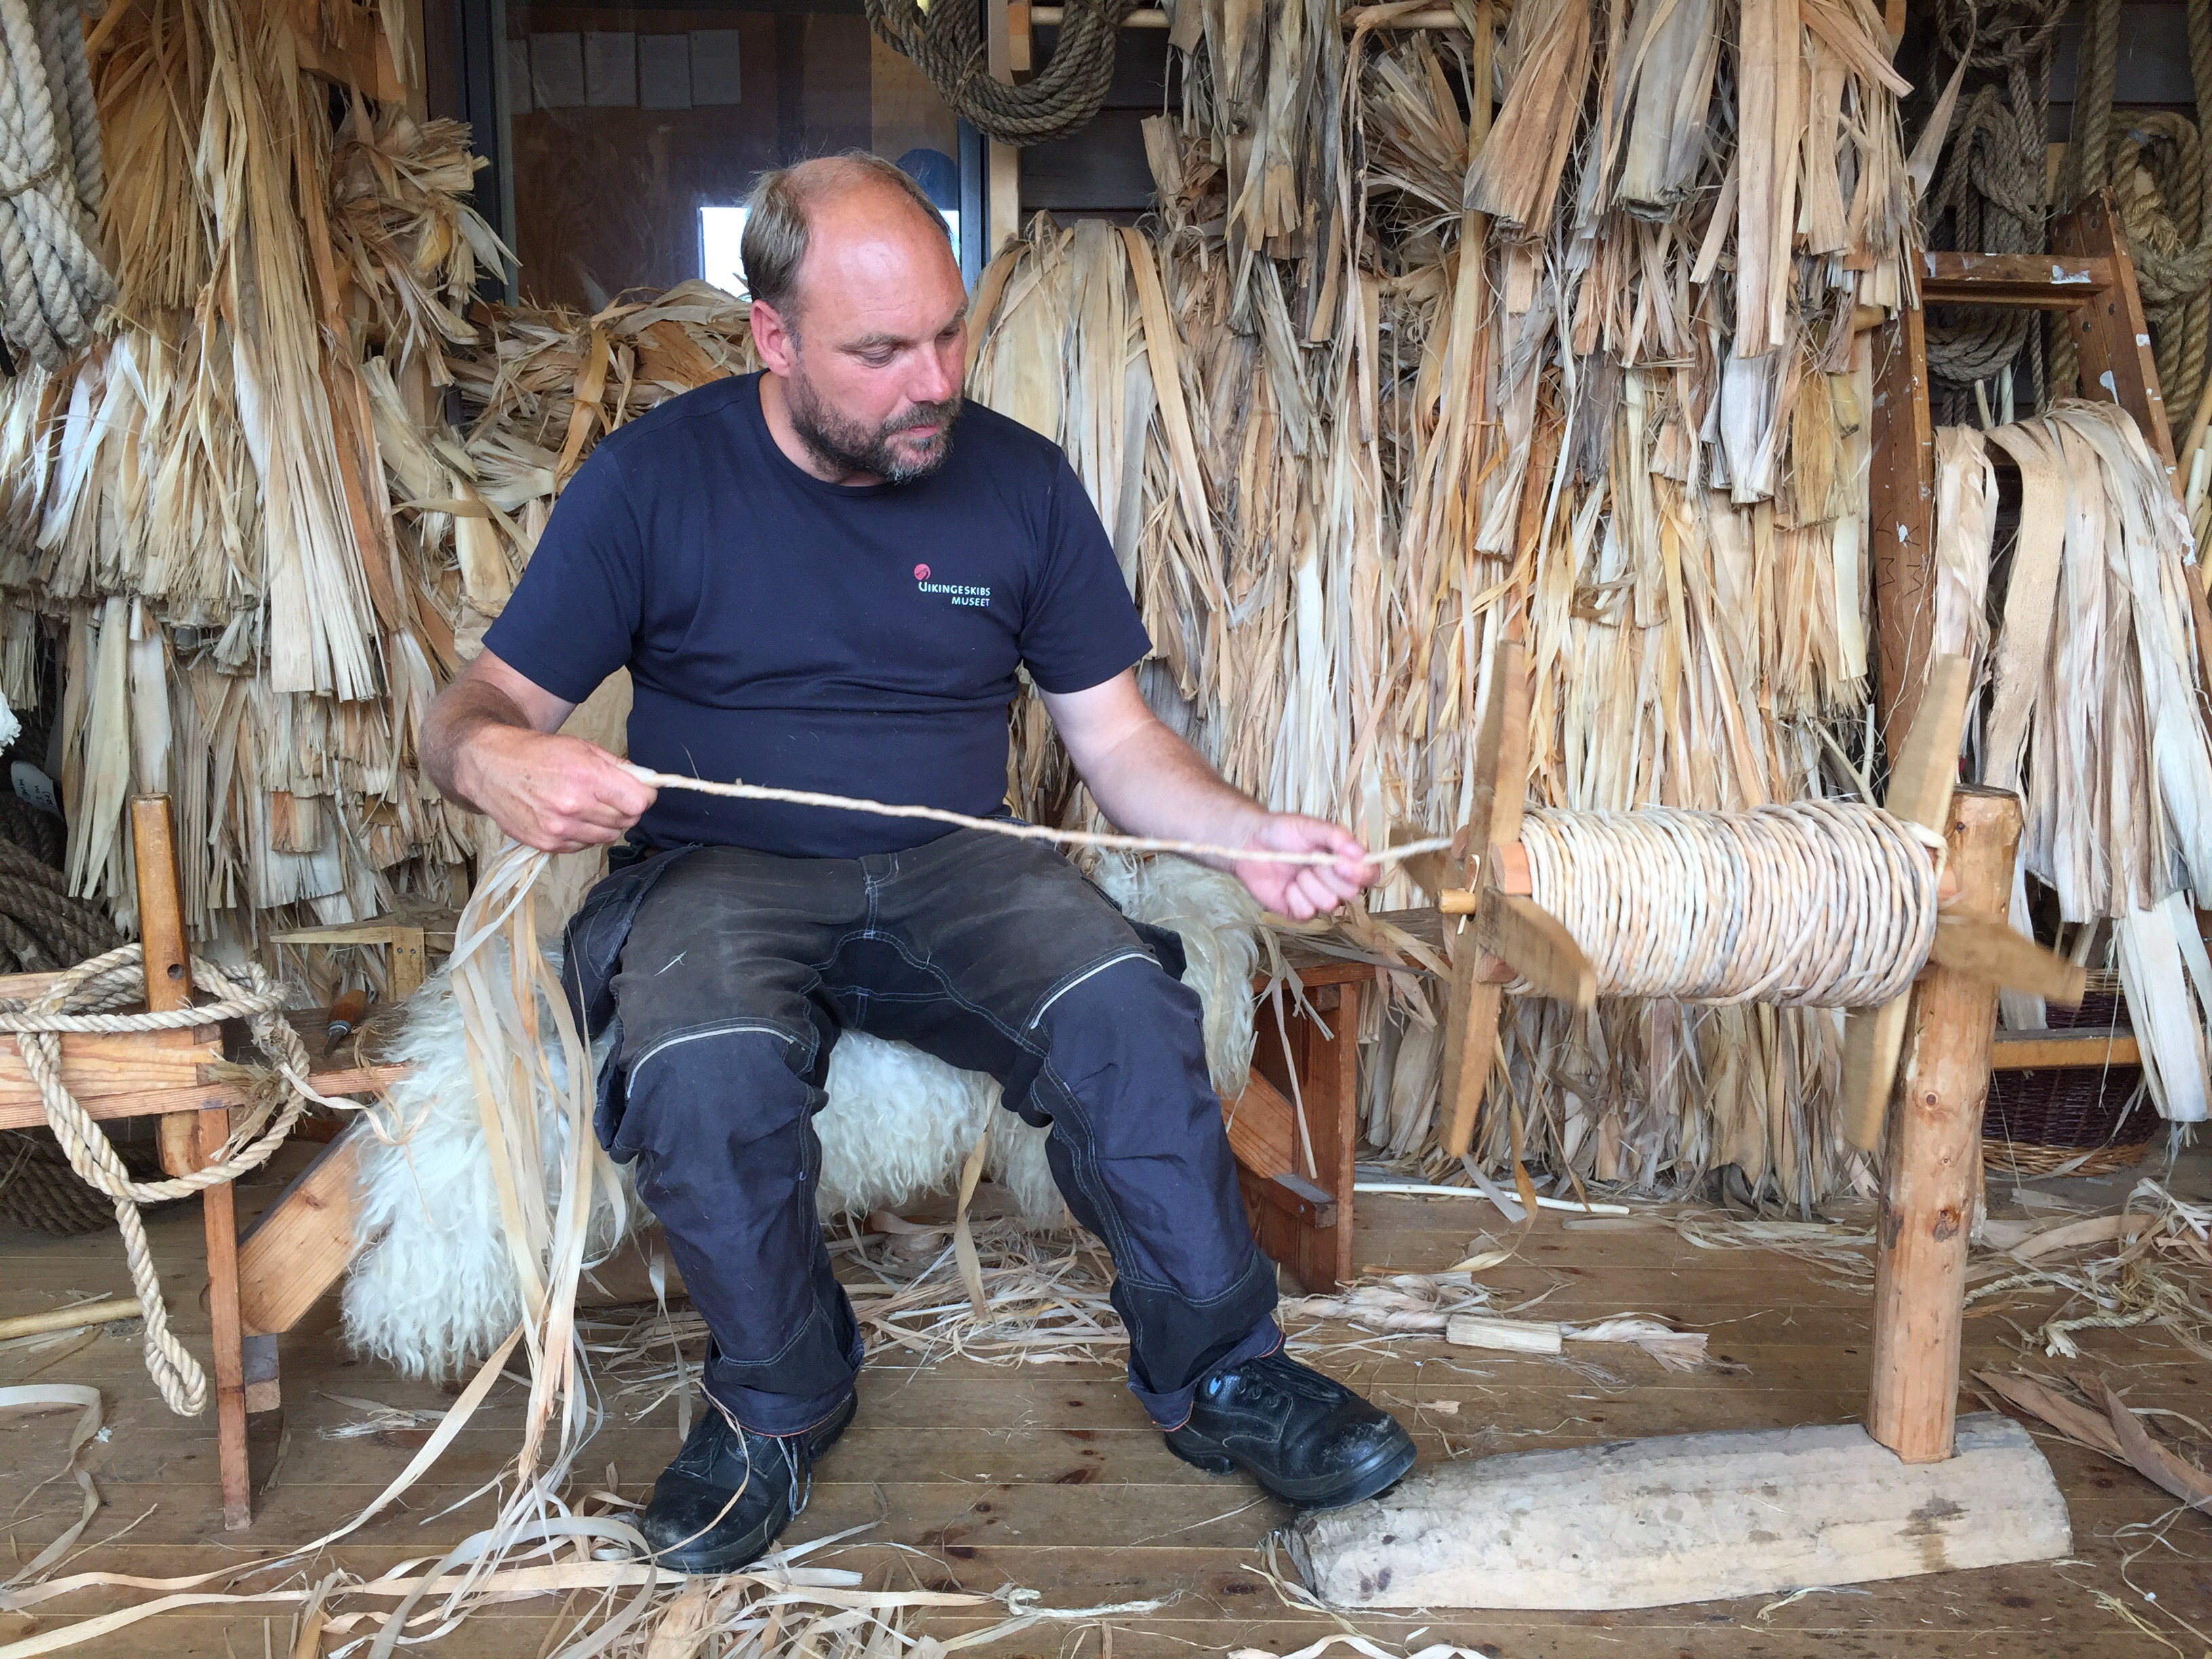
Starting the loop at one end of the rope. Each piece of bast rope is made to order, a specific length, with the ends finished in a specific way.

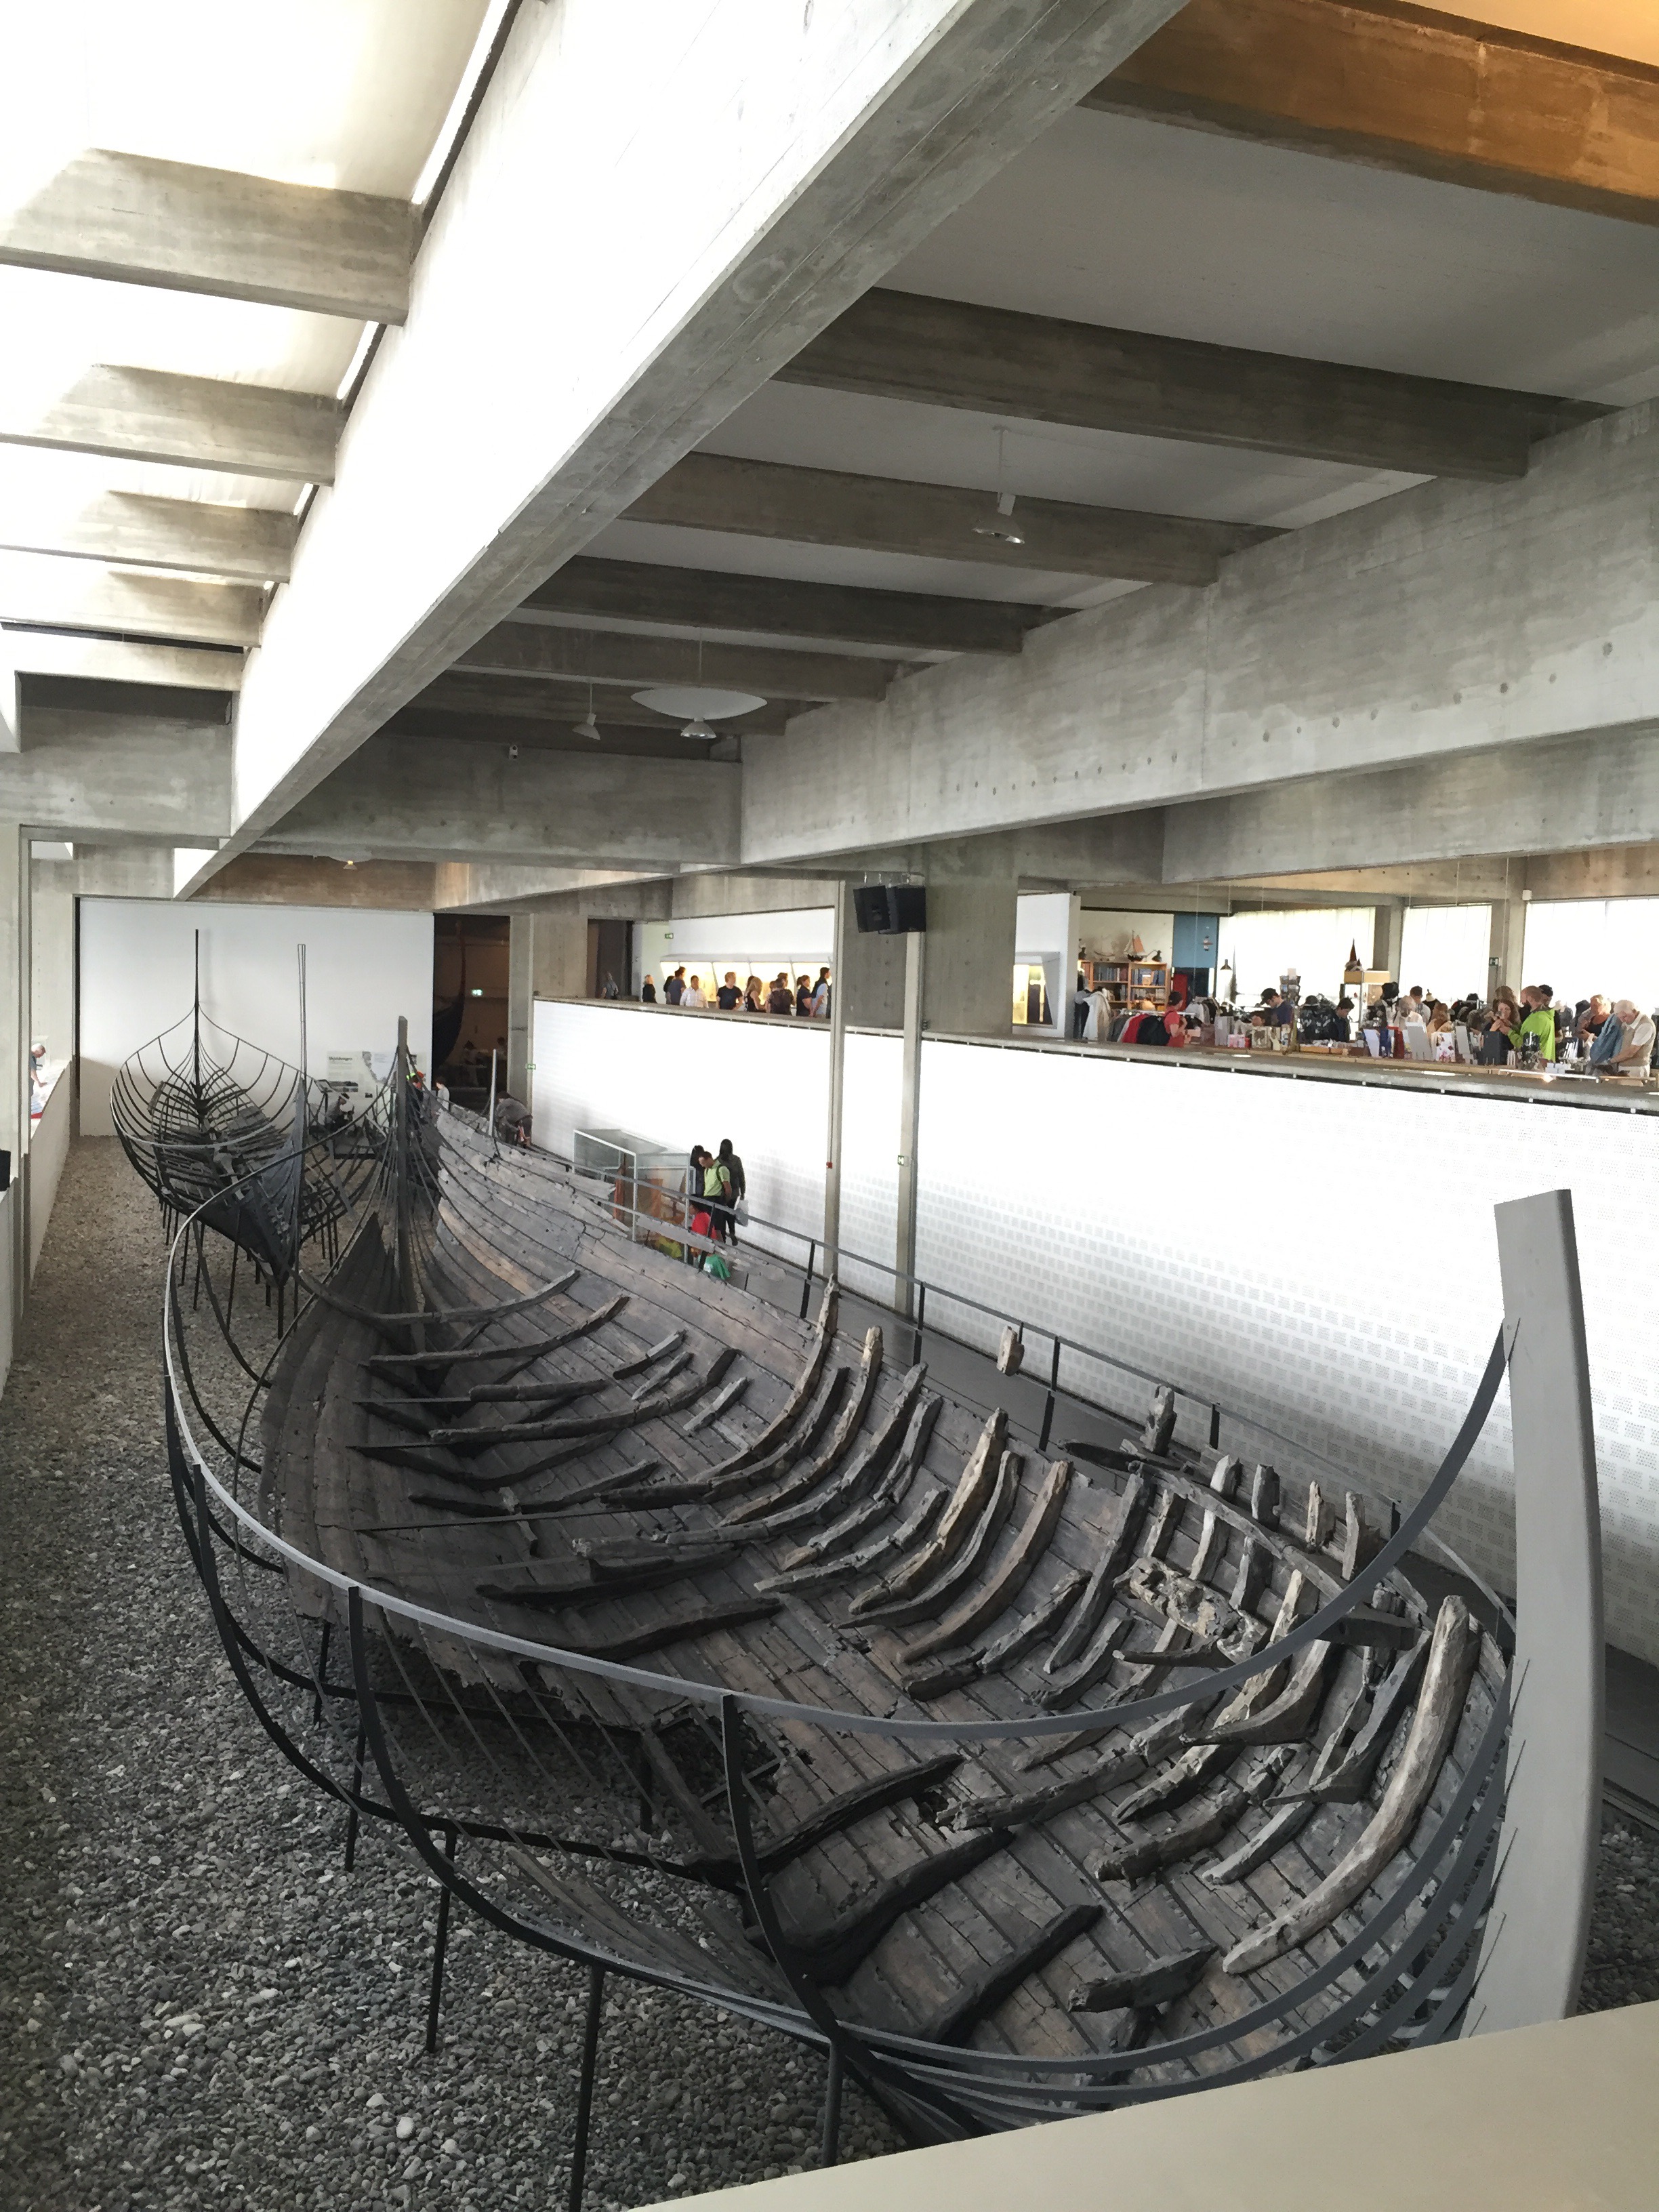
I spent ages watching and asking questions before i took my leave and we headed into what is for most people the main event: the building housing the restored original Viking boats.

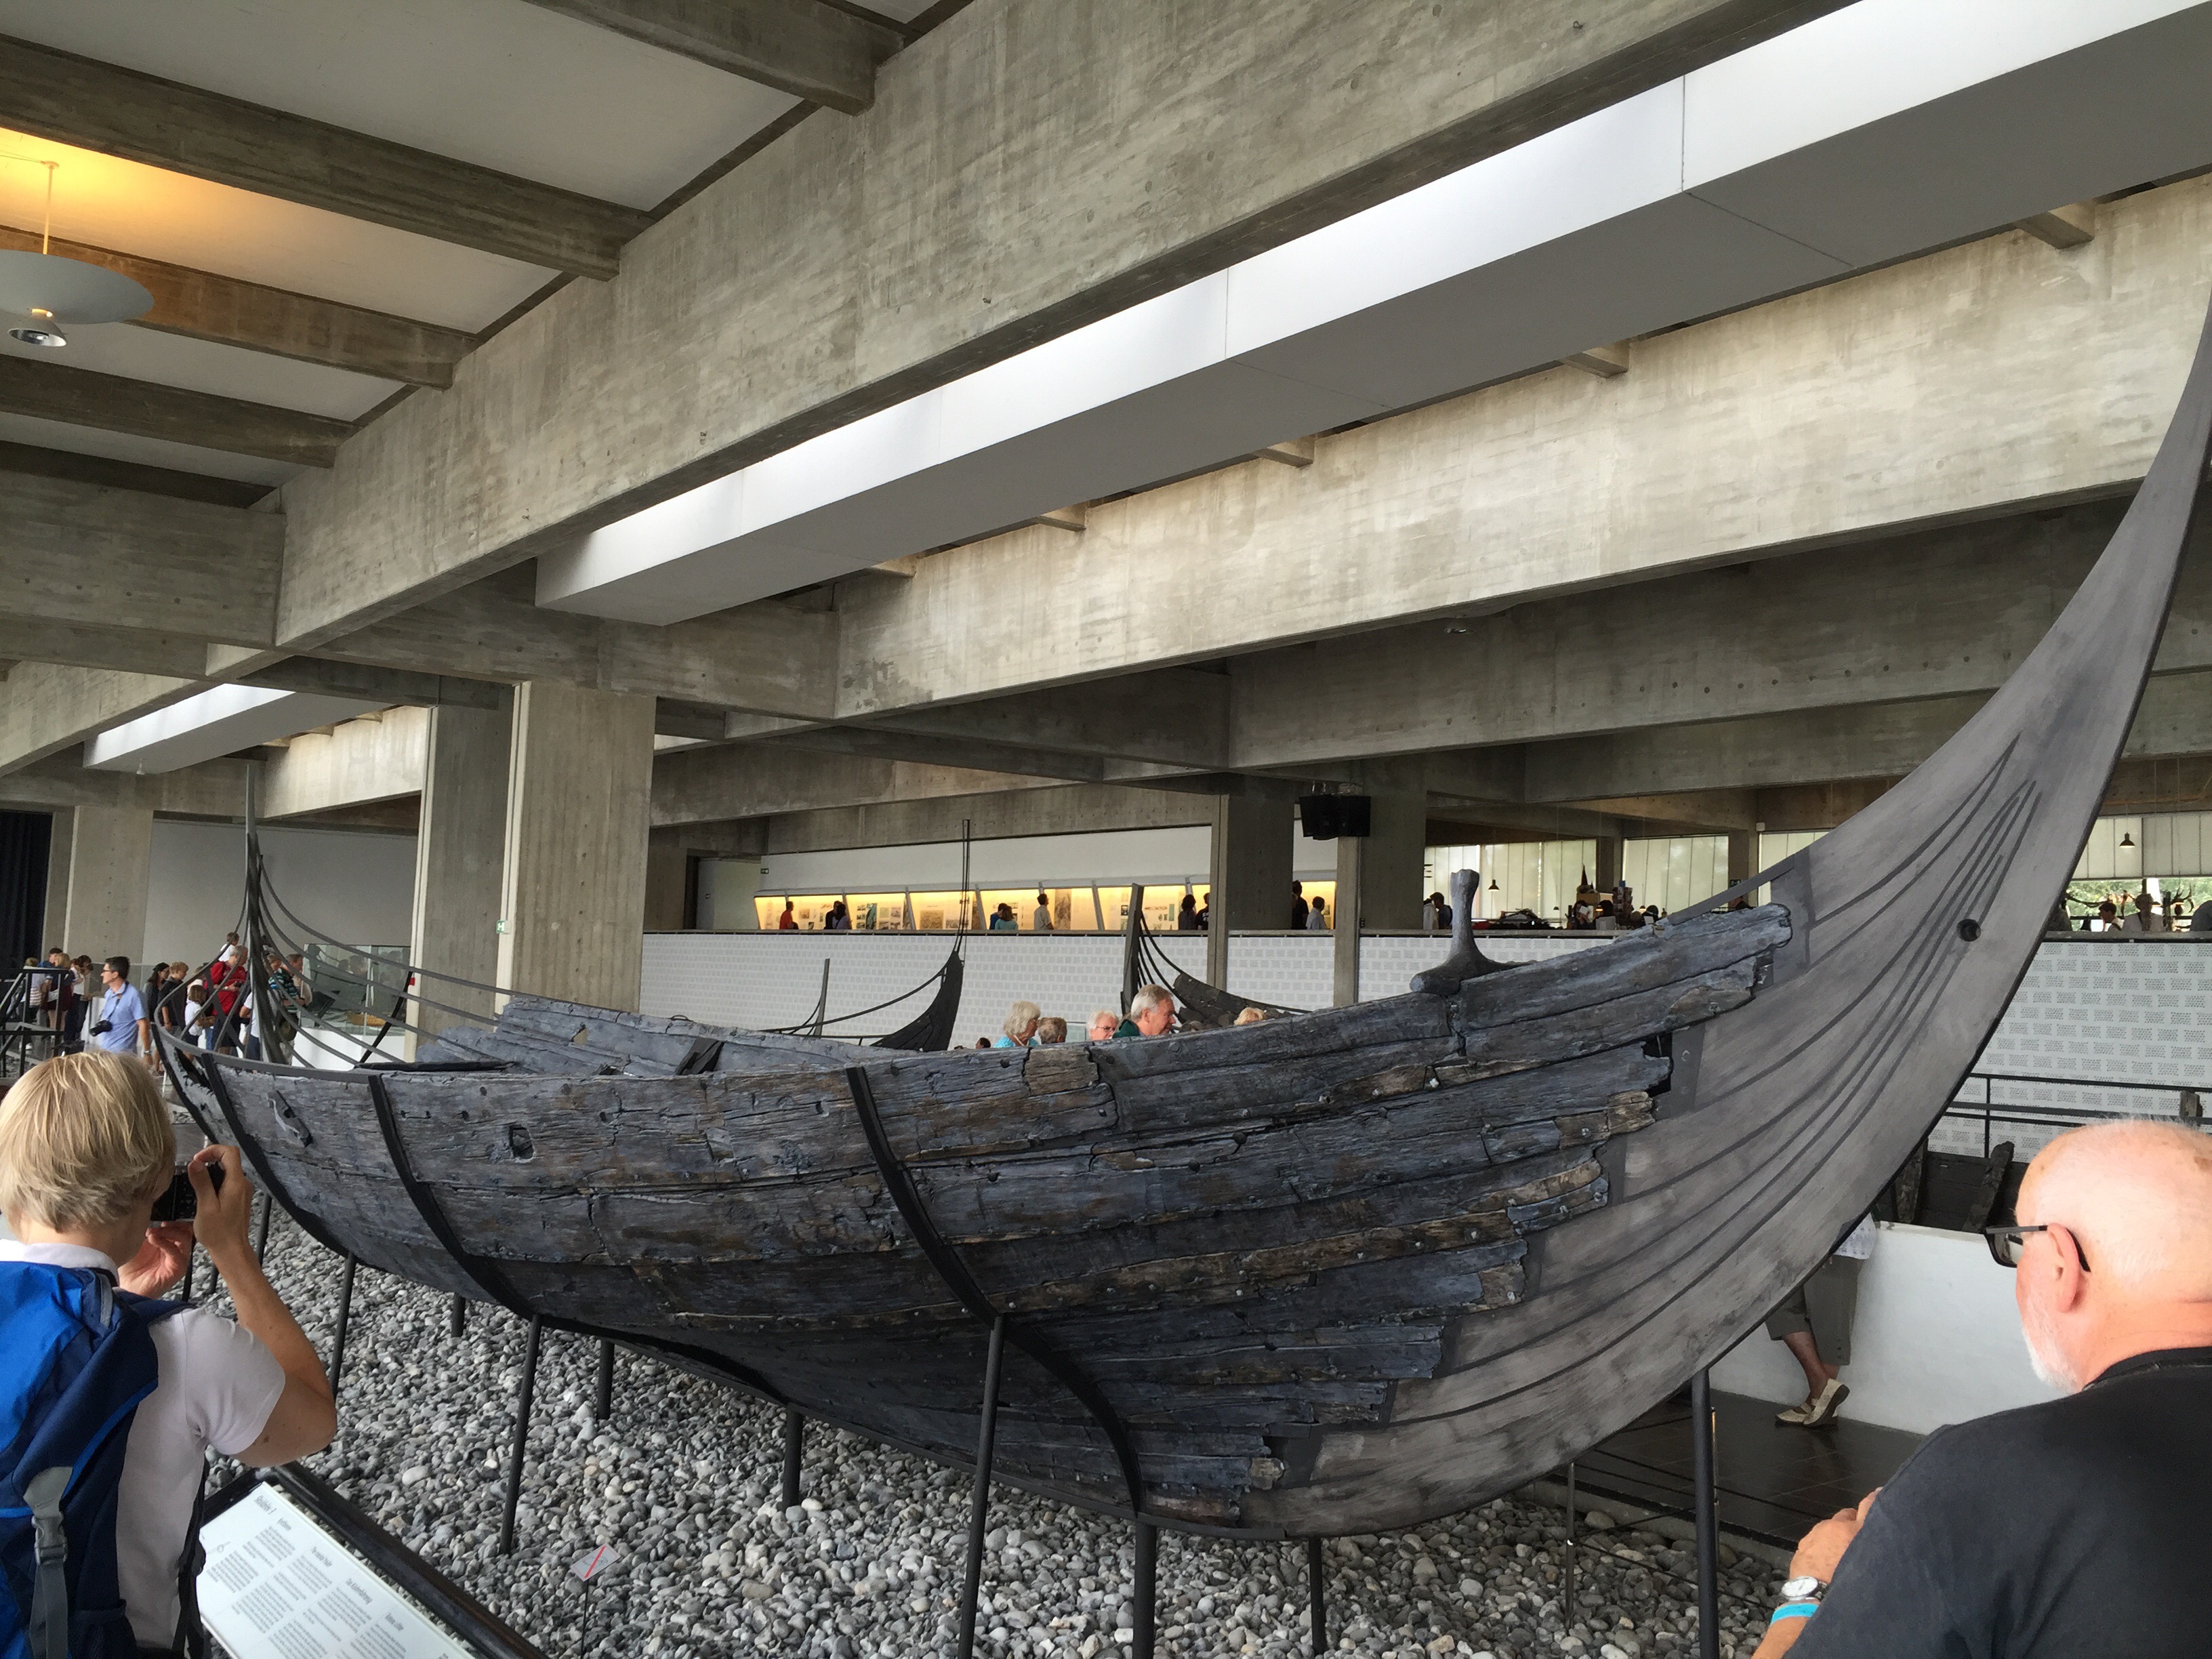
A 1:10 model of one of the boats, used to work out the principles before planning the full-size replica.

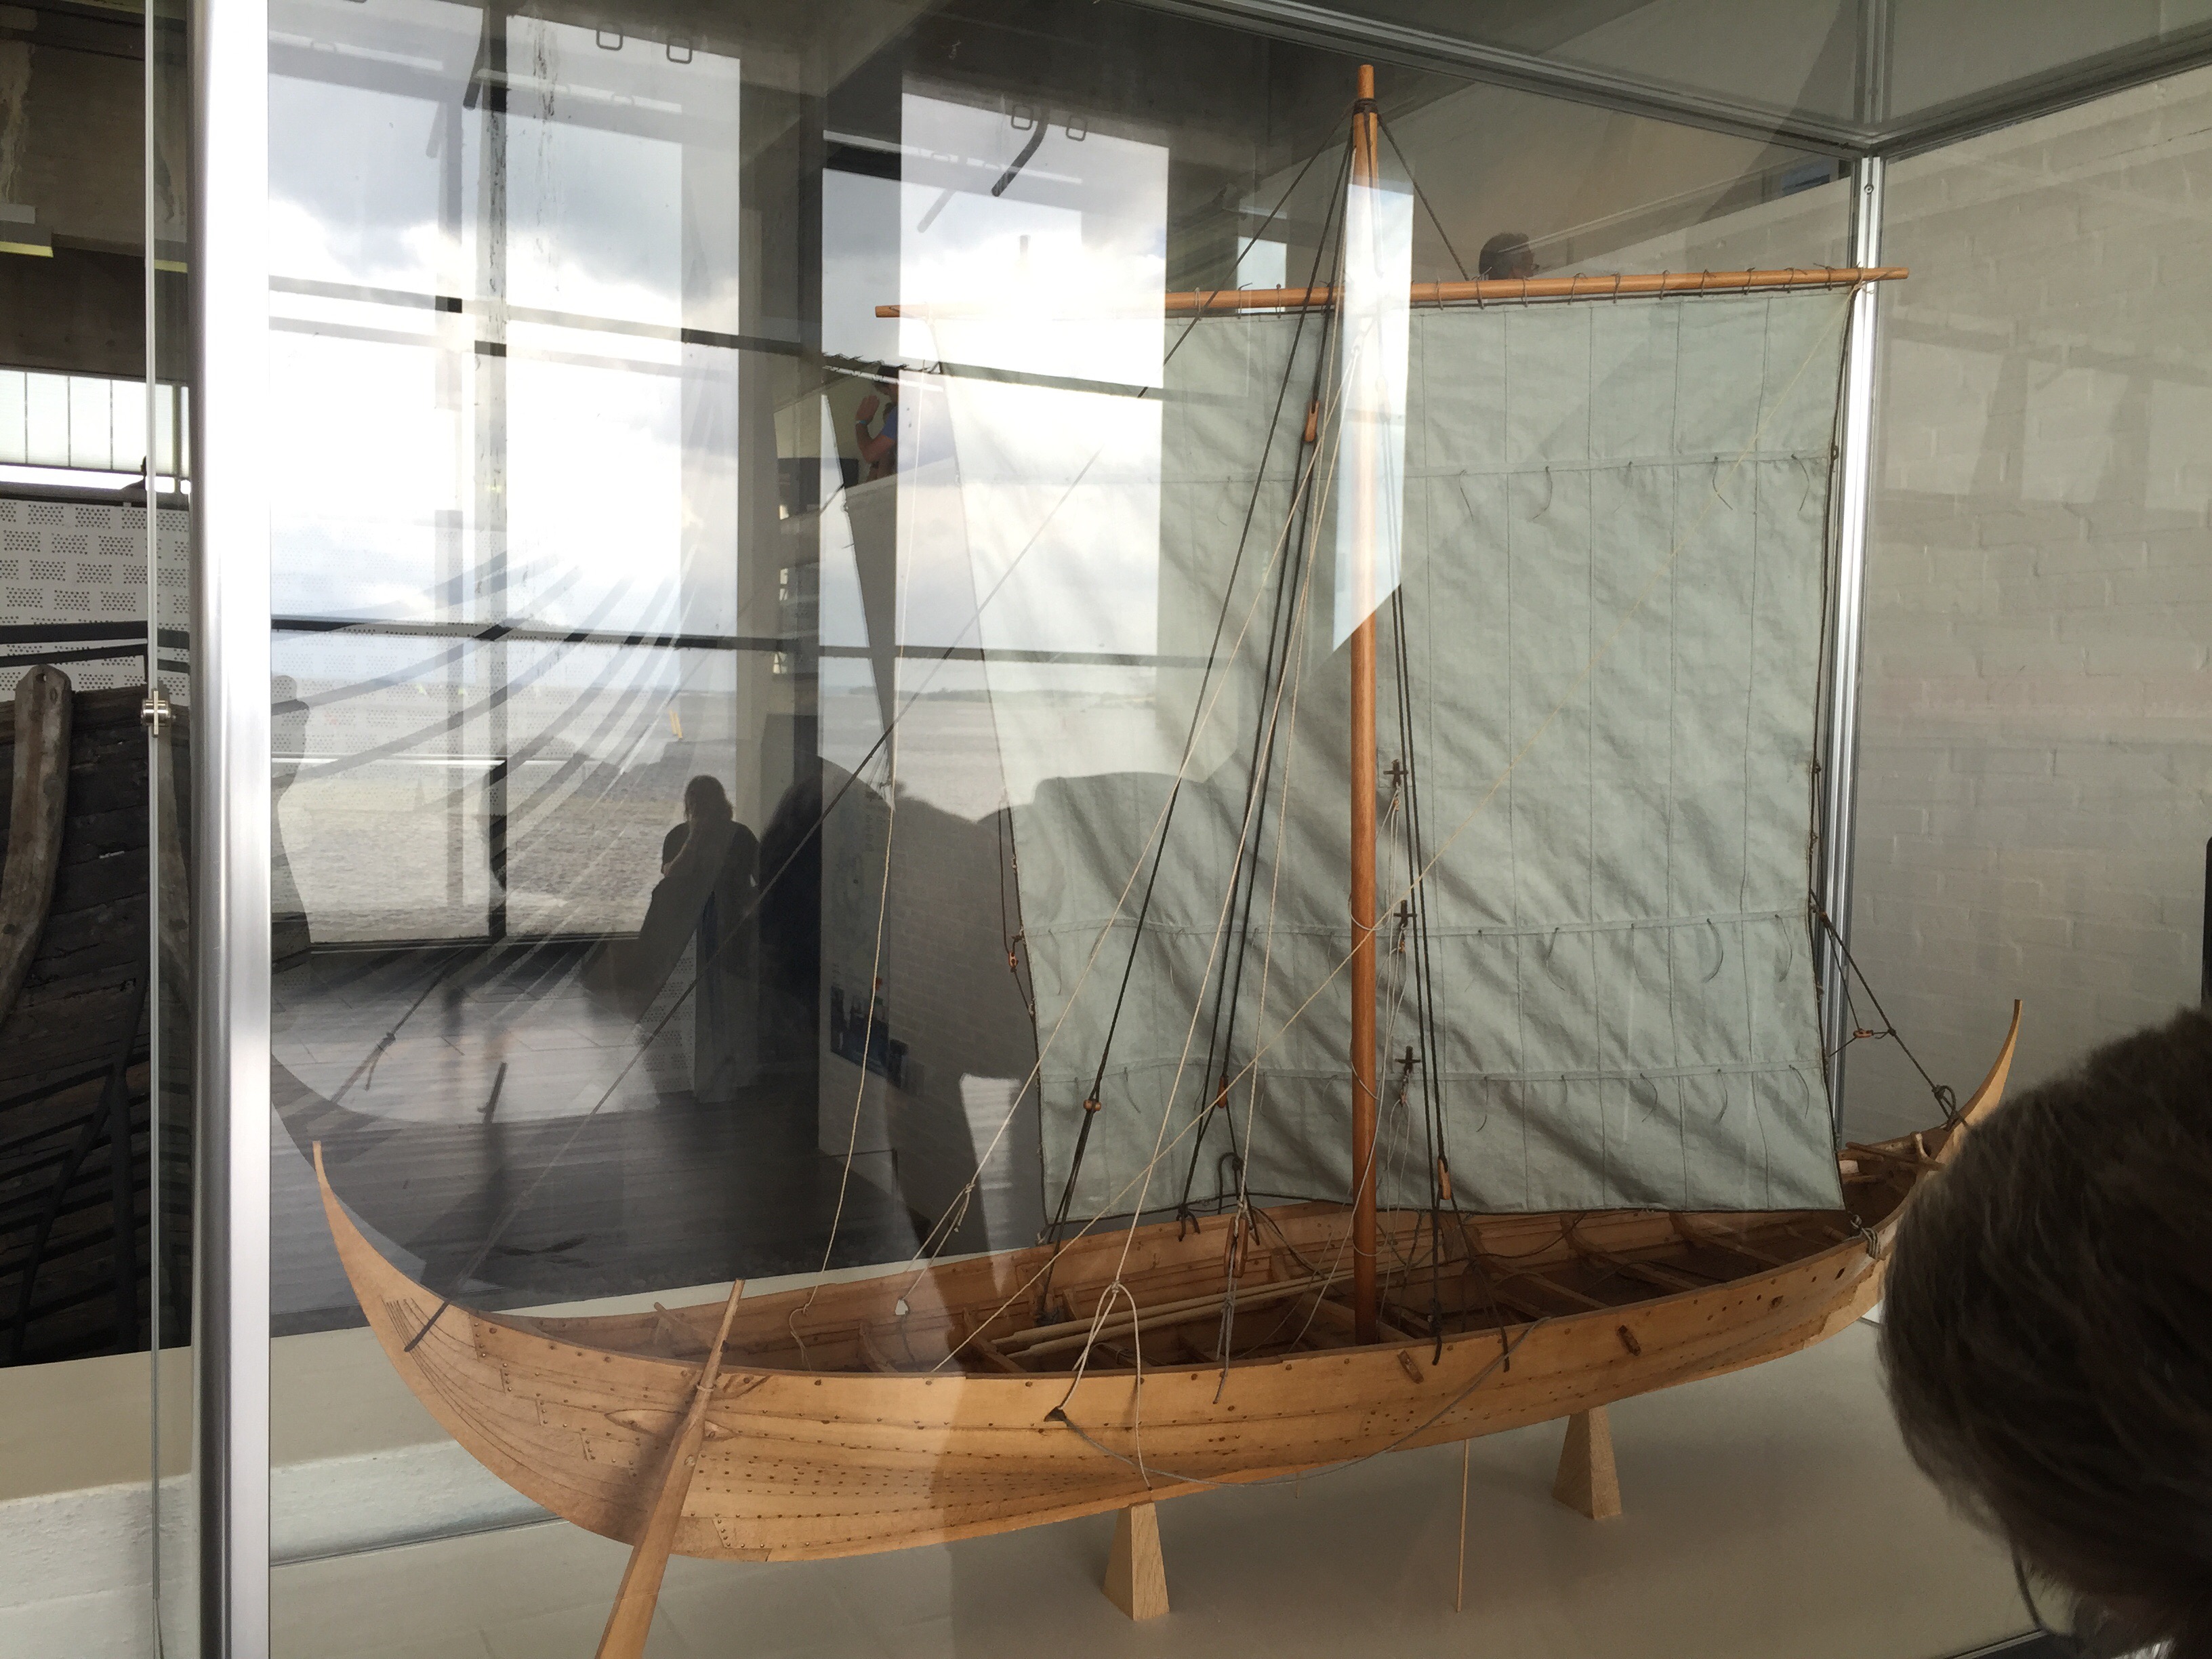
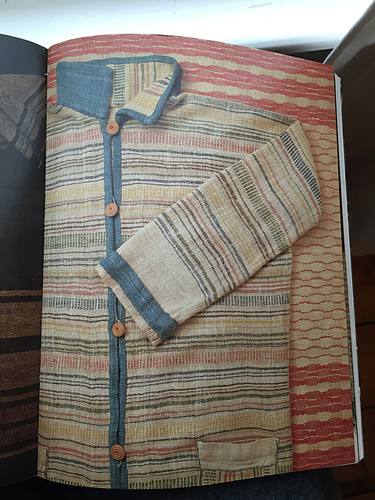
Down the far end, in good light, we saw a warp-weighted loom of linen yarn and someone sewing: Anna making linen ‘summer’ sails for the 2016 Gislinge boat.

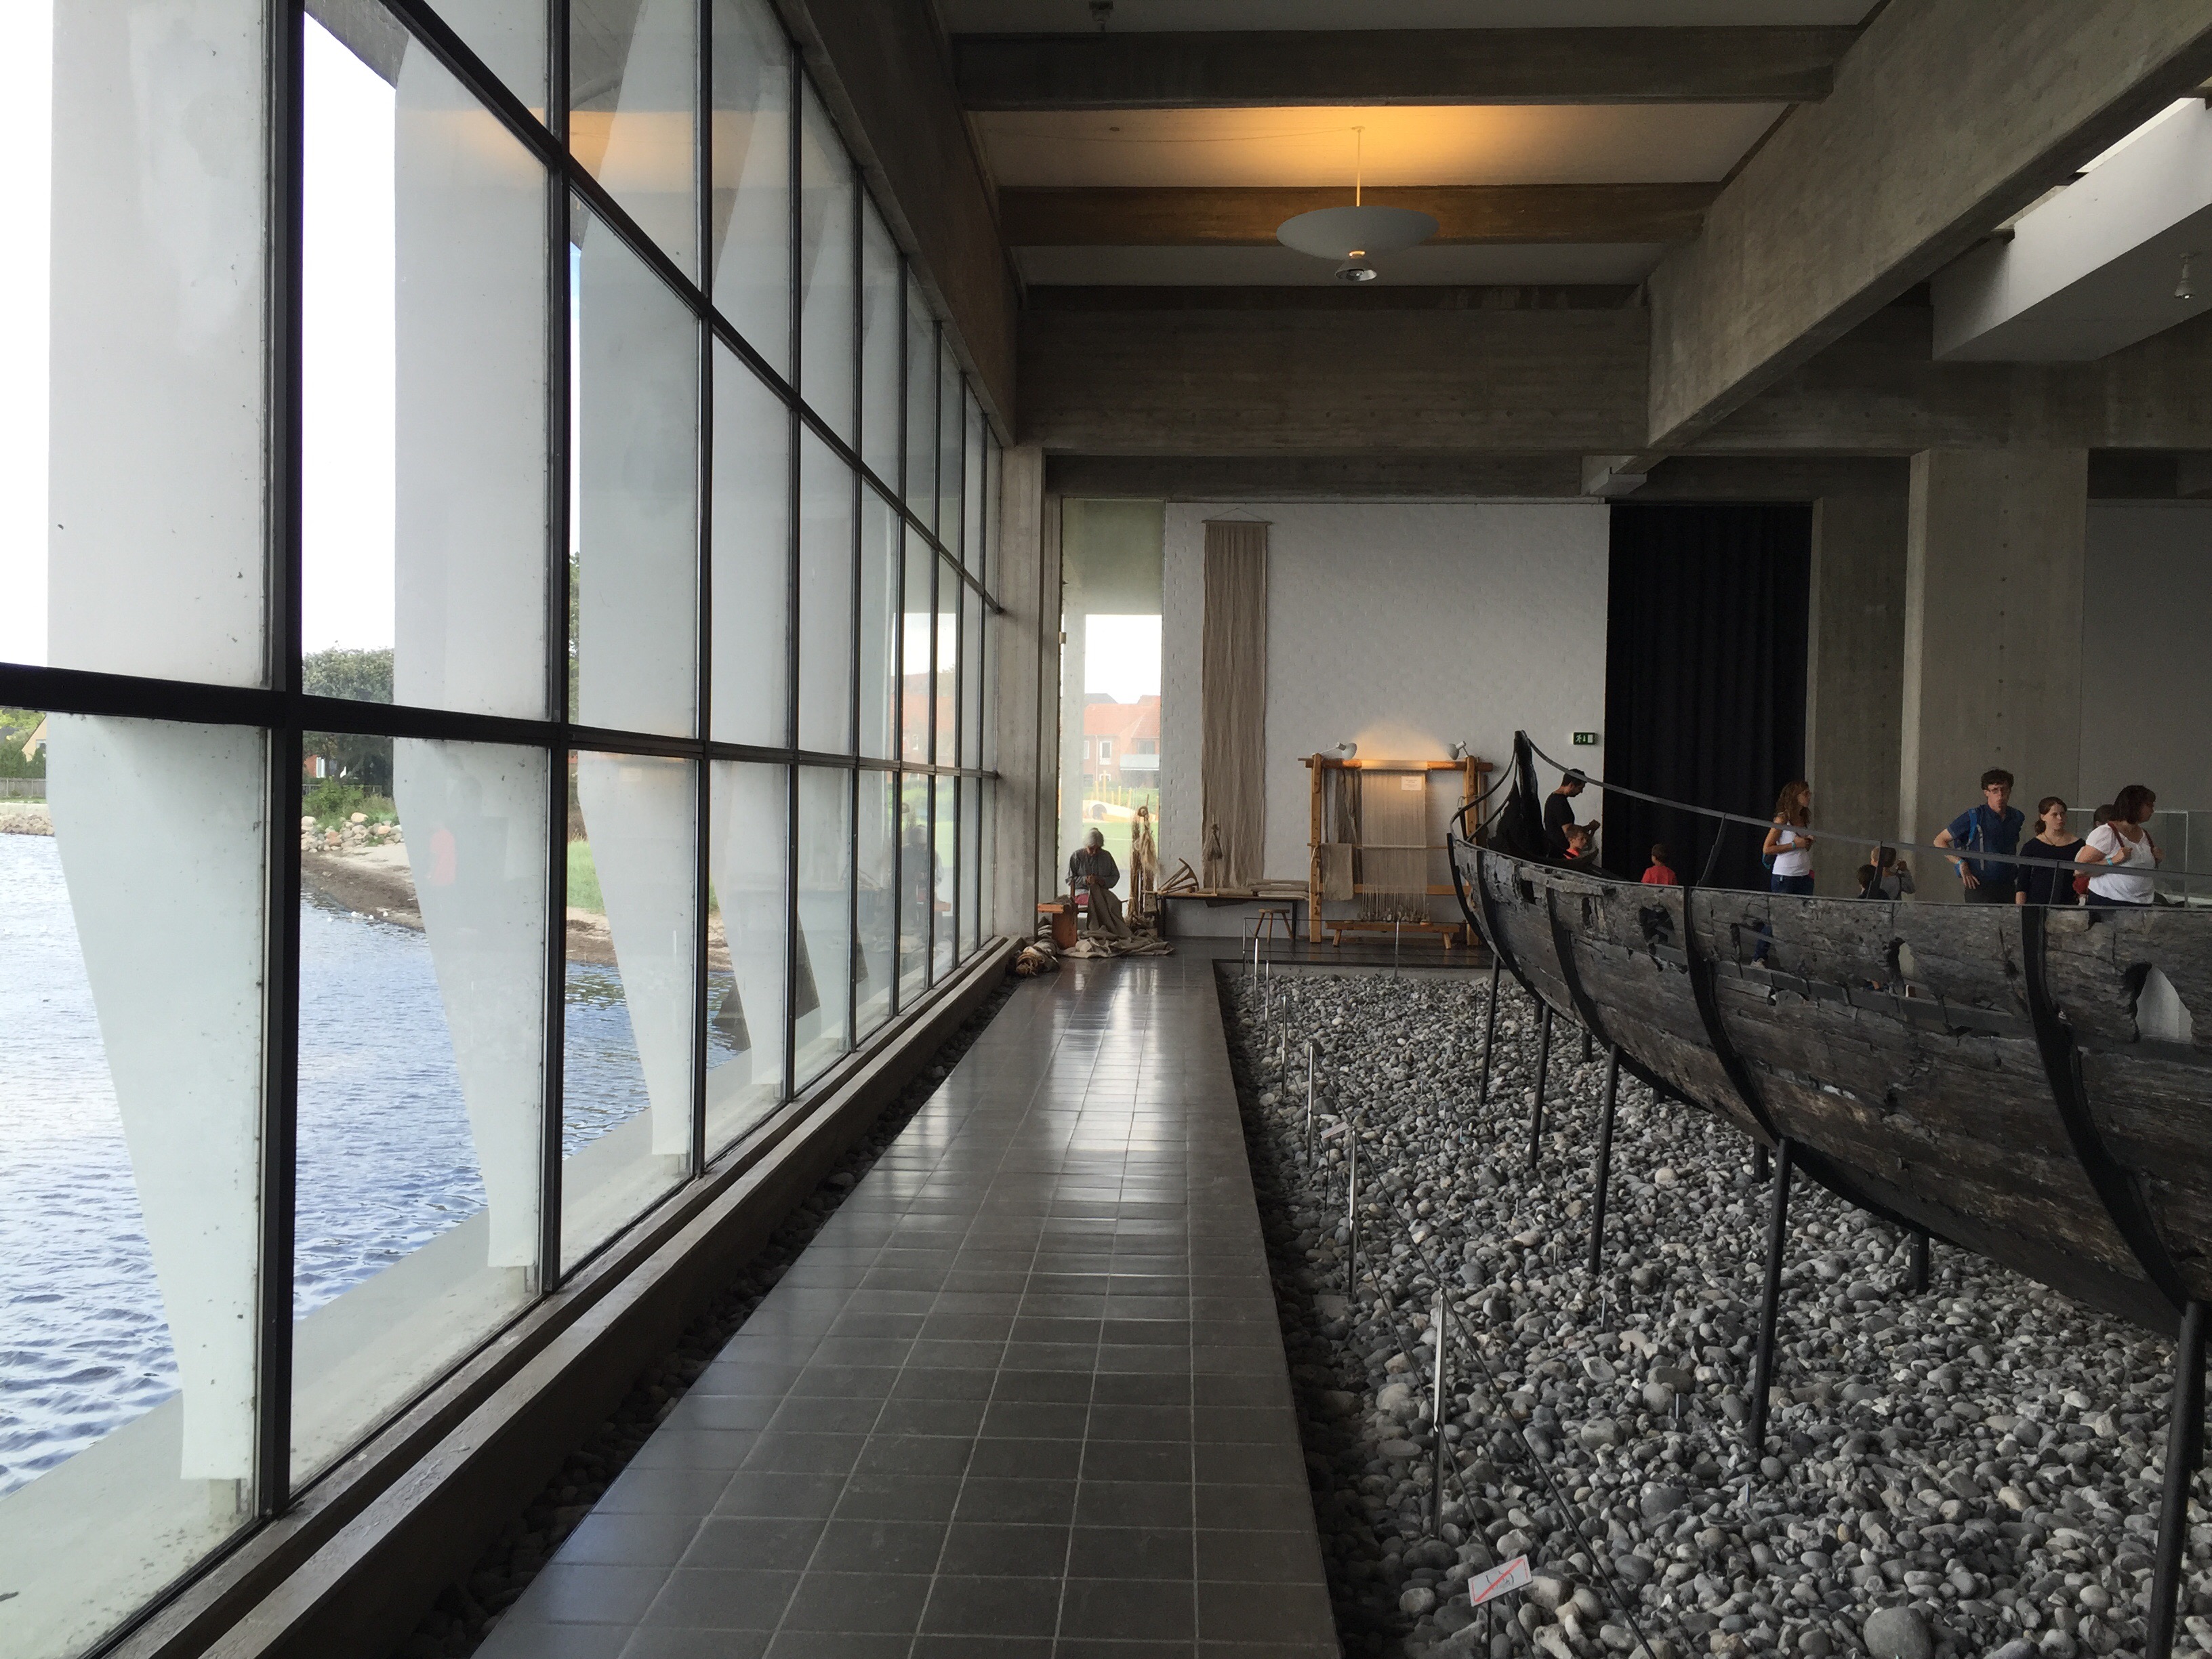
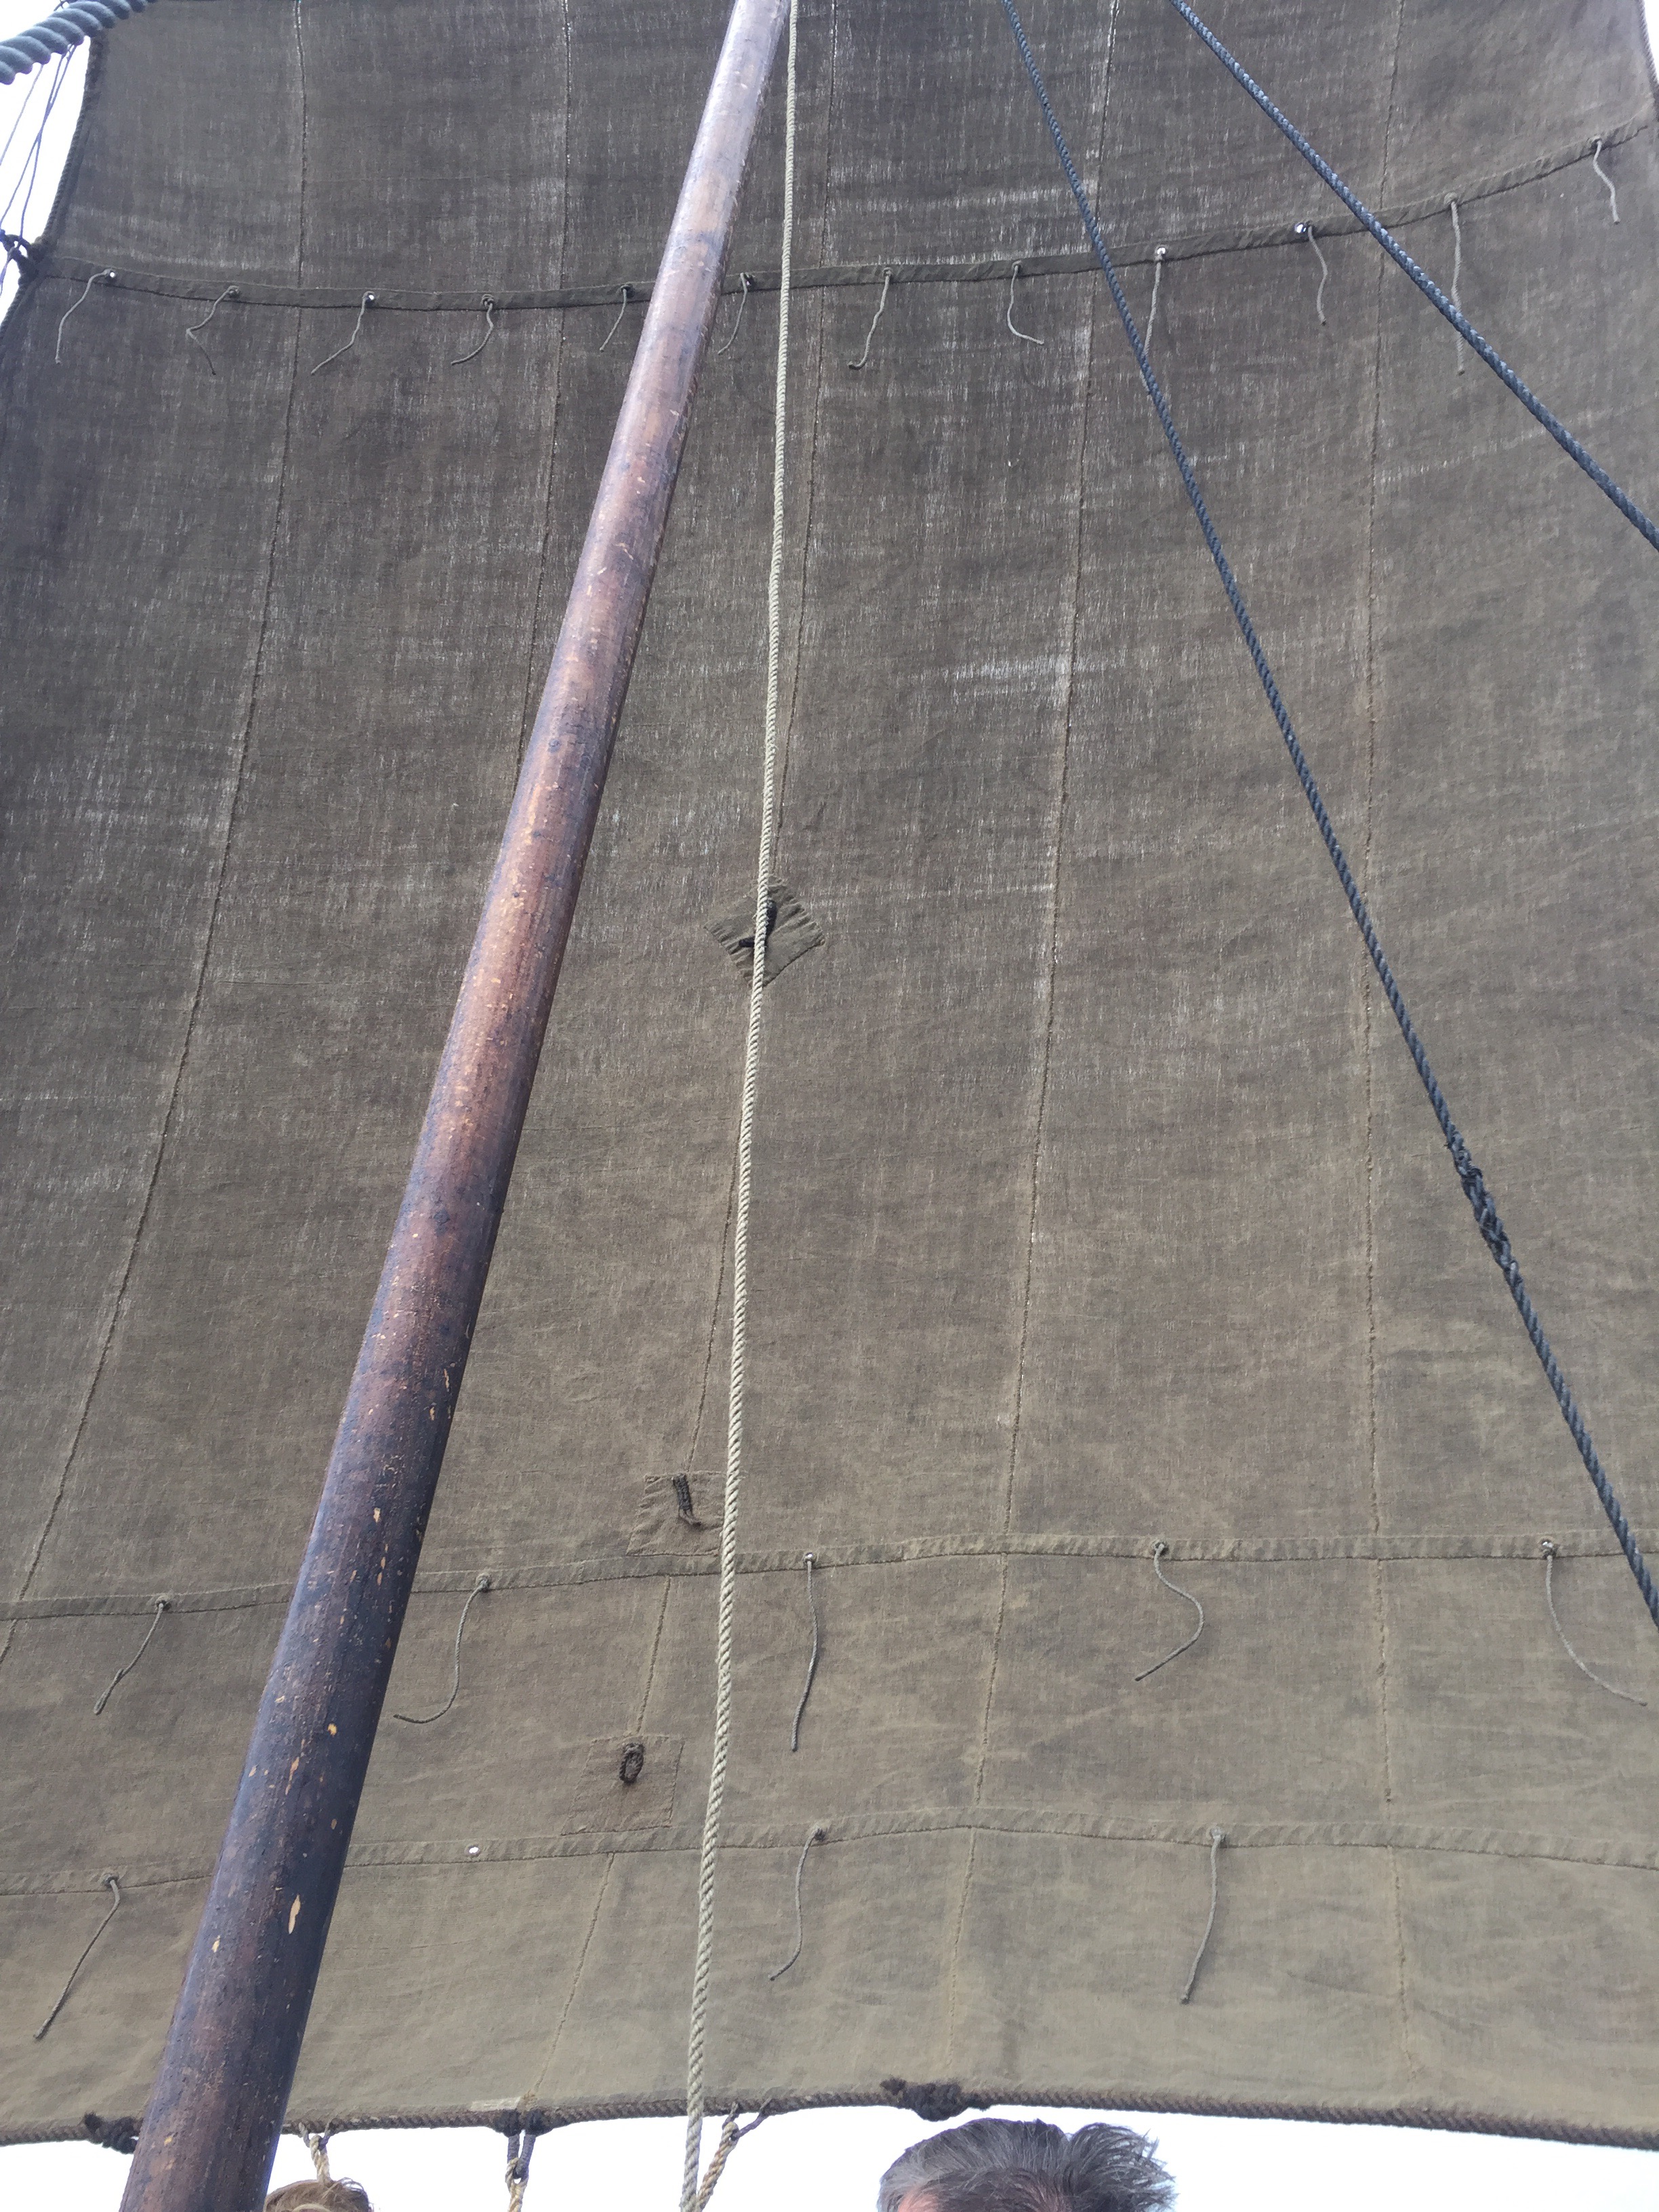
We talked about nettle and linen and the Must Farm finds, and then it was time to go and wait for the evening cruise. Not in fact one of the big and rather temperamental Viking boats, but a replica Norwegian working boat – with a hand-woven, hand-sewn greased woollen sail. Not hand-spun: it would take too long for one spinner who also has to weave! Anna spun samples that were sent to the mill. I don’t have many photos: I was a little reluctant to have my phone out while we were on the water. 

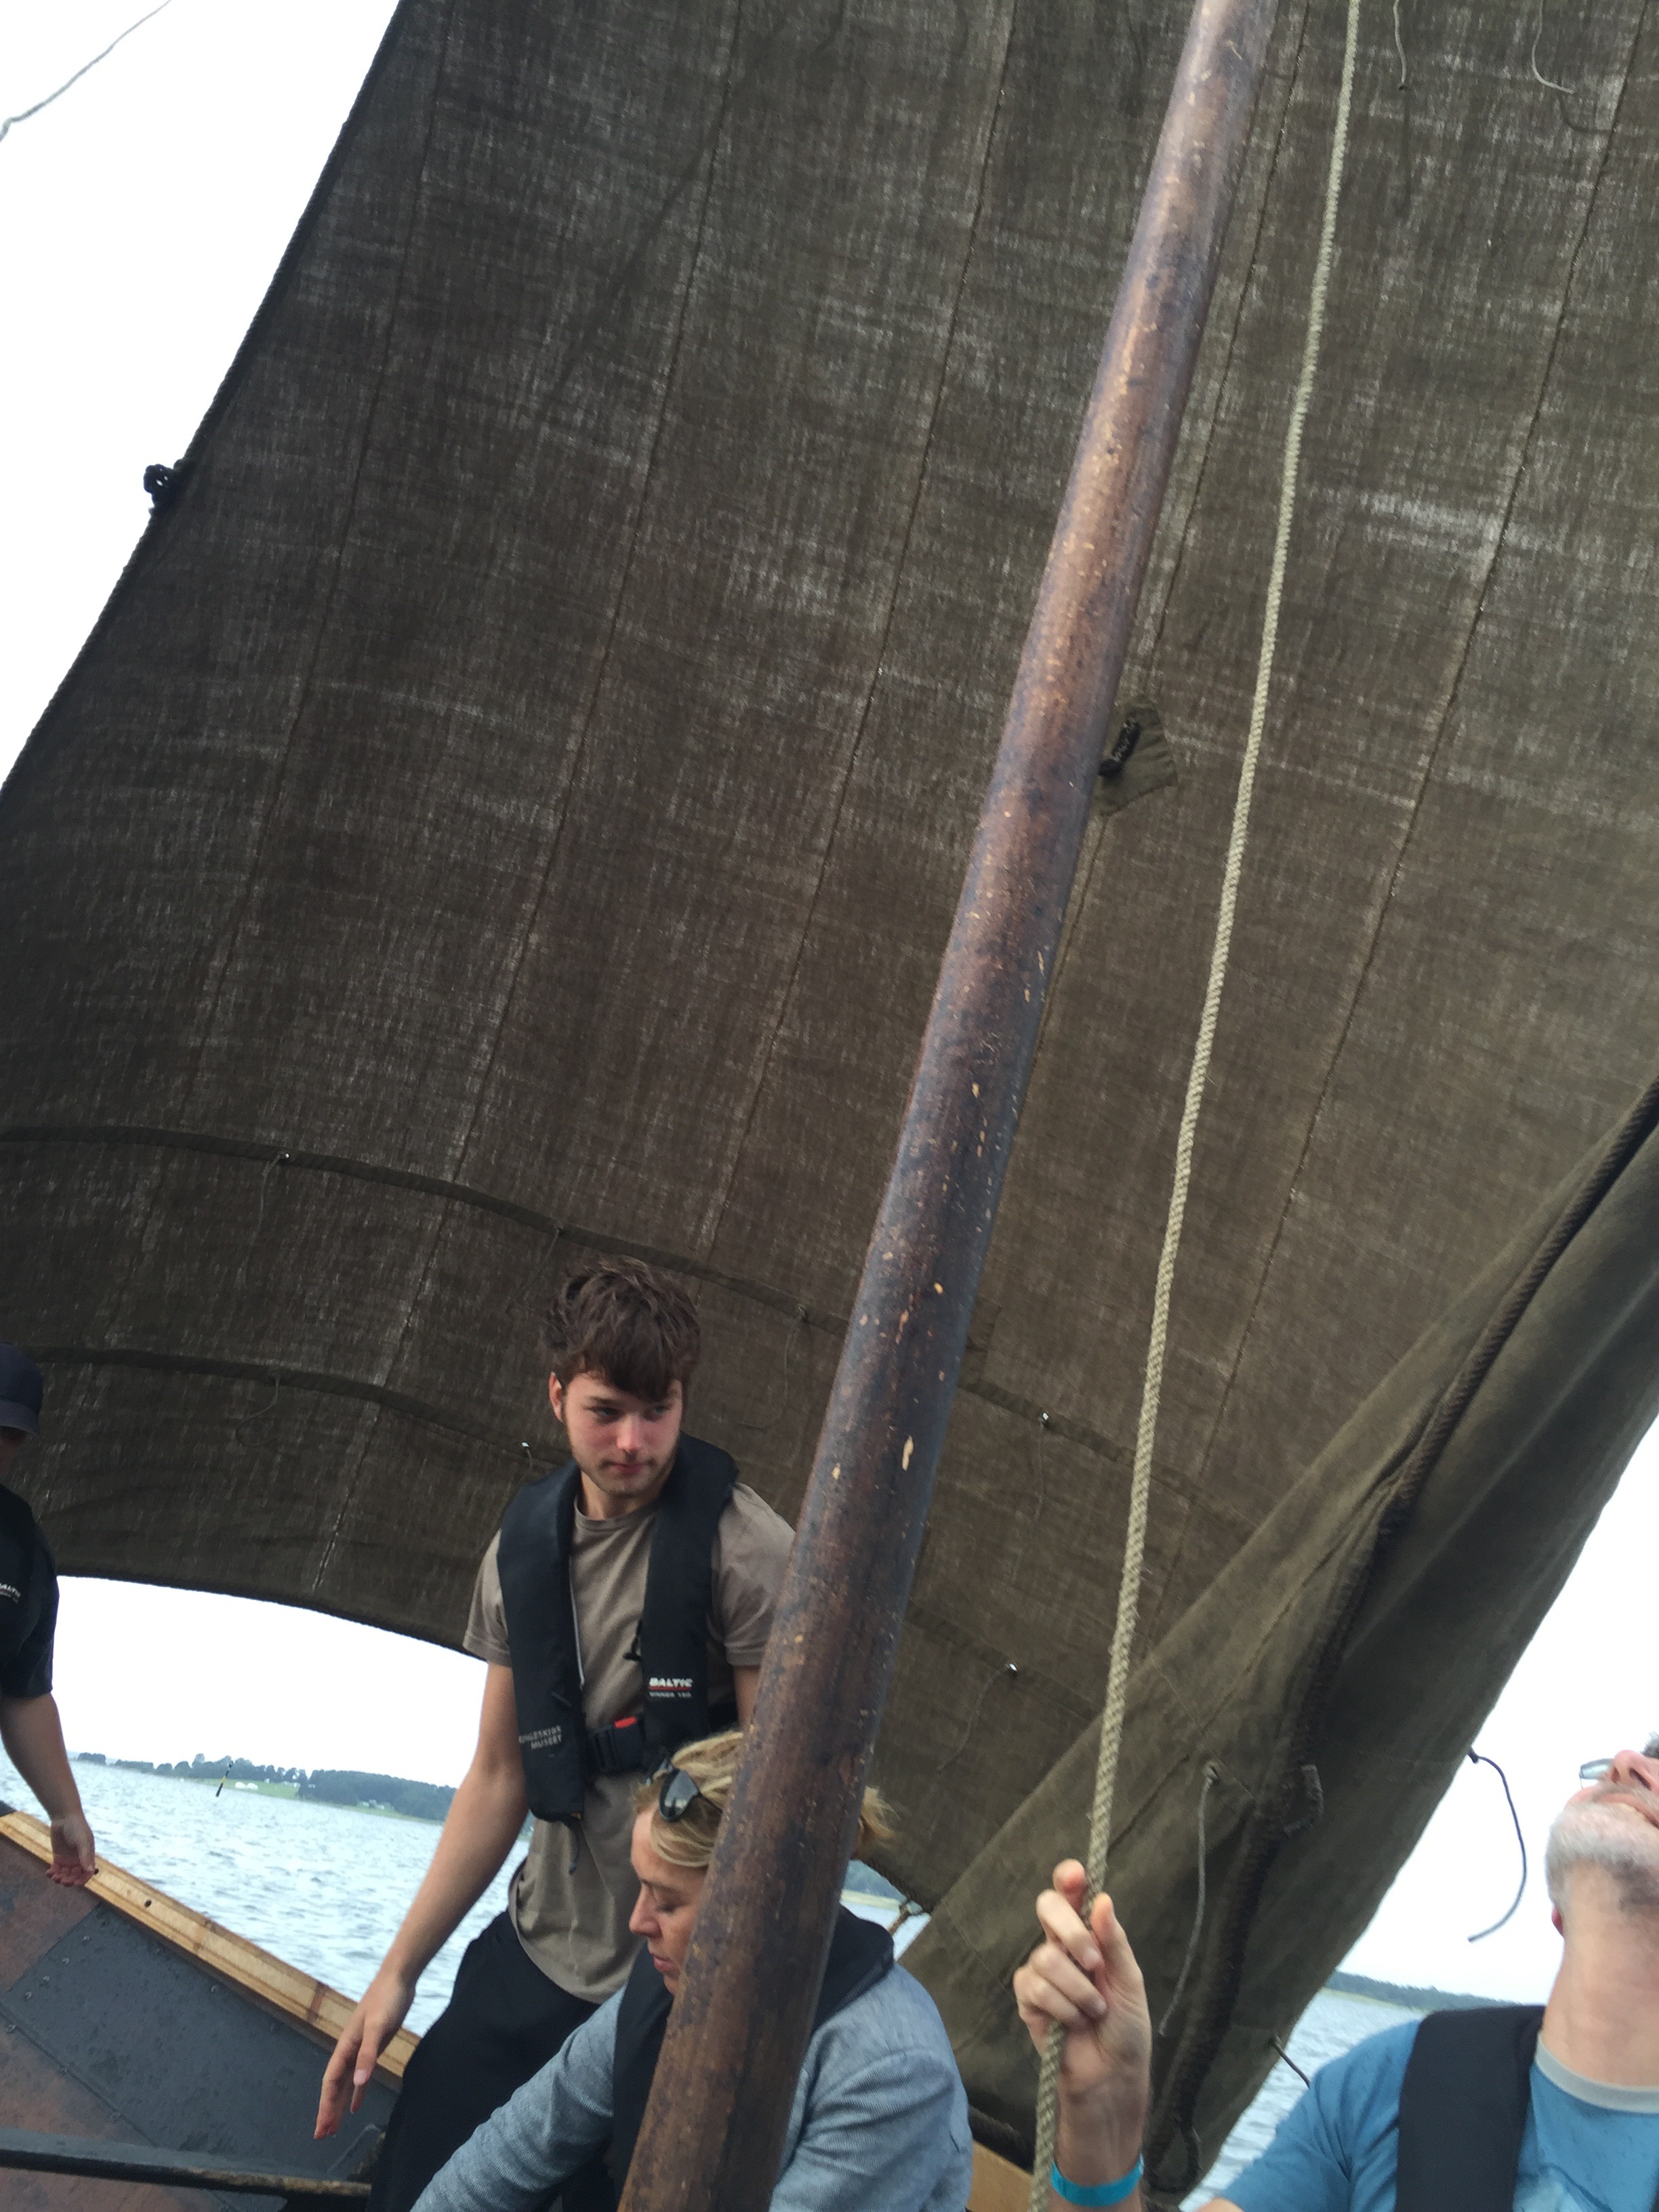
Apparently this is an old sail, wearing thin, so the wind goes through it more than it should. It catches more wind when freshly dressed, but people in the boat object to melted grease dripping from the sail in hot weather. 


We rowed out of the harbour (i like rowing, except for the person behind me who couldn’t keep stroke) until we caught the wind and could raise the sail. We sailed out, around the island and back; tacking was required. A. had the tiller for most of the journey back and was told he’d done very well fir someone who’d never sailed before. It’s not easy trying to keep the wind in the sail AND the boat making progress to the harbour. Then we rowed back into the harbour and i still liked it, except for the same person behind me.

And then we walked to the station and caught the train back to Copenhagen. 2300 hours was a long day of fun.

Copenhagen Day Three (most of it, anyway)

For at least the last week our weather app has said this will be the wettest day, so we declared it Museum Day, just in case the app was right. 

So, after breakfast at the Lagkagehuset on Torvegade in Christianshavn – where we ate yesterday, and they remembered me as the English person with the skulls – we walked to the National Museum of Denmark. And then around the block because it wasn’t open yet. A, poor man, was following me, and I had one goal: Danish Pre-history (which is to say Danish history before anyone wrote it in words). 

I have, therefore, A Lot of pictures. Well over 100, in fact. Here are some of the highlights…

The skeleton of an elk that died in a bog nearly 9000 years ago.Probably not of natural causes: the small bone point was amongst the bones, the harpoon and shafts nearby.

A fragment of fish spear stll bound to its shaft with BAST FIBRES(!! my emphasis), 8000 years ago.

The skull of Porsmose man, bone arrow through his face and another through his sternum. It was striking (ha, not funny) how many weapons were on display in the Prehistory section. Admittedly they survive when other organics might not, but still: imbalance.)

This is so amazing I have trouble finding the words to explain its significance: an ard. The first, the earliest plough. Probably pulled by one human, guided by another. An agricultural revolution before the concept existed.

Crops and domesticated animals: a strainer for making cheese.

And then the main event, at least for me. The tour groups clustered  around Egtved Girland her reconstructed garments

but I looked into the hollows where Skrydstrup Woman‘s eyes should be, and was lost.

There were other graves at Skrydstrup, with textiles, but as I looked at her I felt she could be looking back. Are we answers to her unasked questions?

Then I learned new things about sun symbols,and something I’d never heard about before, the Bronze Age concept of the Journey of the Sun across the sky. Their webpage has the diagram, but not the explanation: the sun travels around and across the flat earth. At sunrise a Fish pulls the sun up over the horizon from the Night Ship to the Morning Ship, and is then eaten by a Bird. At noon the Sun Horse takes the sun from the ship -incidentally the stylised ‘s’ of the sun horse(s) looks exactly like other assumed sun symbols in the iconography of Near East rugs and embroidery! In the afternoon the Sun Horse delivers the sun to the deck of the Afternoon Ship. In the evening the Snake passes the extinguished sun to the night ship.Part of the totally engrossing Journey of the Sun display.

Ninth-century BC blankets found with the body of a woman in a bog in Jutland. Think of the woman, but also note that one blanket appears to be thoroughly fulled.Me leaving noseprints on the glass as I peer at said blankets.

As we walked through pre-history I counted spindle whorls and other mentions of ‘women’s work’. It wasn’t difficult: no discussion of spinning, weaving, cooking. (As opposed to weaponry, battles, injuries.) One Bronze Age spindle whorl (shale) and about 5 Viking age (pottery). Ninth-century AD gravegoods from women’s graves in Jutland, including tortoise (shaped like) brooches and spindle whorls.

Finally the display of Viking Age domestic finds from Trelleborg included spindles and loom weights.Huh. No wonder the ‘Viking!’ exhibition at the BM was all about shiny and killing people: it was telling the same story. 

But Skrydstrup Woman has forgotten more than we will ever know.

And then we went to the Glyptotek followed by Groms pizza and wine and ice cream. It’s raining, but tomorrow should be dry.Tomorrow is Roskilde and the Viking Ship Museum.

Planning another Summer of Blue

I had planned to focus on indigo last summer, but in the event various other things intervened – although I did accomplish more than I posted. I must show you my shoes!

I’m making tentative plans for more blue this summer.

greenhse

I had hoped that the tadeai, the Japanese Indigo Polygonum tinctorium, would survive the mild winter in its house but even though I added fleece and bubblewrap when the nights dropped to -4C, there’s no life in the stems. It may be an obligate annual, or it may simply have flowered itself to death late last autumn without setting any seed, alas.

I admired the few remaining dead leaves somewhat wistfully: look, they’re blue!

DeadindigoGrense

And then cut most of the stems off. I’ve left a few root masses with stubs of stem for the moment, but there was no green in the pith and the roots I pulled up looked brown and dead, so I doubt anything will shoot. But I sowed seed as well; the seed tray is now sitting indoors in the warmth where I am already watching it hopefully.

I took cuttings  – lengths of stems with leaves – from the plants last October when we returned from our holiday and put them in a jar of water. As might be expected from a Polygonum the cuttings formed masses of roots from the submerged leaf nodes, but the rest of the nodes sent out flower shoots.  I pinched them out and more appeared. The cuttings were extremely well-rooted and looked reasonably healthy in late January when I potted them, but just continued to try to flower until they died, leaves slowly shrivelling. A friend who rooted cuttings in August says two are still alive and seem well, so I wonder whether the trick is to catch them before environmental cues set the growth points to ‘flower’ mode. I will try to test that this summer, as cuttings would be the best way to maintain a line that dyes well.

The woad looked reasonably happy. As a biennial this is its year to flower and seed, with leaves that yield little or no blue. I left the plants last year thinking to gather the seed – these were grown from seed I harvested two years ago – but there isn’t really enough space in our tiny garden to keep plants for seed especially when they attract so many Cabbage White butterflies to lay eggs on my salad rocket! The woad is no longer happy: it is composting and I’ll sow more in the Brassica Bed shortly.

Woad

All this plus ‘standard’ indigo vats means there should be more blue this summer. But what shall I do with it? I’m designing stencils to print with fresh indigo leaves, because that was immense fun. But there’s much more fun to be had: a friend sent me two fascinating books.

dyeing

dyeing1

This is the work of Mrs Akiyama, who made a personal study of the natural dye plants of Awa in Tokushima Prefecture, Japan. Awa is famed for its Polygonum tinctorium indigo dyes; there are pages detailing dyeing with fresh and dried indigo (if I’d had more dead leaves I could have dyed with them!) as well as many other plants. And there are notes on working with bast fibres, as well as information on finishing yarns and fabrics after dyeing.

dyeing2

The other book tells me what to do with what I’ve dyed:

Ikat

No more peering at fuzzy videos on YouTube! With luck this will be a summer to remember.

To finish, a reminder of last summer.

shoes

Super-cheap runners, sold as ‘cotton’ (I have my doubts, see below). I washed them thoroughly with dishwashing liquid and rinsed them thoroughly too, then dumped them into a standard thiox indigo vat on the stove.^1 No matter how many times I dipped them, the uppers would not go darker than this; given the depth of blue in the soles. I wonder whether the fabric is in fact polycotton.

The first dyeing attempt was extremely patchy when it dried. Blotches of pale fabric near the heels, more blotches on the toes. I left them outside in the weather for a week or two to think about their sins while I sulked. Then I needed to exhaust the vat, so I reheated it, added reducing agent, and chucked them back (dry, I think), out of curiosity rather than any expectation of success. Imagine my surprise when, after two or three dips, they emerged a relatively solid and respectable pale blue. After washing thoroughly and drying, I considered decoration: stencilling with fresh tadeai was the obvious answer. I cut an assortment of crude paisley stencils and discovered that stencilling on curved surfaces is rather tricky. But the end result is a pleasing variety of blues produced by a variety of indigo techniques, especially when embellished with tablet-woven laces.

It’s a great shame that the shoes are so uncomfortable :-/

^1: A caution. If you try this, be prepared to spend ages scouring melted runner-sole off the sides of the pot. A hint: reheating the pot gently softens the stuff a bit, but it still requires a lot of effort.