Tag Archives: indigo

The Queen of the Night and an Upstart Cat in Puffling Pants

This story started a couple of years ago when a friend posted pictures of a custom doll, a dog made in memory of a much-loved pet, from one of Jenny Barnett’s kits.<https://www.etsy.com/ca/shop/JennyBarnettFelt>
I had thought of dollmaking as ‘interesting, no idea how it is done’, but when I saw that dog An Idea sprang full-fledged from my forehead. As they do. I wanted to make a cat, a beautiful blue cat to remember all the cats I loved. Jenny was only too happy to help and in due course sent pics of two blue cat kits, asking which one I wanted. I wanted both. I couldn’t choose. So both kits arrived. And sat on the shelf, because I wanted to make something of my own, not follow the pattern supplied. and I didn’t know how. I bought patterns for small stuffed toys — a bird, a cat, a rabbit –– and made them, revised patterns and re-made them, drafted my own patterns and made my own creatures. I made a teddy bear, I made another teddy bear. I made a hare.

Handstitched and embroidered white cotton hare
Winter Hare, my own pattern cut from an old pillowcase.

The Queen of the Night
I chose the darkest of the two cats. I drafted a pattern for a female body (for some reason the cat spirit was female) and stitched a draft. Modified the draft. Found the fine cotton lawn I’d dyed with indigo last summer, cut the pattern, and stitched.

The body is offered to the head.

I tested the fit and when I was satisfied, I stitched more, in indigo-dyed embroidery floss and fine reeled silks, and the hand of the lawn changed, became stiffer, the figure became more real, more characterful . I spent days thinking about how to attach the arms and legs, whether or not she should have a tail (I decided not, but I’m slowly changing my mind). I thought about jointing, I tested indigo-dyed wooden beads, but in the end I opted for tiny mother-of-pearl buttons and spent hours online to find them. Every thought, every decision, every stitch added weight to her presence until she became more than simply ‘the blue cat’. Welcome the Queen of the Night.

The Queen of the Night

The Queen of the Night should have a cloak to conceal her glory. I found a fragment of blue silk velvet I bought because it was beautiful, spent hours online looking at cloaks and capes, thought and sketched and stitched more. The cloak has a high collar so the Queen’s head is crowned by silver moonlight.

An Upstart Cat in Puffling Pants? Or the Prince of London in Darkness?*
But wait, I hear you say, ‘What happened to the other kit?’
My original cunning plan was to make both cats and send one to tell M that I miss her, but it took so long to make the first cat that I wasn’t sure I’d live long enough to make the second, and it would have to be done exceptionally well because she’s not only a special person, she’s an accomplished sewing person. And a cat person. I cheated and asked if she’d like a doll kit to play with, no strings. She said yes! And that was, I thought, the end of it. I was curious about what she might make of it, but I’d given it to her so it was no longer my concern. I did once say that if by chance it was sitting on a shelf nagging at her, she should send it back; she said she had an Idea but had to work out how to accomplish it.

Time passes. Imagine the fluttering calendar pages.

And then a box arrived. The customs declaration said ‘doll’, and I discovered that adult anticipation is far more complex than that of a child. I remember desperately wanting to know what was in the parcels under the Christmas tree but, holding that box, my anticipation was different. I knew what must be in the box, but … I didn’t know what was in the box. The uncertainty balanced against the certainty that whatever it was would be *wonderful*.

I opened it and collapsed the possibilities. And caught my breath with delight.

An Upstart Cat in Puffling Pants. Or the Prince of London in Darkness.

I posed him with some of the books containing imaginary London. Because, holding him for the first time, I imagined him stalking, cat-arrogant, along the Thames beside The Globe as sunset fades to darkness. He would be acquainted with the Marquis de Carabas, he would emerge from the shadows to assist the Midnight Mayor (should the Mayor require assistance; he often does). He is part of *my* much-loved London made real in my hands, possibly the most thoughtful gift I’ve ever received, and he is one of the few things I would pack in my go bag because that night, after opening the parcel and meeting him, I dreamed of him stolen and I was desolate.

He’s wearing an Elizabethan costume made entirely of glove leather, stitched with copper thread. His doublet is trimmed and ruffed (is that a word?) with black lace stitched with copper. He has more weight, more presence, than the Queen of the Night, and my friend who made him real is Awesome.

* The card had two names for him. ‘An Upstart Cat in Puffling Pants’ refers to ‘Upstart Crow’, a UK sitcom and (with added ‘The’, a play) about the life of Shakespeare. ‘Puffling pants’ is one of the jokes; it refers to the trunk hose, with lining visible between the slashe
https://peterviney.com/stage/the-upstart-crow/

He might (also?) be a? the? Prince of London in Darkness. I wouldn’t speculate, he might take offence.

Planning another Summer of Blue

I had planned to focus on indigo last summer, but in the event various other things intervened – although I did accomplish more than I posted. I must show you my shoes!

I’m making tentative plans for more blue this summer.

greenhse

I had hoped that the tadeai, the Japanese Indigo Polygonum tinctorium, would survive the mild winter in its house but even though I added fleece and bubblewrap when the nights dropped to -4C, there’s no life in the stems. It may be an obligate annual, or it may simply have flowered itself to death late last autumn without setting any seed, alas.

I admired the few remaining dead leaves somewhat wistfully: look, they’re blue!

DeadindigoGrense

And then cut most of the stems off. I’ve left a few root masses with stubs of stem for the moment, but there was no green in the pith and the roots I pulled up looked brown and dead, so I doubt anything will shoot. But I sowed seed as well; the seed tray is now sitting indoors in the warmth where I am already watching it hopefully.

I took cuttings  – lengths of stems with leaves – from the plants last October when we returned from our holiday and put them in a jar of water. As might be expected from a Polygonum the cuttings formed masses of roots from the submerged leaf nodes, but the rest of the nodes sent out flower shoots.  I pinched them out and more appeared. The cuttings were extremely well-rooted and looked reasonably healthy in late January when I potted them, but just continued to try to flower until they died, leaves slowly shrivelling. A friend who rooted cuttings in August says two are still alive and seem well, so I wonder whether the trick is to catch them before environmental cues set the growth points to ‘flower’ mode. I will try to test that this summer, as cuttings would be the best way to maintain a line that dyes well.

The woad looked reasonably happy. As a biennial this is its year to flower and seed, with leaves that yield little or no blue. I left the plants last year thinking to gather the seed – these were grown from seed I harvested two years ago – but there isn’t really enough space in our tiny garden to keep plants for seed especially when they attract so many Cabbage White butterflies to lay eggs on my salad rocket! The woad is no longer happy: it is composting and I’ll sow more in the Brassica Bed shortly.

Woad

All this plus ‘standard’ indigo vats means there should be more blue this summer. But what shall I do with it? I’m designing stencils to print with fresh indigo leaves, because that was immense fun. But there’s much more fun to be had: a friend sent me two fascinating books.

dyeing

dyeing1

This is the work of Mrs Akiyama, who made a personal study of the natural dye plants of Awa in Tokushima Prefecture, Japan. Awa is famed for its Polygonum tinctorium indigo dyes; there are pages detailing dyeing with fresh and dried indigo (if I’d had more dead leaves I could have dyed with them!) as well as many other plants. And there are notes on working with bast fibres, as well as information on finishing yarns and fabrics after dyeing.

dyeing2

The other book tells me what to do with what I’ve dyed:

Ikat

No more peering at fuzzy videos on YouTube! With luck this will be a summer to remember.

To finish, a reminder of last summer.

shoes

Super-cheap runners, sold as ‘cotton’ (I have my doubts, see below). I washed them thoroughly with dishwashing liquid and rinsed them thoroughly too, then dumped them into a standard thiox indigo vat on the stove.^1 No matter how many times I dipped them, the uppers would not go darker than this; given the depth of blue in the soles. I wonder whether the fabric is in fact polycotton.

The first dyeing attempt was extremely patchy when it dried. Blotches of pale fabric near the heels, more blotches on the toes. I left them outside in the weather for a week or two to think about their sins while I sulked. Then I needed to exhaust the vat, so I reheated it, added reducing agent, and chucked them back (dry, I think), out of curiosity rather than any expectation of success. Imagine my surprise when, after two or three dips, they emerged a relatively solid and respectable pale blue. After washing thoroughly and drying, I considered decoration: stencilling with fresh tadeai was the obvious answer. I cut an assortment of crude paisley stencils and discovered that stencilling on curved surfaces is rather tricky. But the end result is a pleasing variety of blues produced by a variety of indigo techniques, especially when embellished with tablet-woven laces.

It’s a great shame that the shoes are so uncomfortable :-/

^1: A caution. If you try this, be prepared to spend ages scouring melted runner-sole off the sides of the pot. A hint: reheating the pot gently softens the stuff a bit, but it still requires a lot of effort.


A quick post: indigo leaf prints

Just to prove I’m still playing with indigo, although I’ve had less time than I thought I would.

If you’ve only got a few leaves, try leaf prints.

IndigoLeafPrintSilk1

This is Japanese indigo. The technique also works for woad leaves, although the print is fainter than this, at least from my plants; ‘true’ indigo should also work. I am astonished by how much of the leaf structure can be captured by this technique. (The skulls were printed by rubbing fresh leaves through a stencil; I have to post this, too!)

Leaf printing seems to work best on finer fabrics like this silk; I tried it on a heavier cotton/light canvas, and the juice didn’t penetrate far enough to make a good print.
Take a leaf, put it on the fabric, cover it with a piece of clear plastic/heavy cellophane (I used a piece from a packet of oat bran). Take a dessert spoon and hammer the leaf with the bowl of the spoon through the plastic; try to make sure you cover (damage?) the entire leaf area. I think this breaks the cells to release the juice. Then put a dab of washing-up liquid on the plastic to act as a lubricant (don’t get it on the cloth) and ‘polish’ the leaf through the plastic, using lots of pressure. Too much and you can see the leaf squash into mush that obscures the detail; too little and the juice isn’t pressed into the fabric. Practice. Have fun!

IndigoLeafPrintSilk3

pH damages protein fibres: a test.

SilkpHDamage3

“Protein fibres prefer acid conditions; plant fibres prefer alkaline conditions” is a truism that I’ve repeated myself on many occasions. It’s a commonplace when discussing indigo dyeing, as the vats are generally alkaline: indigo is more soluble at high pH. Warmth only makes things worse: hot alkali is said to cause damage faster than cold. Liles and others mention the risk posed by the vat fluid “Indigo vat fluid may be allowed to dry on cellulosic fibres but should never be permitted to do so on protein fibres, since the alkali becomes more concentrated as drying proceeds” ( JN Liles, 1990. The Art and Craft of Natural Dyeing. University of Tennessee Press).

In accordance with this I don’t allow the vat fluid to dry on my silk and wool; indeed, I sometimes put dyed goods into a citric acid rinse as soon as they’re cool, then plunge them into cold, thoroughly oxygenated tap water. The theory behind the cold rinse is that not only does this rinse out alkali not neutralised by the citric acid and oxidise the indigo compounds, it washes out loose indigo particles while they’re still truly loose, not dried onto the yarn or fabric to wear off later onto skin or other garments.

But I’ve been wondering exactly what damage alkali does, and how quickly the damage occurs. Should I be quite so paranoid when working with wool and silk, counting the minutes that the dyestuff is in the vat? I decided to investigate.

Bombyx aka Mulberry Silk seems more fragile than wool and therefore more likely to reveal damage. I took samples of commercial silk fabric, yarn, and Bombyx spinning fibre, tied them into bundles and submerged them in a 1-2-3 Fructose vat. I tested the pH of the vat at the start of the session and every time I removed a sample: it was over pH11 the entire time. The vat was maintained at 50–55°C for the duration of the test save for a brief overheating to something like 65°C  for about 30 minutes between 2 and 3 hours into the test (I forgot to turn the gas off! Oh, for a water bath). The samples were removed from the vat, cooled slightly, then briefly rinsed in a citric acid solution (pH4) before further rinsing in cold tap water and air drying.

SilkpHDamage1

And this is the result of the test. From left to right:

Undyed silk; 30 mins; 1 hour; 2 hours; 3 hours; 4 hours 15 mins; 5 hours 15mins; 7 hours; 9 hours;  10 hours 45 mins (I had to go to bed, the next day was a gym day).

I think there’s a visible difference: after nearly 11 hours at 50°C or higher at >pH11, the silk on the end is less lustrous. As the photo suggests, it’s lost some of its drape, its flexibility. The difference is more obvious in the hand: that silk is ‘cottony’, it’s not as smooth as silk. So, that’s likely to be one aspect of pH damage.

To me, the most interesting thing is the time it took for the damage to be noticeable. (Note: the temperature peak 2–3 hours in is likely to have had some effect, but I don’t think it’s terribly significant – there’s no perceptible jump in the degradation at that point.) I can’t detect a difference between the undyed silk and that which was in the vat for an hour. I’m not even certain there’s a significant difference between the 1 hour and 3 hour samples; beyond that, the fibre does seem to be more cottony. The depth of the blue colour doesn’t change from 30 minutes, so there’s no benefit to leaving it in longer. It seems likely to me that the damage is cumulative, so caution is indicated when dipping repeatedly for darker colour, but still there’s far more leeway than I feared. I’m no longer going to count minutes and seconds when silk or wool is in a chemical vat for 15 or 20 minutes.

The colour change intrigues me. Again, the blue had a greenish tinge at 1 hour, so it’s not attributable solely to the temperature change. Is the alkali causing the silk to yellow? I need to try this again with washing soda and plain white silk.

SilkpHDamage2

What to do with indigo, part I

So what am I doing with the vats? At this point I’m primarily interested in seeing how easy they are to assemble and run, and what the pH is, information that will help me to choose vat methods for dyeing projects in the future. Mostly I will be dyeing wool for spinning and spun yarn for weaving, but it’s a shame not to investigate other possibilities.

Fabric is an obvious choice; it would be impossible to dye garment lengths in my relatively small jars, but I can play with techniques I haven’t used before, such as shibori. Well, used seriously. Like anyone growing up in the 1960s and 70s I did my fair share of mad tie-dyeing, but there are many other, more disciplined techniques. I have a thing about grids, regular patterning, so itajime (shibori patterning created by pressure) with squares of wood caught my eye. Two 1.5″ squares of board, some string and a strip of silk were easy to assemble… on reflection, for my first attempt, I should have tried larger squares and cotton, because ironing the slippery silk into the necessary neat square packet was exceedingly difficult. Tightly tied between the squares, the folded silk was thoroughly soaked in tap water with a drop of detergent as wetting agent before spending about 10 minutes in the fructose vat, reheated to 50°C and revived with 5g indigo, 10g, calcium hydroxide and 15g fructose.

SilkSq.Itajime

Opening it was my reward for doing the ironing; an hour later and a rinse in vinegar later, I had this:

SilkSq.Itajime2

Lots of room for improvement, but proof of principle nonetheless!

Note the rather pretty patterns on the wood squares. Indigo will dye anything that has roughness to trap the particles. Tokushima Prefecture in Japan is trying to find new products for its traditional indigo vats, including wood for speaker cabinets and mug mats as well as fabulous flooring. I moved the fructose vat into a jar in the greenhouse after dyeing the silk in it last weekend; although it was not heated, I noticed there was a thin flor on the surface, so I dropped a scrap of wood into it for a day, removed it for a couple of hours to dry, then put it back for another day.

Fresh from the vat it was a beautiful green blue. Note that the dense wood associated with the knot has absorbed less of the indigo.

WoodTwodips2 days

Almost dry and it’s definitely blue.

WoodTwodipsDryish

Three days later, fully dry, I’ve given half of it a single coat of yacht varnish, the only glossy thing I have to hand. Sadly it’s slightly yellowing, whereas I think those floors are protected by a thick layer of perfectly clear polyurethane.

WoodTwodipsVarnish

But still, pretty. Worth a few more coats, I think.

The Fructose 1-2-3 vat: an indigo vat for the 21st century?

Using only urine (ammonia) and natural indigo, the sig vat is perhaps the least polluting, most environmentally-sound of all the indigo vat recipes, but the need to collect and store urine, the smell, and the need for multiple dips to obtain darker blues meant the dyeing industry welcomed development of new methods of dyeing with indigo. By the late 20th century the (extremely convenient) sodium dithionite/hydrosulphite vat (the zinc-lime vat developed in 1845 is a type of hydrosulphite vat) was responsible for the bulk of indigo blue on textiles, but concerns about pollution associated with the process – toxic sulphites, sulphates, and sulphides are produced as degradation products – was increasing. In the late 1970s thiourea dioxide (effective at only 10–12% the usual concentration of sodium hydrosulphite), was being proposed as a more environmentally-sound reducing agent. Now, reducing sugars are under investigation.

Reducing sugars contain or generate aldehyde groups that, activated by alkalinity and heat, will absorb oxygen from a solution. Fructose and glucose found in ripe fruit are reducing sugars; ordinary sugar – sucrose – is not a reducing sugar. So it’s possible to create an vat from indigo, lime (calcium hydroxide) and over-ripe fruit such as bananas, or dates that relies on the chemistry of the sugars rather than fermentation of the fruit. (There’s a blog post about a banana vat here.) But it’s easier to prove the principle using fructose from the supermarket shelf in Michel Garcia’s 1-2-3 recipe. It’s very simple: One Part indigo to Two Parts lime to Three Parts fructose, plus warmth.

I warmed roughly 1 litre tap water (for the record our tap water is alkaline, roughly pH8.4) to 50–60°C in a saucepan. I dissolved 15g indigo – for this I used Tamil Nadu indigo – in warm water, added it to the saucepan, then did the same to 30g lime, then gently stirred in 45g fructose. The Tamil Nadu indigo is markedly ‘blue-er’ in solution than the ordinary indigo I’ve used up to now; the solution was a vivid deep blue.

Start

I left this to work for about an hour, at the end of which it showed all the signs that indigo had been reduced and the vat was ready.

ReadyFlor

Vat ready for use. Note the flor, the metallic copper/purple/blue skin of indigo that forms where the reduced indigo oxidised on contact with air. In this vat there were metallic bubbles, too. Beautiful! Scrape the flor to one side with a spoon before adding materials to the vat, or remove it altogether and replace when you’ve finished.

Beautiful, but the strong reduction is an indication of high pH and indeed, the pH paper read 11 or higher. I added a skein of handspun silk, DRY, because I wanted to see what happened if I did so. The silk instantly went blue, as did the vat; wearing rubber gloves I squeezed air out of the silk until it sank, then reheated the vat to 50°C and left it to work, theorising that there was sufficent fructose to re-reduce the solution.

45 minutes later I removed the silk. Beautiful!

Silk45minsFructose

I thought about a second dip, but worried about the effect of longer exposure to high pH and decided to wait to see what colour this became. After all, I have all summer to make things blue.

IndigoThreeShades

Three silks for comparison: on the left, 45 mins in the fructose vat; in the middle, about 12 hours (two dips) in the sig vat; on the right, 90 minutes in the sig vat. Interesting!

That traditional sig vat: results!

We left our trusty sig vat on May 15th, hoping for a warm day that didn’t occur for another two days. But by the 17th the liquid was very definitely yellow-green although there was a lot of sediment and  particulate matter adhering to the glass of the jar. I think this is a combination of vegetable and mineral matter in the indigo powder – the actual indigo content of ‘ordinary’ indigo may be well under 30% by weight – and some debris from the urine itself. At any rate, Sunday the 17th was forecast warm and sunny, so on Saturday I de-gummed 2 smallish skeins of handspun silk, neutralised the washing solution with a vinegar rinse, then rinsed them thoroughly to remove the vinegar, and left them soaking in water ready for dyeing. Remember that the soluble leuco-indigo needed to dye material converts to the insoluble, non-dyeing blue form in the presence of oxygen: it is generally advised that fibre be thoroughly wetted to minimise the amount of oxygen it introduces into the vat. If you’re dyeing in a urine vat, urine is the obvious fluid to use for wetting, as it adds nutrients for the fermentation.

Sunday morning I cracked open the lid of the jar in the greenhouse and the smell of the vat rose to greet me. A powerful aroma, now with some ammonia in the mix. I put both skeins in the jar, which on reflection was a bad move: there really wasn’t enough room for both. Also, as they were loose in the jar, they came into contact with the sediment.

May17SilkMy handspun silk in the urine vat in the greenhouse with the Japanese Indigo plants.

I couldn’t wait to check whether it was working. Literally. The timestamp tells me this photo was taken only three minutes after the skeins went into the vat. How sad is that?

May17SilkTest

But look! It’s going blue! I pushed it back into the jar to go bluer.

I removed both skeins from the jar after 1.25 hours and hung them to dry on an improvised rack to oxidise. Note how turquoise the yarn appears at the beginning of the oxidation.May17SilkOne

Now, at this point I digress to explain that throughout the afternoon my husband was walking back and forth from house to garage past the greenhouse and, eventually, the yarn from the vat. When he first encountered the smell of the vat he commented that it was a bit whiffy. I quickly shut the greenhouse to trap the odour. But by 1530, with the yarn out to oxidise, his comments were more forceful, along the lines of “The birds are falling dead from the trees!” The smell does fade from the dyed material; it’s much less noticeable when the material is dry, and I find that after washing with scented detergent and hanging to dry outside on the rosemary bush, I can only smell it if I press the fabric to my nose. The distinctive scent of the urine vat was once regarded as an indicator of good cloth well-dyed: when chemical vats were introduced in the second half of the 19th century, cloth-buyers would check for the smell of the urine vat. Some cloth merchants used commercially-available fake urine vat scent to mislead them!

May17SilkFirstOut

As the oxidation proceeded I was able to see just how much gunge was stuck to the skeins, but could reassure myself that it will wash off (and it mostly did, even in the quick post-dyeing wash). I put the vat to bed (as it were), topping it up with fresh urine and replacing the bag of indigo.

Once washed and dried the skeins proved paler than I’d hoped, so I tested one of the characteristics of the urine vat. With pH paper. Most indigo vats are strongly alkaline (my post on Indigo chemistry explains why), running at pH11 or even higher. This alkalinity degrades and damages protein fibres such as silk, so repeated or lengthy dips to get greater depth of colour are a bad idea. The urine vat, however, is much less alkaline: this one, yellow-green and ready to dye, tested pH9 on the 24th May. I decided to see what happened if I put a dry skein of silk for a longer period (dry because I had read that putting the fibre in dry could give a greater depth of colour). I pushed a skein into the jar late in the afternoon, took it out to oxidise for a couple of hours in the early evening – it was noticeably darker – and then replaced it in the jar overnight. End result: a significantly darker indigo.

May25thSilkCompare

It’s still a little bit turquoise, but obviously much darker than the skein next to it. Which is in fact a bit darker than it looks in the photo: light reflecting off the silk makes it paler.

Conclusions

Pros: This is the easiest and least expensive of the vats I’ve tried so far (more than I’ve written about so far), and it’s kinder to protein fibres such as silk and wool than the other vats. The results are good, but I think they’ll be better in a different vat. I think a higher grade of indigo (containing less waste material) will give me darker colours, and a larger, deeper vat will make it possible to avoid any sediment, perhaps by placing something like a colander or strainer at the bottom of the vat to keep the material off the bottom. So I’ve ordered a better grade of indigo and I’m about to start collecting more urine.

Cons: This vat has a strong, distinctive, and – to some people at least – highly unpleasant odour. While the odour from the vat can be controlled and contained, the smell coming off the dyed material as it oxidises is less easy to contain if it’s hung out to air. However, it is possible to oxidise the dyed material in well-oxygenated water: allow the cold water (cold water holds more oxygen than hot) to plunge into a container in such a way as to generate lots of aeration bubbles. Immerse the fabric in that water, swirl it around, keep the tap running to refresh the oxygen. This is not a technique to use with warm wool, but I have tried it with silk and found no damage, although the skein could have done with more ties. In theory it should not remove indigo that wouldn’t be lost in the normal washing process, but I have no real way to test that theory at the moment.

How the magic works: the chemistry of blue.

dd541-woad6The transformation from green-yellow to indigo blue that takes place before your eyes when something is removed from an indigo vat is the nearest thing to real magic that I know of. But it’s not magic, it’s chemistry, and understanding it is helpful in troubleshooting vats and in choosing vats for specific fibre types.

Where does indigo come from, and why is it there in the first place?

Most of the indigo used commercially is now synthetic indigo, one of the myriad colours chemists derived from the magic compound aniline in the 19th century. I’m more interested in natural indigo, which is extracted from plants such as Woad (Isatis tinctoria, a member of the Cruciferae, related to cabbages) and Japanese Indigo (Polygonum or Persicaria tinctoria, a type of knotweed) in addition to ‘true’ Indigo, Indigofera, a member of the Leguminosae (related to beans and peas) which has several species including tinctoria and suffruticosa. In fact many plants will yield indigo, but only a few yield it in sufficient quantity to be of any use in dyeing.

I haven’t yet found a reference giving a firm reason for the presence of the indigo compounds in plants, but a couple of papers suggest in passing that it might discourage pests.

Indican, the compound that yields indigo blue, is a glycoside: a sugar (in this case a form of glucose) bound to another molecule, indoxyl. When the glycosidic bond is broken, the indoxyl is freed. When the indoxyl compound is oxidised, it becomes blue: indigo blue. Sounds simple enough, but how does the processing of the plant material and the dyeing accomplish this?

The indigo-bearing leaves (it’s usually the leaves; the lower the amount of other plant matter, the better the final grade of indigo) are harvested. In Japan the Japanese Indigo leaves are dried in the sun and stored for later use. Elsewhere the leaves are then physically damaged – chopped, pounded or trampled – presumably to release larger quantities of indican. This is the point at which woad was traditionally made into balls of leaf matter and dried for easier storage and transport. In West Africa the pounded leaves might also be dried and stored at this stage. Alternatively (in West Africa and elsewhere) the mass of fresh leaf material might be fermented; in Japan the dried leaves are later moistened and fermented; in Europe the woad balls are moistened and fermented (the process known as couching). In other words, bacteria are encouraged to consume the glucose in the indican, leaving the indoxyl molecules as highly reactive free radicals. The bacterial breakdown of glucose may be an aerobic process in which the bacteria consume oxygen, creating the reducing (low oxygen) environment necessary for the next stage of the process, or an anaerobic process in which the bacteria release hydrogen that acts as a reducing agent in the next stage.

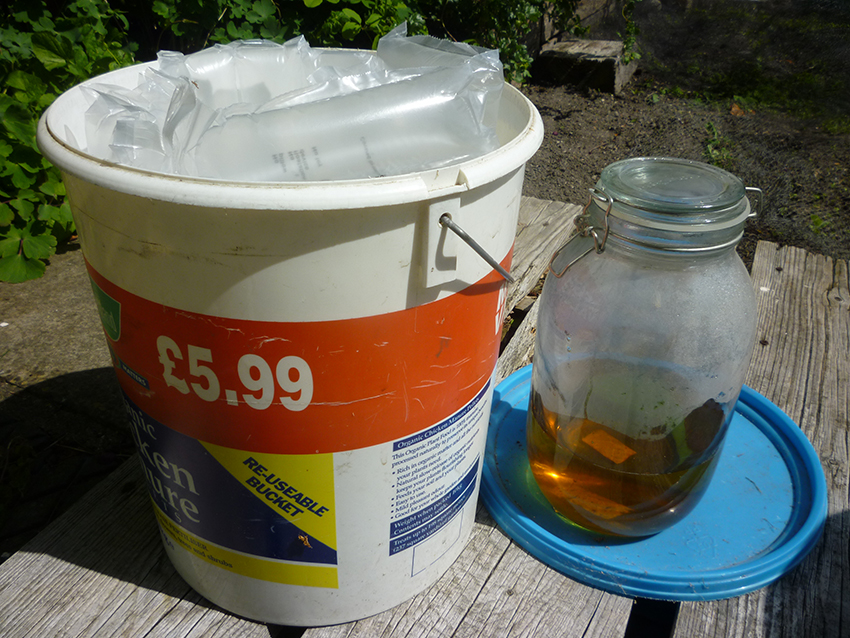
The indoxyl free radicals bind to each other to form indigo. If an alkali is present (pH is above neutral), this takes the form of water-soluble leuco-indigo (leuco means white), also known as white indigo or white indigotin. The ‘white’ refers to the compound’s relative lack of colour: the leuco-indigo solution is a clear yellow or yellow-green. This is the form in which indigo dyes, so at this point it is possible to convert the fermentation vat to a dye vat, or to continue the process to extract indigo from the solution. Extraction is simply a matter of converting the soluble leuco-indigo to its insoluble blue form by adding oxygen: straining the fluid off the leaves, then pouring it back and forth between two containers may be sufficient, after which the blue particles of indigo can then be filtered out of the liquid. I wrote a post (with lots of pictures) about processing woad leaves in this way in 2013; you can see it here.

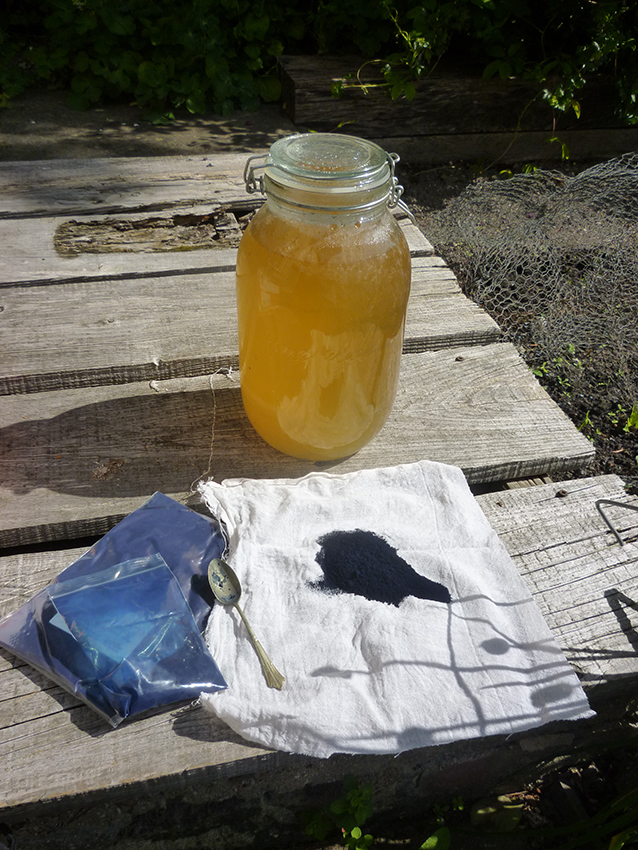
The actual indigo pigment content of the particles is reported to vary from 12% for Japanese Indigo, through a maximum of 40% for woad and 77% for Indigofera indigo. The remained of the mass is plant matter, mineral matter and other pigments such as indirubin (known as indigo red and one of the components of Murex purple). This mix is one reason that natural indigo produces more variable shades of blue than the purer synthetic form.

ThioxSilkonVatsilks

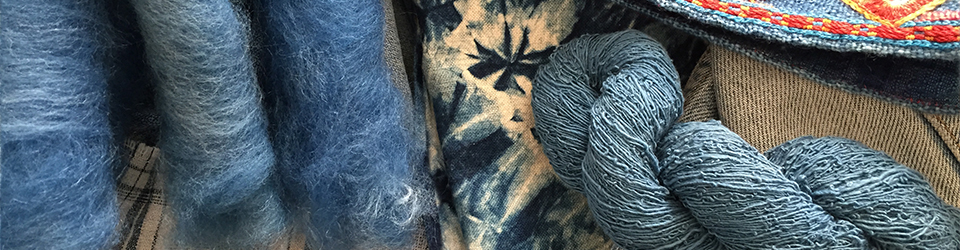
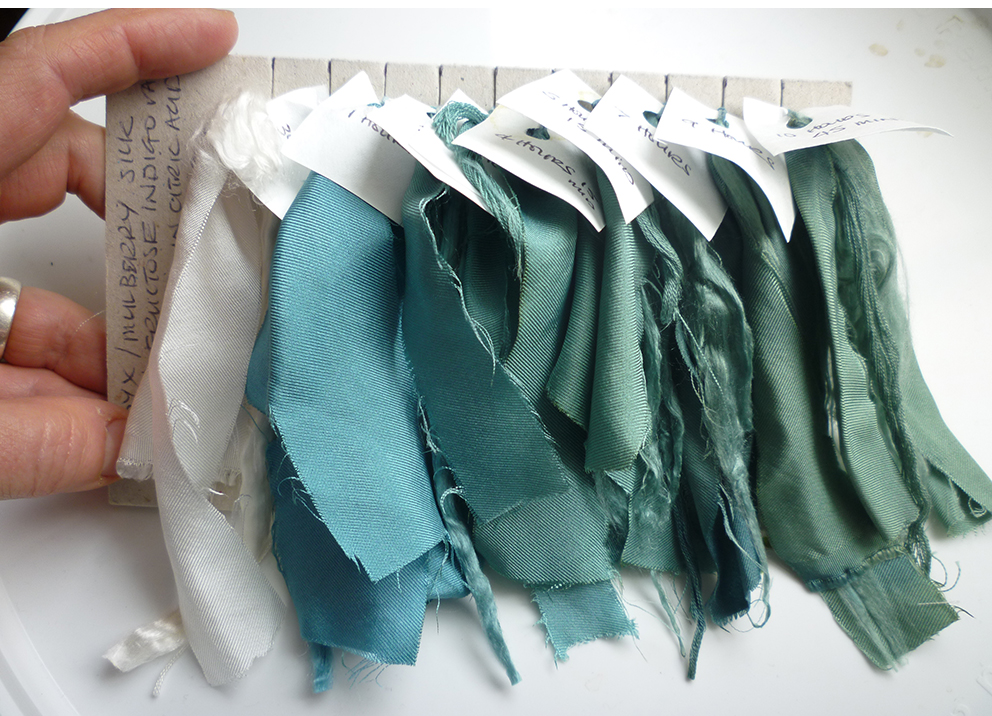
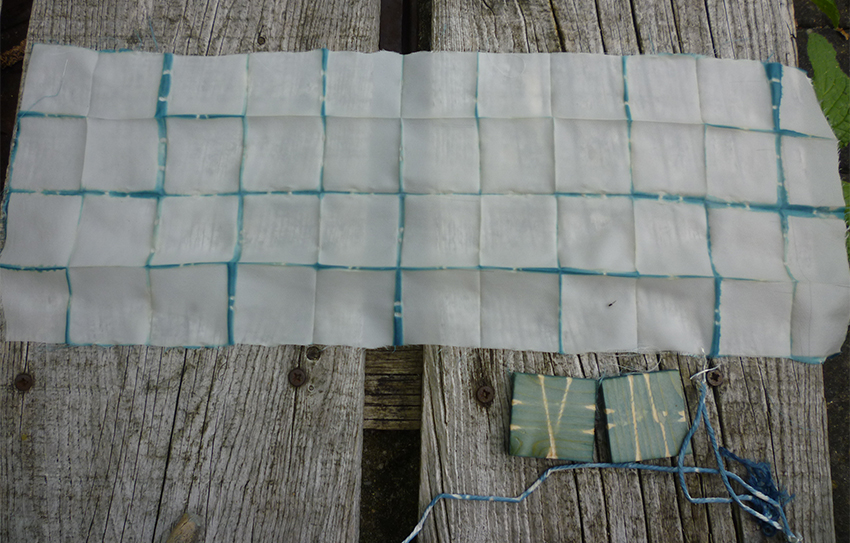
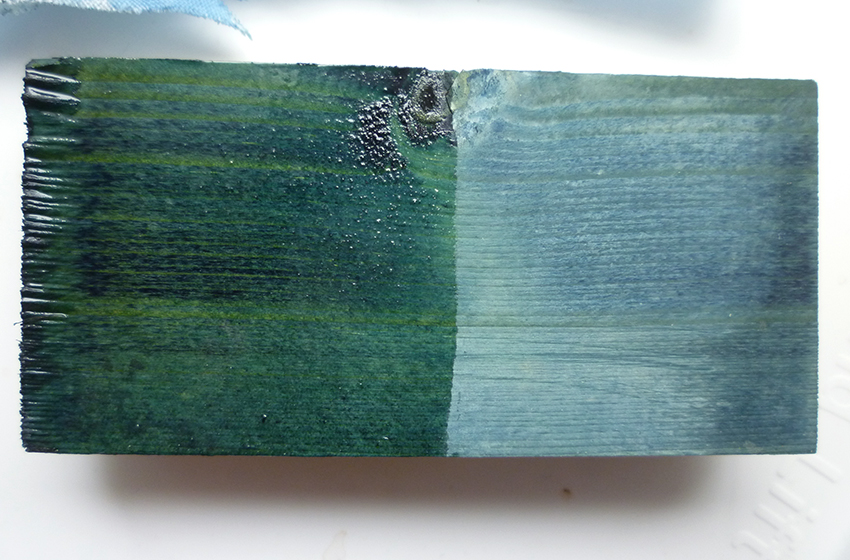
Handspun Bombyx silk indigo-dyed in three different vats. The dark blue on the left was put dry (unwetted) into a 1-2-3 Fructose vat, to which I added a little more fructose and heat to raise the temperature back to 50°C before leaving the silk for 45 mins. The patchy warm-grey-blue on the right was well-wetted before spending an hour in the urine vat. The curl of bright blue silk in the centre had 5 dips in a standard Thiox vat.

How does indigo dye?

Water carries the soluble form, leuco-indigo, as it soaks through the material in the vat. When the material is exposed to the air (or another source of oxygen such as well-oxygenated water) the leuco-indigo oxidises to blue indigo particles that physically lodge in unevennesses in the material. Unlike many other dyes, the particles are not chemically bound to the material, just wedged into cracks and crevices. This means that dense, smooth materials or those that are not easy to wet will not hold a lot of dye or will not be easy to dye. Indigo is one of the most light-stable natural dyes, but the way in which it dyes means that materials dyed with indigo ‘fade’ in two ways: as particles of indigo are dislodged and fall away from the material, and as the dyed material itself wears away to reveal undyed material. Taken together, these largely explain the classic fading of denim. (Light does degrade indigo into compounds such as isatin, but the physical damage is more significant.)

Making leuco-indigo: reducing the vat to remove oxygen

Whether they’re based on synthetic or natural indigo (including plant material that contains indigo), all indigo vats work on the same basic principle: convert the blue indigo into soluble leuco-indigo, then allow that solution to penetrate the material to be dyed. As leuco-indigo only maintains that form in the absence of oxygen, the vat must be reduced – the oxygen removed – in some way. Traditional vats use bacterial fermentation: the vats contain organic matter on which bacteria feed, such as the nutrients in urine, rice bran, the plant material that contains the indigo compounds, or even the skin flakes, sweat and manure held in a sheep fleece.

Chemical vats use raw chemistry, compounds including sodium hydrosulphite or thiourea dioxide or reducing sugarssuch as fructose to remove oxygen from the vat.

Making leuco-indigo: the vagaries of pH

pH – the acidity or alkalinity of the vat – is important, as the conversion to leuco-indigo requires an alkaline environment. It’s easiest to predict and maintain in a chemical vat, with recipes calling for measured amounts of lye (sodium hydroxide) or washing soda/soda as/soda crystals (sodium carbonate) or calc aka calcium hydroxide aka slaked lime. It’s just as important in a biological vat, but much trickier to maintain, because the fermentation process produces byproducts such as lactic acid that lower the pH. Apparently dyers in the past learned to manage their vats by tasting the fluid or feeling it between their fingers, trying for something that’s slippery (alkaline), but not too slippery. Fortunately we have pH paper, which works even for indigo vats – the blue does not appear so quickly that it prevents reading the pH.

pH also influences the dyeing process in other ways. Both cotton and indigo are ionised at higher pH; there are two forms of leuco-indigo, and the most ‘efficient’ of these in terms of dyeing is most common at pH11, which is also the pH at which de-protonation/ionisation of the cotton (and possibly other cellulosic fibres) has begun, making it attract the dye. So cellulosic fibres are best dyed at pH11.

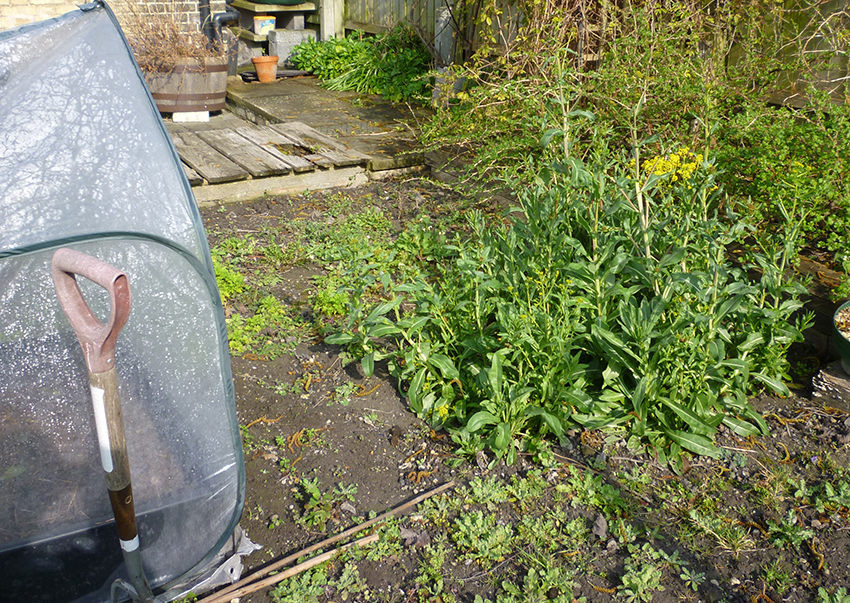
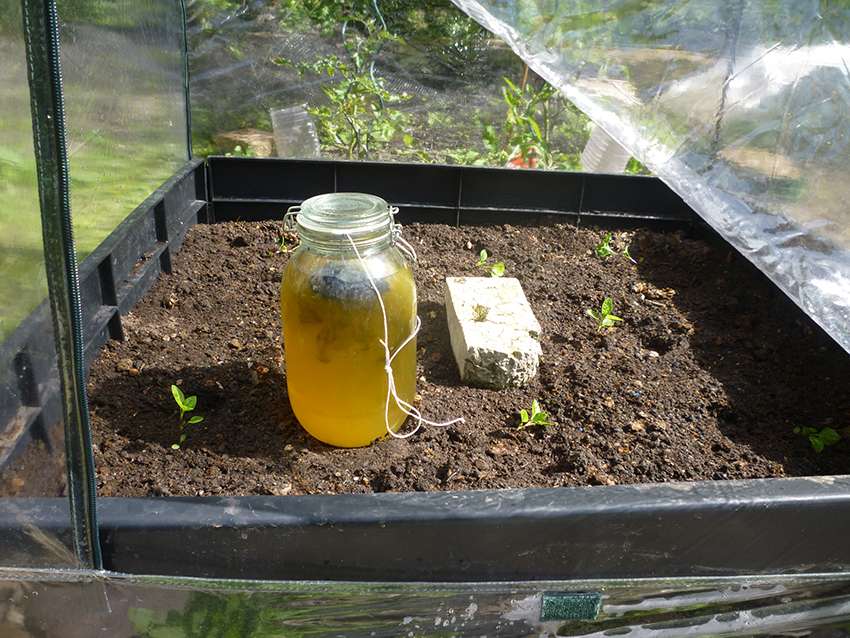
But protein fibres such as silk and wool are damaged by high pH, and heat accelerates the damage. pH paper allowed me to confirm that my sig (urine) fermentation vat does indeed run at about pH 9 in the relative coolth of the pop-up greenhouse, whereas the 1-2-3 Fructose vat I created yesterday was pH11 at 50°C. So: to dye my handspun silk (a smooth, dense fibre, hence takes up less dye) a dark blue, I had the option of multiple dips in the urine vat OR a shorter single dip in the Fructose vat.

Having said all this, pH paper and knowing how to use it doesn’t guarantee success with a biological vat. I think the current woad vat may be a loss, possibly because I used garden lime instead of calcium hydroxide to try to control the pH. But perhaps there’s so little blue present that I’m not seeing it on the material. Further work required.

NDamask1

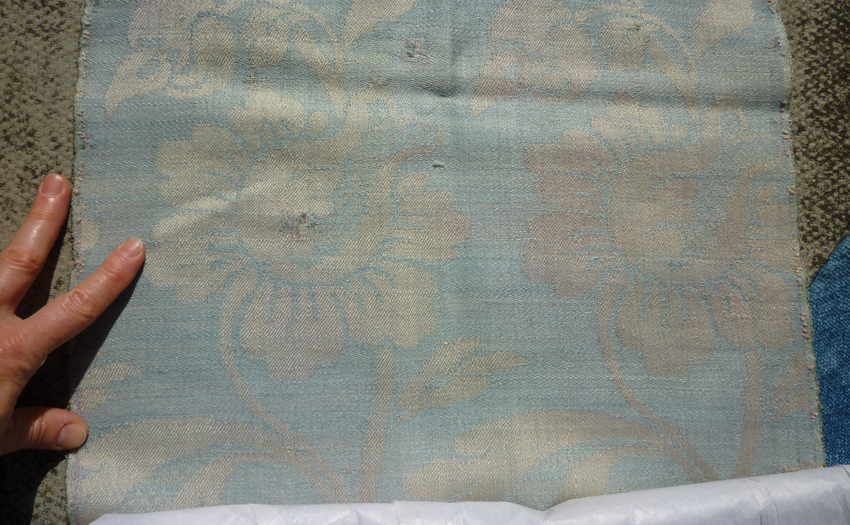
There are far too few pictures in this post, so here’s a Norwich damask, a dress fabric dating from the early 1700s. Handspun 2-ply wool warp; the purplish shadows in the pale areas hint that the warp was once dyed reddish-purple, probably with logwood, long since faded except where protected inside the seams. The handspun singles weft is clear pale indigo blue. The original fabric was probably lavender-lilac purple with red-purple patterning.

Further reading

Balfour-Paul, J, 2011. Indigo: Egyptian Mummies to Blue Jeans. British Museum Press

Hall, K, 2012. Indigo background (written specifically for South Carolina teachers).

Click to access Indigo-Recipe.pdf

Melo, M J, 2009. History of Natural Dyes in the Ancient Mediterranean World. In Handbook of Natural Colorants, John Wiley & Sons. http://www.researchgate.net/profile/Maria_Melo8/publication/227979187_History_of_Natural_Dyes_in_the_Ancient_Mediterranean_World/links/0deec5374a69835606000000.pdf

Vuorema, A, 2008. Reduction and analysis Methods of indigo

Click to access AI388%20Vuorema.pdf

A traditional indigo sig vat.

Oxford English Dictionary: Also seg, sigg, zig(g). Of obscure origin, the form does not correspond to older Flem. seyck, G. seiche, in the same sense. Urine.

Anyone horrified by the idea of working with urine should leave the room now…

Urine has been a valued ingredient in the dyeing process for many centuries: dyers had containers on the street to collect contributions from passing members of the public. Fresh urine is sterile, or nearly so (If you can’t get clean water to wash out a wound, the next best thing is to pee in it. Honest!) but bacteria soon begin breaking down the proteins, sugars and other compounds in the urine to produce ammonia, which gives stale urine that pungent, penetrating odour. Ammonia is a very useful alkali and, just as important for working with indigo, the bacteria that create it consume oxygen as they work. The resulting low-oxygen, alkaline environment is ideal for converting indigo into its soluble form for dyeing – and all that’s needed is pee! Incidentally, the first pee of the morning is better than any other, as it’s richer in nutrients for the bacteria. The urine of children is better than that of adults, as their higher metabolic rates mean more nutrients in the urine. The sugar-rich urine of diabetics is good, too. But beware the urine produced by those indulging in diuretics such as beer: it contains fewer nutrients as the body tries to flush out the toxins with higher volumes of fluid. Some urine vats fail to ferment for no obvious reason; it’s possible that some medications interfere with the bacterial action.

The simplicity of this process has interested me since I first read about it, and it’s an obvious candidate for inclusion in my Summer of Blue. So, as the teaser image on the first woad vat post suggested, I made some preparations.urine

That’s a 3 litre jar, half-full of our urine, with a bucket containing thermal insulation to keep the fermenting urine warm. I collected more urine over the next day. All that’s needed for a urine-based indigo vat: urine, natural indigo, and a twist of fine cloth to contain the indigo powder.

SetupThe cloth with the indigo is tied tightly and dropped into the jar. At this point the urine has almost no smell at all, certainly nothing offensive.

DayOneSigVatMayThe bag of indigo is squeezed gently every day to release more indigo into the fluid, which will be blue until bacterial action – fermentation! – creates the high pH, low oxygen environment in which the blue indigo converts to the form in which it dyes, the yellowish soluble ‘white indigo’ or leuco-indigotin. Fermentation requires gentle warmth; I was going to put the jar in that bucket on a hot water bottle surrounded by insulation, but the warmth of the sun persuaded me to try an easier solution:

DayOneSigVatWarm

I simply sat it on the warm soil in the pop-up greenhouse that is sheltering my Japanese indigo plants. That was May 13. On May 14 the temperature plummeted and we had rain; the 15th had slightly more sun, but was still cold. Today, the 16th, is warm again. I foolishly didn’t take a photo of the fluid surface before I squeezed the indigo, so I can’t show you the tiny patches of metallic scum, a sign that it is working. But in this photo you might be able to see the greenish rather than bluish colour of the liquid. More important is the smell: it has the rich organic odour of stable manure or something similar. Nothing like the acrid ammonia of stale urine.

DayFourSigVat

And look at the change in pH over the course of three days! No lime needed here:

DayFourSigVat.pH

If tomorrow is as warm as today, I might put some wool in that jar tomorrow evening, just to see what happens. The urine fermentation vat works at a far lower pH than the vats reduced with thiourea, so they’re much kinder to protein fibres. At pH 9 wool and silk can sit in the vat for several days without damage, or they can be dipped repeatedly, both processes yielding darker shades of blue. Blue!