Tag Archives: fine_spinning

Adjusting a spinning wheel to spin fine(r) yarns

This is complicated and far easier to explain in person when I’m pointing at the bits of your wheel in front of you, but I’ll try to cover the main topics, and I’ll suggest some tweaks that I find useful.
If you find this an intimidatingly technical read, I assure you it was just as intimidating to write. It requires precision in the descriptions that makes me feel as though I’m pretending to be an engineer.

‘how do I stop my wheel pulling!’ is the most frequent question when I teach this in person, so I’ll start by discussing take-up (the speed/force with which your wheel pulls the yarn through the orifice and onto the bobbin).

‘how do I add more twist faster?’ Once your wheel isn’t snatching the yarn from your hands you have time to consider another important issue: the thinner your yarn, the more twist is needed to make it competent. So, once you’re happy drafting your fine yarn it’s worth setting up your wheel to add lots of twist fast if that’s possible.

Here’s an example of what is possible with a wheel set up to spin fine thread. At Fibre East in 2014 someone asked if I could spin cotton thread for lacemaking. I said I wasn’t sure, never having seen any. I went home, ordered some 185/2, and experimented. The answer is yes, I can (the thread on my bobbin is 2-ply), but I cannot mercerize the thread so it’s too fuzzy and not shiny enough.

Definitions referred to in the text

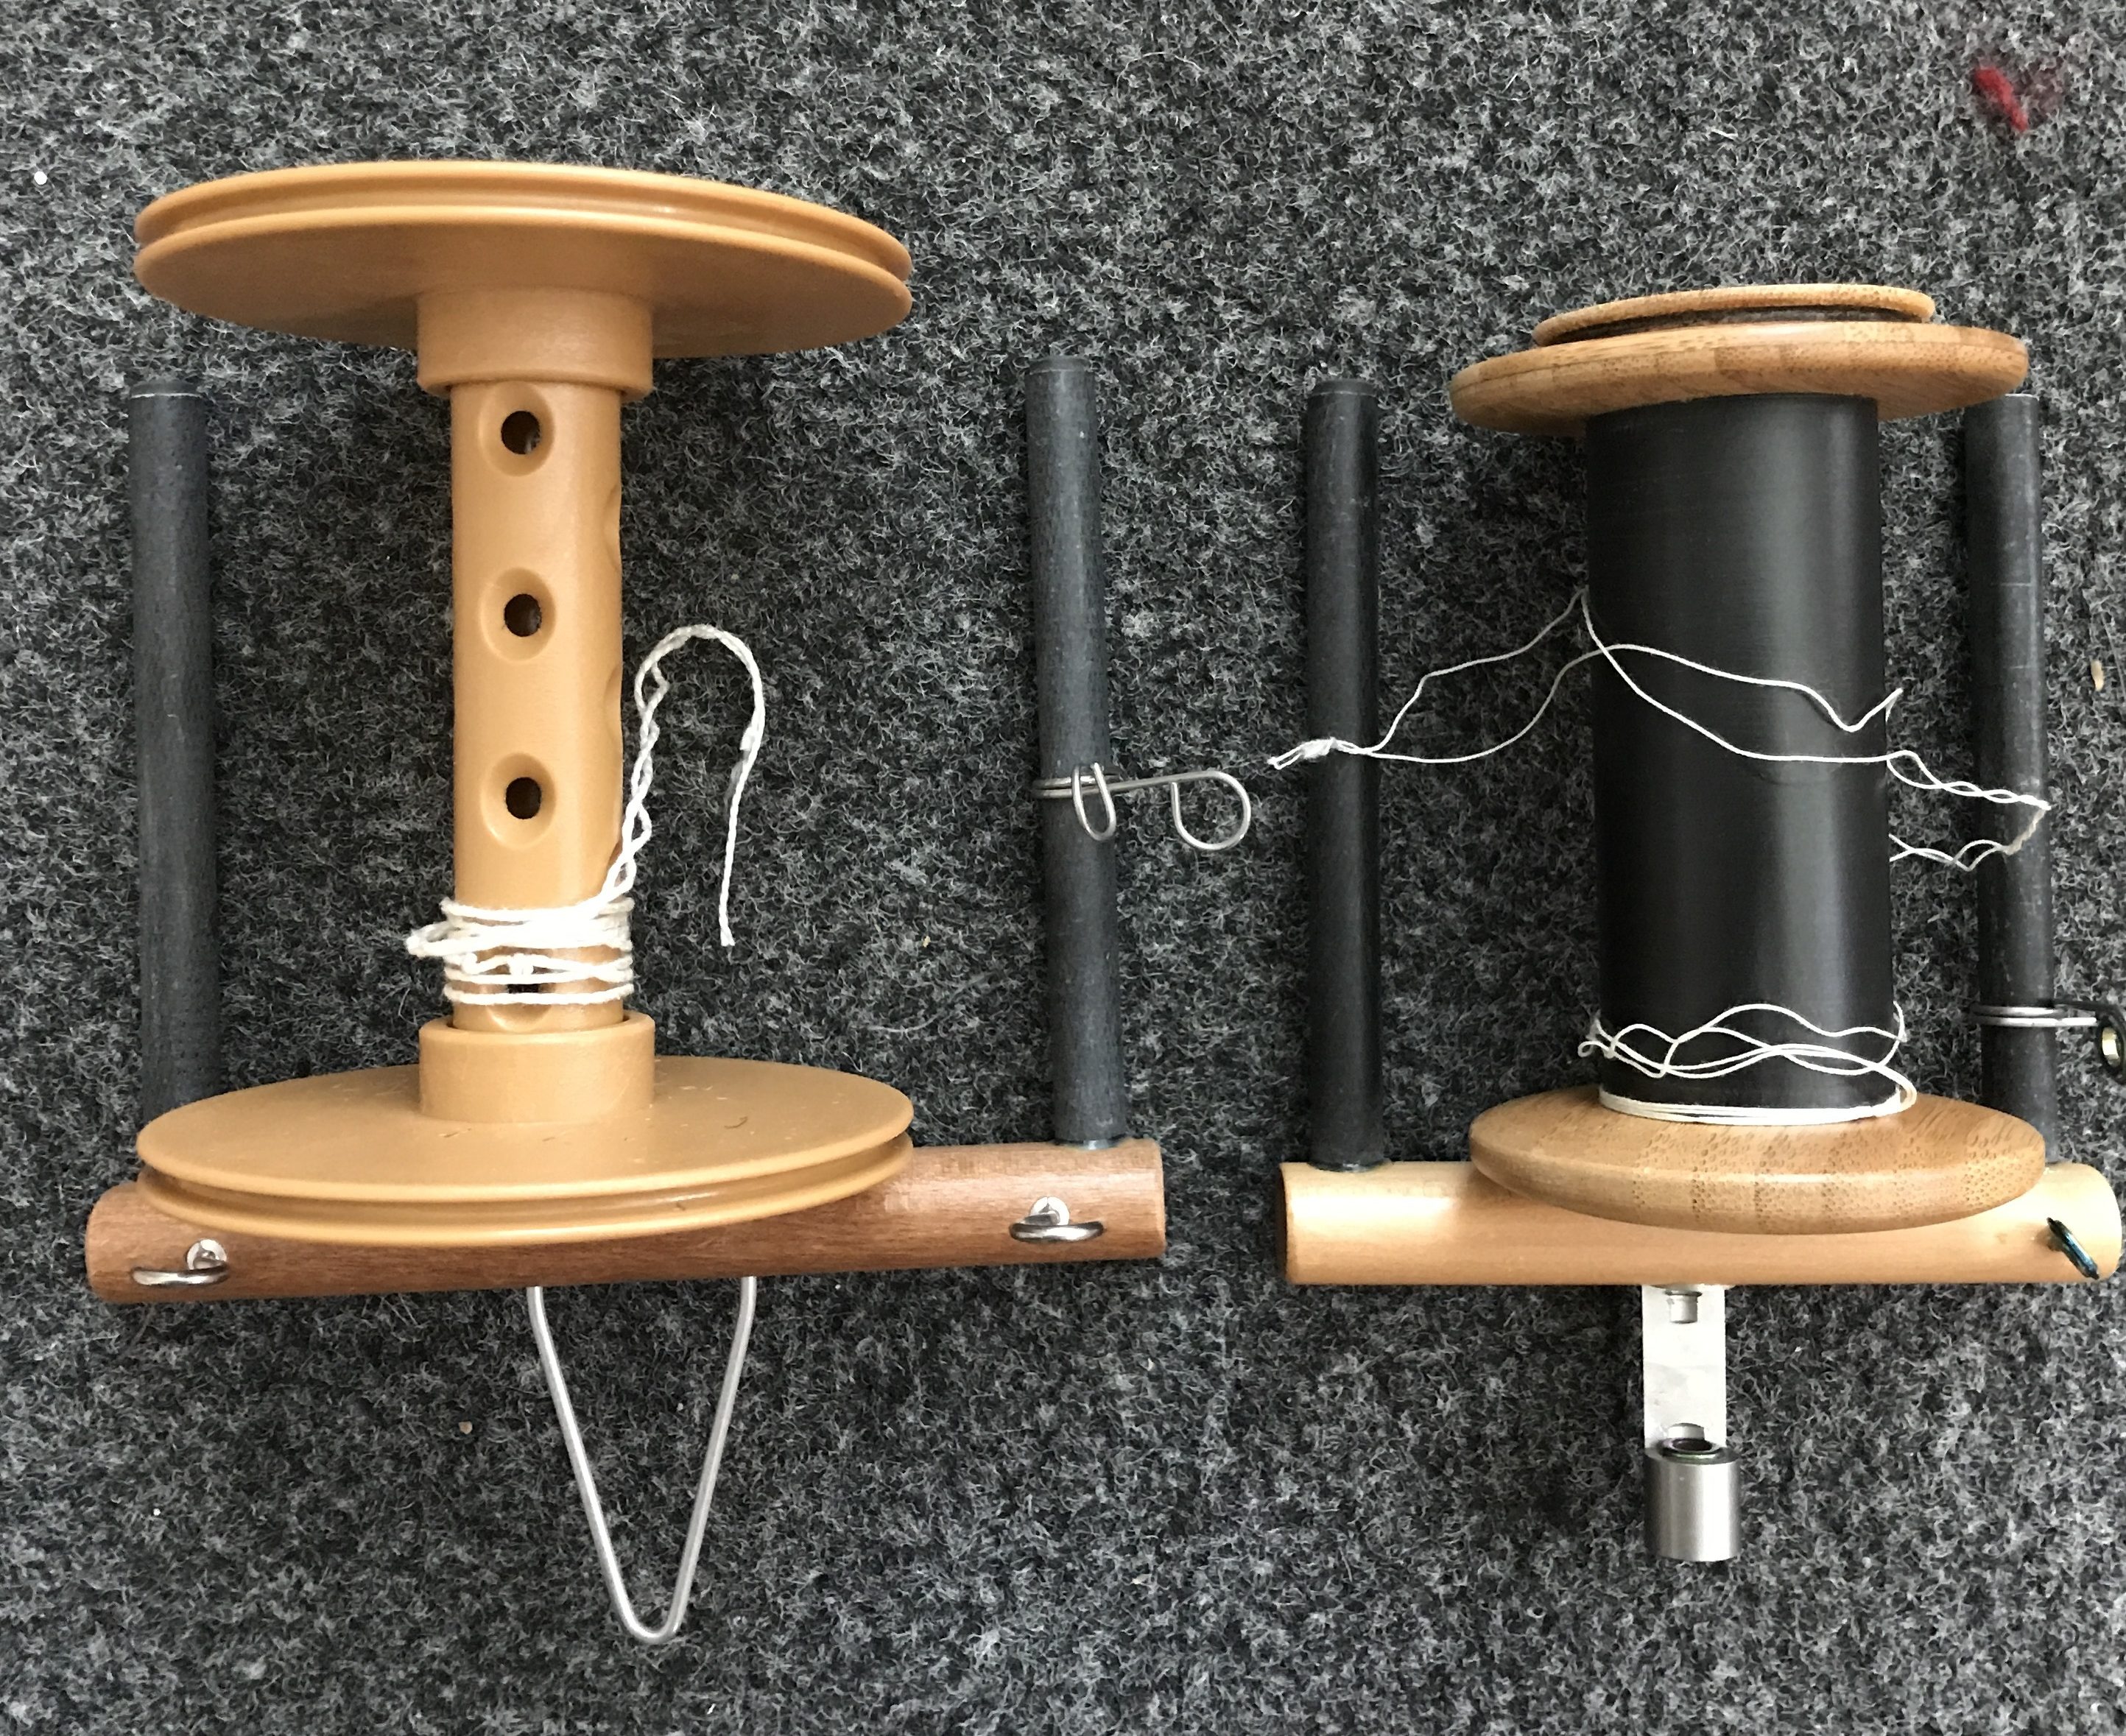
Fat-core bobbin: a bobbin that is made with a fatter-than-usual central tube connecting the two ends. You can make a fat-core bobbin by half-filling any bobbin evenly with random yarn, then wrapping a piece of paper around the yarn to give a smooth starting surface. Or just hold a strip of card onto the yarn for a couple of rotations. Or buy some foam pipe insulation with a central hole that roughly fits the tube of your bobbin. I like to have a different (smooth) surface in case my fine yarn starts to sink into the previous yarn, plus I can admire the new fine yarn more easily.

Left: standard Majacraft bobbin and delta flyer on left. Right: fat-core lace bobbin and lace flyer.

Lacing or cross-lacing a flyer: taking the yarn (or the leader, to start with) from the bobbin to a hook on one arm of the flyer, then back to a hook on the other arm [repeat as desired] before taking it to the orifice and out into the world. Each additional hook creates friction that reduces the take-up slightly. You can lace any flyer with hooks. If the one set of hooks is on the other side of the flyer arm I have been told you can put the yarn through a hook, take it under the flyer to a hook on the other side, then back again, but I have not tried this myself. Note that lacing will reduce the amount of yarn you can put on the bobbin: don’t fill to the point that the bobbin is rubbing against the laced yarn.

The ratio of a wheel is the number of times the flyer rotates for each rotation of the drive wheel. The higher the ratio, the more rotations of the flyer. The current Ashford Traditional set up as ‘single drive’ (I think that’s scotch tension) has a maximum ratio of 17:1, which means the flyer rotates 17 times for each rotation of the drive wheel. This is faster than the maximum possible for a normal Lendrum with a top ratio of 10:1. If that is far too slow, then just swap the standard Lendrum flyer for the Lendrum Very Fast Flyer with tiny flyer whorls for a maximum ratio of 44:1 (44 rotations of the flyer for each rotation of the drive wheel).

Take-up: the force with which yarn is pulled onto the bobbin. The flyer of a spinning wheel winds yarn onto the bobbin because the flyer and the bobbin rotate at different speeds. The greater the difference between the bobbin speed of rotation and the flyer speed of rotation, the harder/stronger/faster the take-up will be. The harder/faster the take-up, the faster the yarn is pulled onto the bobbin. Which means less time for you to draft a fine, even yarn, and less time for twist to be added to it before it goes onto the bobbin (the finer the yarn, the more twist is needed to make it competent). All of which means that if you are trying to spin finer yarns, especially weaving yarns or threads, you need to understand how to make sure you can keep the yarn off the bobbin long enough to add enough twist to make that yarn competent.

‘How do I stop my wheel pulling so hard!’

Spinning wheels may be classified according to the way they transfer rotation from the drive wheel to the flyer and the bobbin (in other words, which bits are connected by the drive band). The different ways of transferring rotation mean different ways to control take-up (see the definition above). Here are some suggestions for ways to reduce take-up on different wheels.

On a double drive wheel (not shown in the diagram, I ran out of time!) the drive band forms a figure-of-eight folded back on itself to become two loops. One of those loops goes around the flyer whorl to drive the flyer, the other goes around the bobbin, and then both loops go around the drive wheel. The main control of speed and take-up (the power with which the yarn is pulled onto the bobbin) is slippage, the loss of power caused by the drive band sliding around the whorls instead of making the whorls spin. Thus you can reduce take-up by loosening the drive band (usually by tilting or sliding the mother-of-all toward the drive wheel) to increase slippage. If you want super-fine control consider using a thin, hard-spun drive band such as fine crochet cotton. It is sometimes said that there is a relationship between drive band thickness and the thickness of the yarn you are spinning: thinner and/or harder drive bands have a smaller surface area in contact with the flyer whorl, so finer adjustments may be possible.

Scotch tension wheels
the drive band connects the drive wheel to the flyer
The flyer begins to rotate and the rotating shaft of the flyer drags the bobbin with it, meaning a more gentle start. As the bobbin fills it gets heavier, which means it isn’t slowed so much by the brake band. You might need to tighten the brake band a tiny bit to maintain take-up as the bobbin fills.
To reduce take-up start by loosening the brake band (turn the appropriate knob). You can also lace the flyer and/or use a fat-core bobbin, but Scotch tension offers yet another option: you can change your brake band.
A finer/thinner brake band offers finer control because it has a smaller surface applying friction. I use a fine crochet or tatting cotton for my brake bands. I recommend trying this particularly if you are currently using a monofilament (clear plastic fishing line) brake band. You don’t have to cut or otherwise destroy your existing band, just untie it (even if it’s fiddly) and try something thinner. You can always put the old one back.
Another issue I’ve seen on some wheels is that the spring fitted on the brake band can be too stiff to ‘even out’ tiny differences in take-up. If you’re having no trouble drafting a fine competent yarn but it sometimes breaks for no obvious reason, consider this possibility. I have made improvements by swapping out both Ashford and Majacraft factory springs for softer springs; rubber bands work very well but don’t last long, hair elastics last longer (you can cut and knot long ones to make them fit). I’m currently trialling the spring from a cheap pen on the Majacraft and so far I like it.

My Majacraft Rose showing brake band of fine crochet cotton with a spring from ballpoint pen.

Irish tension or bobbin-led wheels
the drive band connects the drive wheel to the bobbin
Wheels such as the Louet S10 transfer rotation directly from the drive wheel to the bobbin. This means the bobbin is the first thing that rotates (hence the name ‘bobbin-led’) before friction between the bobbin and the shaft of the flyer basically drags the flyer into rotating. So on these wheels the bobbin moves first and it moves fastest, which means it starts with a strong ‘tug’ on the yarn you are spinning. They were designed to spin flax which has a long, strong fibre; wools and cottons have shorter, weaker fibres so fine yarns spun from these are more easily broken by that initial tug.
To reduce take-up and the strength of that initial tug, after loosening the brake with the screw (you can have it so loose that the brake is just sitting loose on the orifice) try any or all of the following: make sure everything is lubricated so the flyer starts moving as quickly as possible; lace the flyer; use a fat-core bobbin.

‘how do I add more twist faster?’

Not all wheels allow you to do this. On some wheels you will have to sit and hold the yarn and treadle until the yarn has enough twist for your needs and you can allow it flow onto the bobbin.

Note: ALWAYS check the amount of twist by examining the yarn on the bobbin. Frictional contact with everything on the route from your hands to the bobbin – the edge of the orifice, the hooks – holds twist back, so there’s more twist in the make between your hands and the orifice than there is in the yarn on the bobbin. You can and should check this for yourself: pull a loop off the bobbin and allow it to ply back on itself, then allow the yarn outside the orifice to do the same thing. The loop outside the orifice will have a slightly tighter twist. So you need to treadle until you like the yarn coming from your hands, then treadle a little bit more to ensure the yarn on the bobbin has the same twist.

Some wheels allow you to alter the speed at which the bobbin and flyer rotate in relation to the drive wheel (the wheel’s ratio), and this allows you to add more twist faster with the same treadling speed*. For example, if the whorl on your flyer has more than one groove, putting the drive band around the largest whorl means the flyer will rotate fewer times per rotation of the drive wheel than if you put the drive band around the smallest whorl. I can’t think of a better way to say that in words. But if it doesn’t make sense, mark a distance on your (flat) floor; 18″ will suffice. Make a mark on a can of tomatoes, then count the number of times that mark comes around as you roll the can the 18″. Now mark and roll something smaller (a pill bottle, or a pencil) the same distance and count in the same way. The smaller thing rotated more times over the same distance because it has a smaller circumference (my primary school teacher would be so proud…). Which is why using a smaller whorl means your flyer and bobbin rotate more times (inserting more twist) per rotation of the drive wheel. ‘Large drives small’ for maximum rotation.

Some wheels also have whorls on the drive wheel, which allows more variation in the ratio. Using the largest whorl on the drive wheel to drive the smallest whorl on the flyer means the flyer is rotating as many times as possible for each rotation of the drive wheel. On Majacraft wheels where the flyer whorl is easily accessible, sticking out above the drive wheel, it is easy to use different flyer whorls to insert more or less twist, or even to add a third whorl between drive wheel and flyer to further accelerate rotation.

*Note ‘same treadling speed’, not same effort. Nothing is free: the extra rotation/twist requires a little more treadling effort to do the work (of rotating the flyer and bobbin faster).

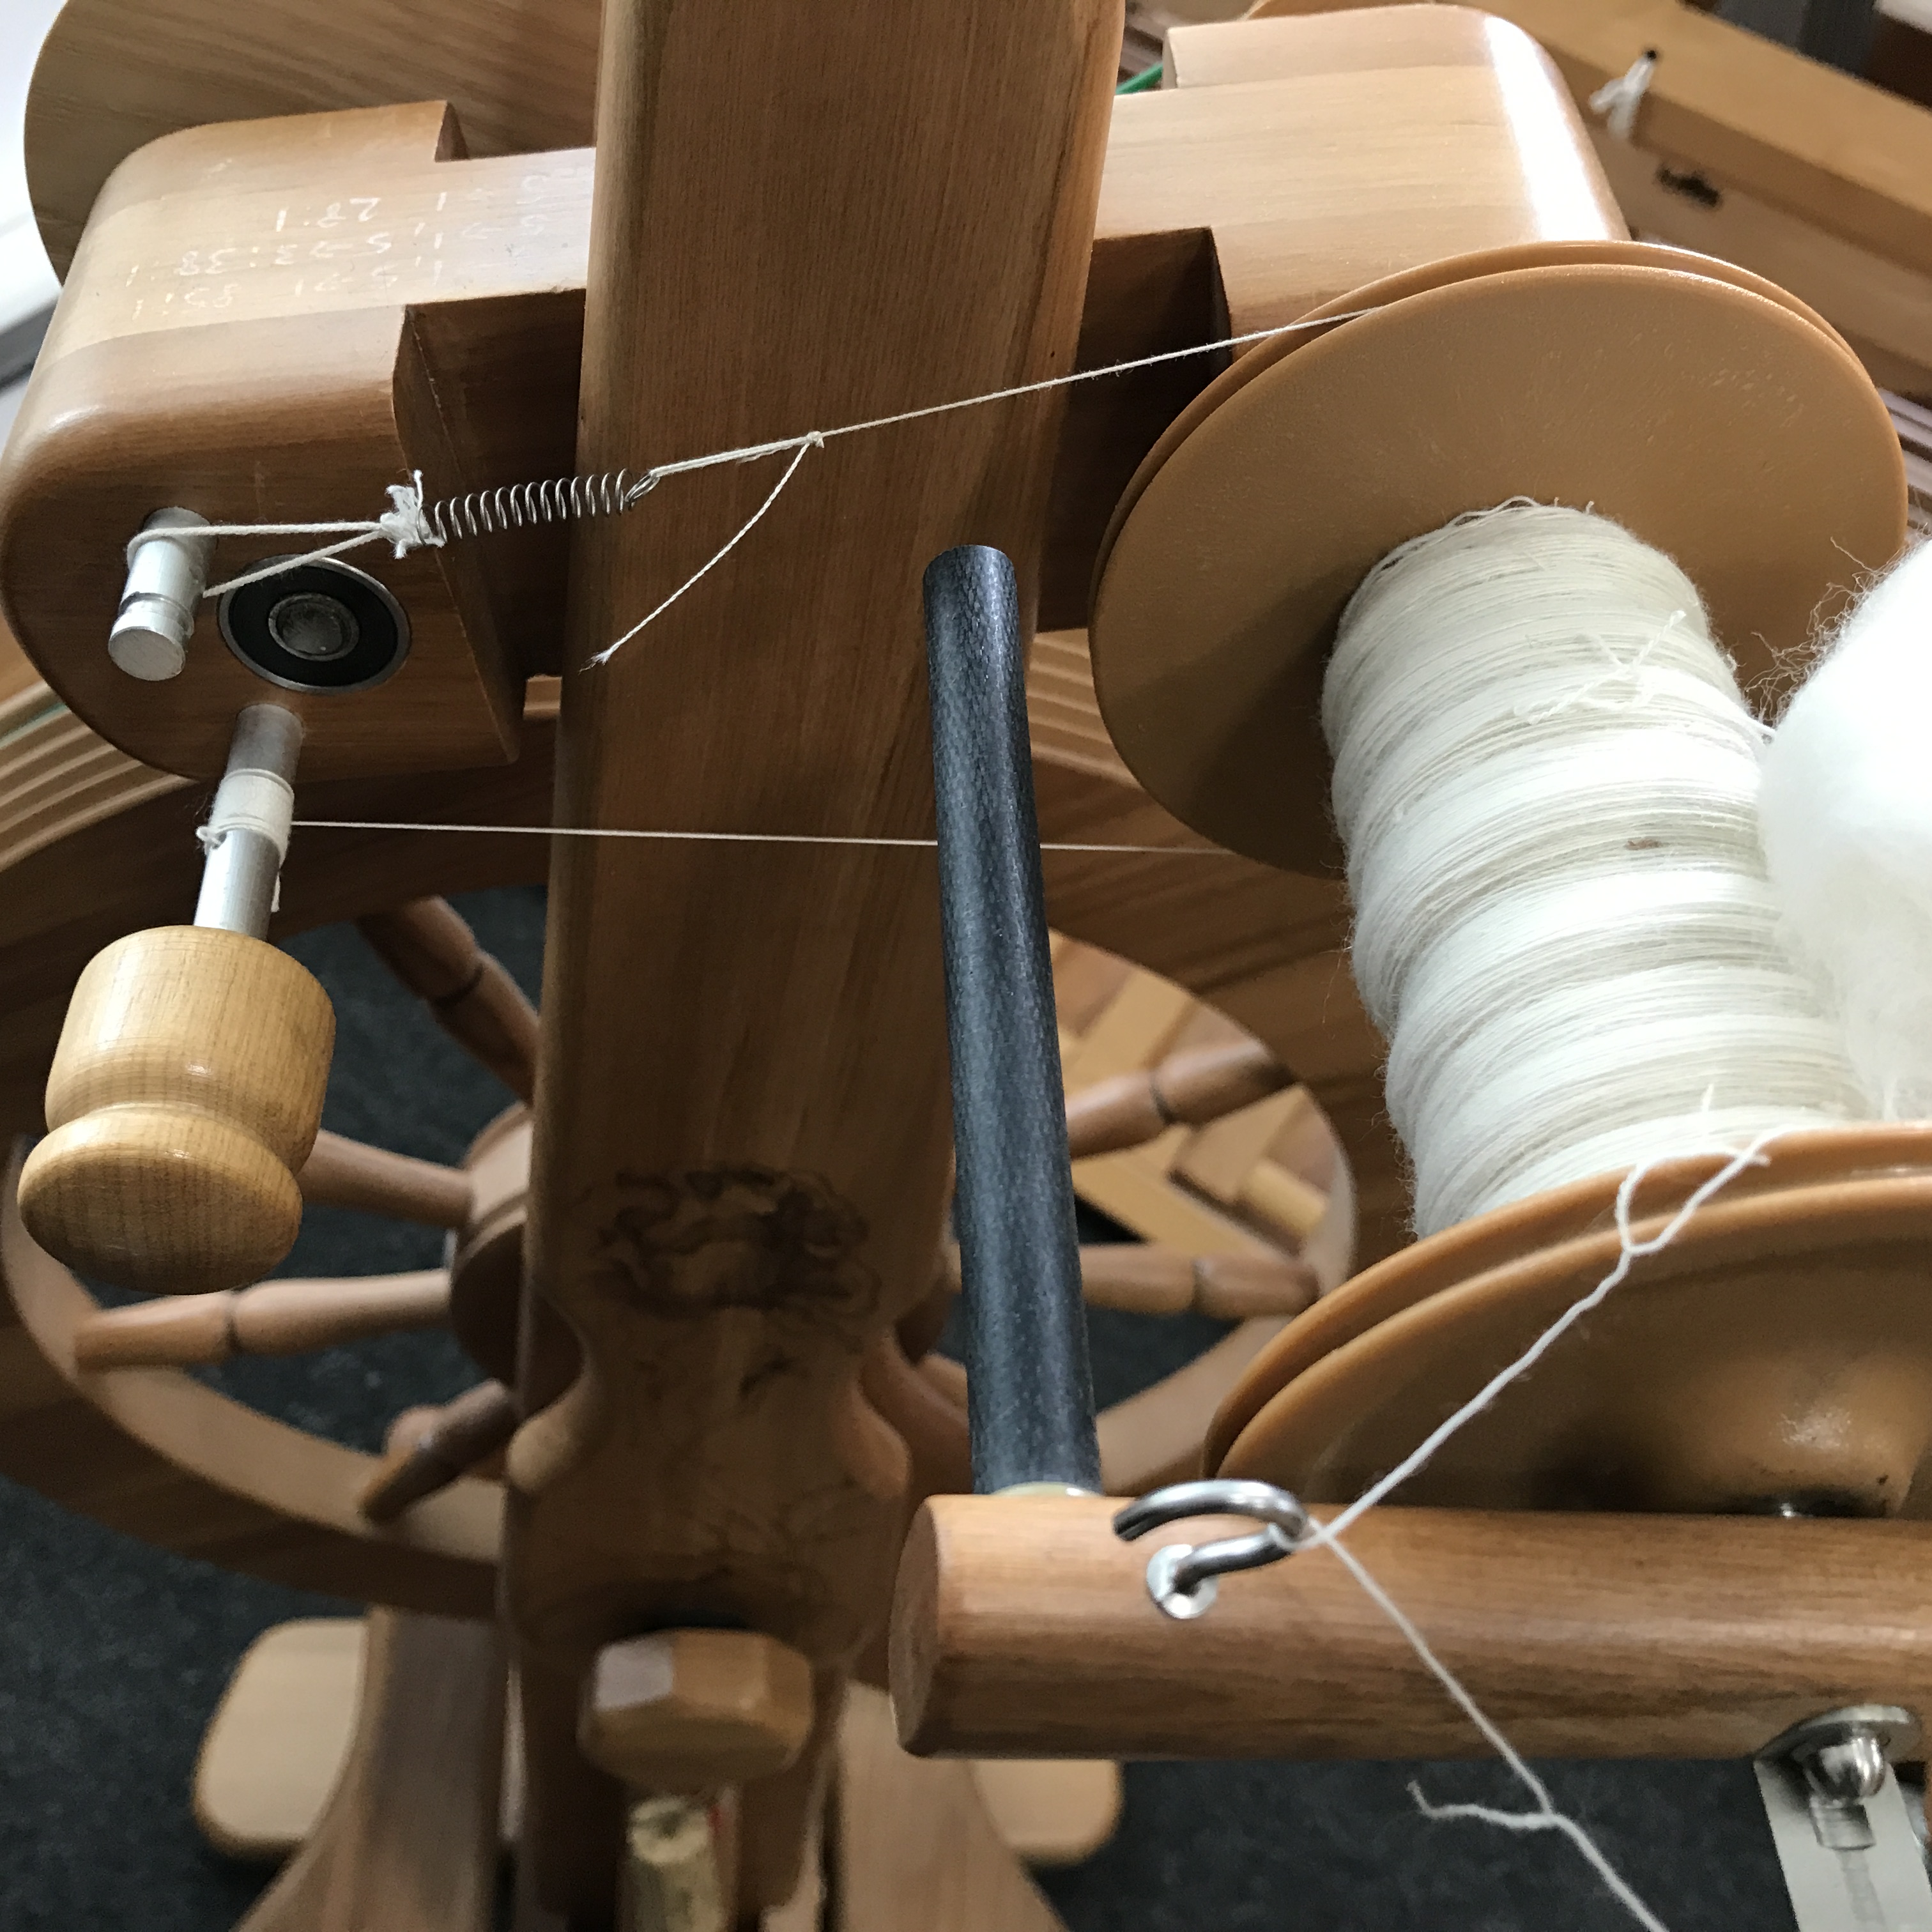
The photo below shows the back of my Majacraft Rose, with the drive band coming from the largest whorl on the drive wheel to the smallest whorl of the high-speed flyer whorl. This is the ‘accelerator’ or ‘high speed’ head for the Rose; the large whorl to the right can be used to further increase the rotational speed of the flyer and bobbin: run the drive band to the small whorl of the accelerator bobbin to make it rotate as fast as possible, then run the accelerator band (not shown in this photo) from the large whorl of the accelerator to the small flyer (you might notice that to do this I have to reverse the position of the flyer whorl). The grease pencil notations are for calculation of ratios in various configurations.

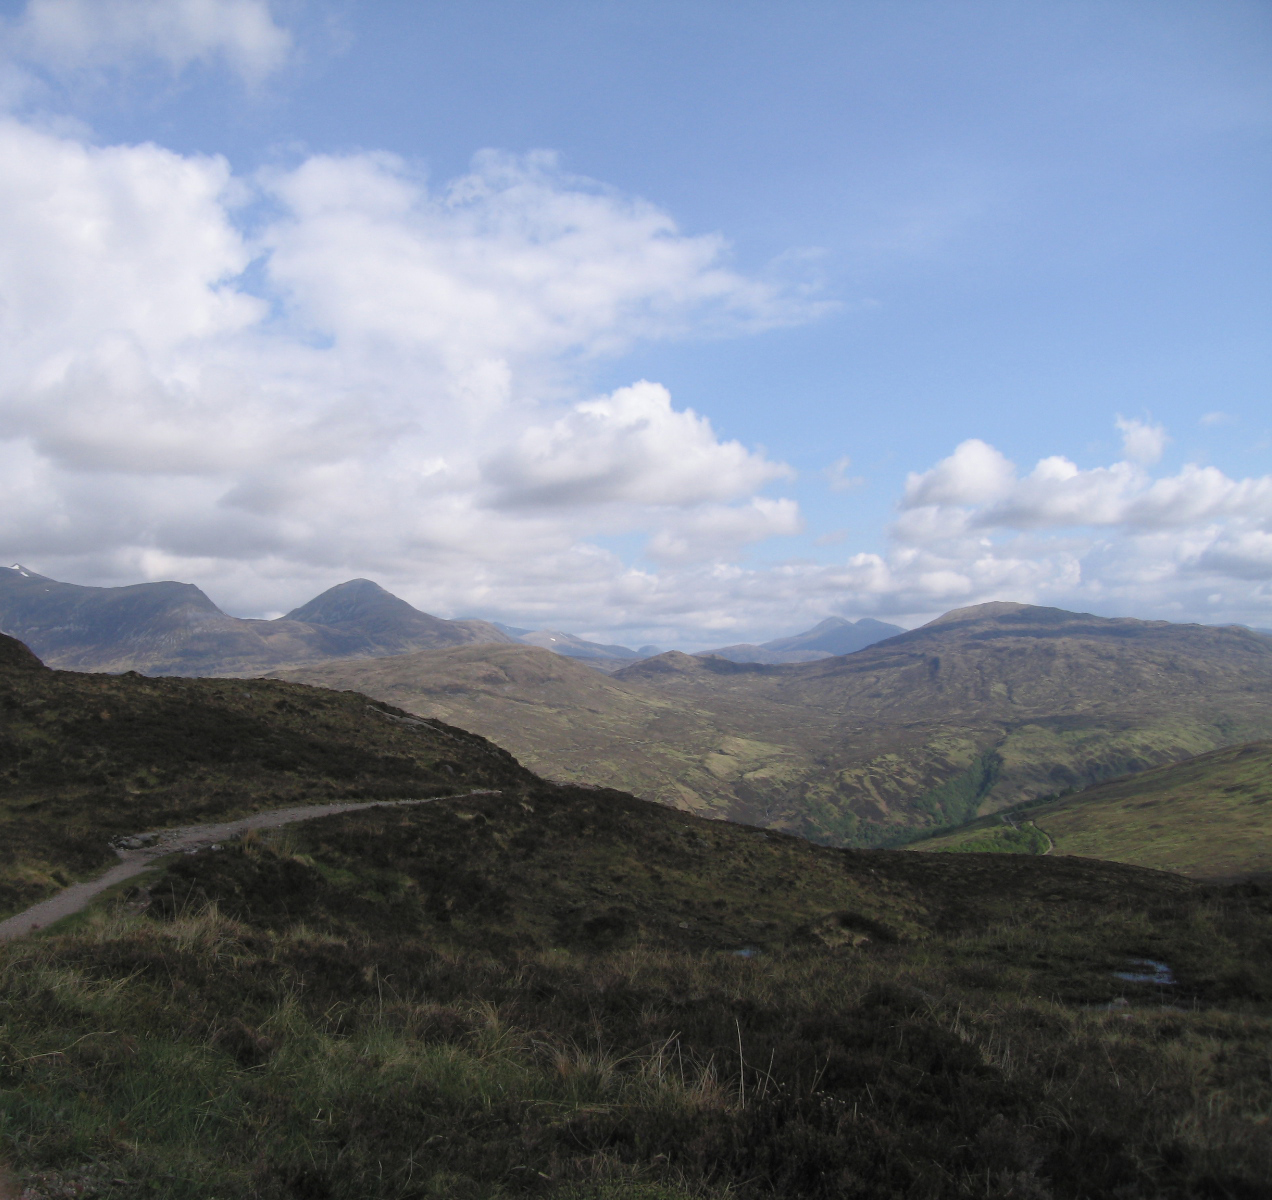
Here’s a reward for reading all the way to the end. Scotland! looking north from ‘The Devil’s Staircase’ (not as bad as it sounds, Conic Hill was far worse) on the West Highland Way.

White felt disc hand-embroidered with flowers in brightly-coloured handspun silk

Spinning thread for handstitching, Part II. Spinning silk.

This is what started it all. Spin Off Autumn Retreat 2010. A pile of dyed mulberry silk top and some felt discs on a table in Robin Russo’s class, and the comment that spinning your own silk embroidery thread and stitching a needle case is good fun. So I spun the silk using a top-whorl spindle to insert quite a lot of twist, used an Andean plying bracelet for the short lengths I spun, and used the embroidery stitches I could remember from my childhood. It was good fun. And that was my first gentle reminder that stitching could indeed be fun.

I’ve used this needle case gently for the last 11 years and the silk threads are still in reasonably good shape. 

250x view of blue handspun silk embroidered flower petals showing relative lack of wear.
250X view of some stitches from the needle case to show wear of areas with less twist.

You may be able to see some slight ‘fuzziness’ indicating wear on the areas with very little twist.

Twist is good!
Twist locks the fibres in the yarn together to make a competent yarn: too little twist allows the fibres to slide within the yarn, which will then stretch under tension or even drift apart entirely (don’t ask me how I know this, it’s not a pleasant memory). But tight twist also means the fibres tightly spiralling on the thread are less exposed to wear in any one location on that thread. Tight twist locks the ends of fibres more tightly into the spun yarn. 

But not always!
Uncountered twist makes a yarn — or in this case a thread — that is lively. Most stitchers either add twist or untwist their thread ever-so-slightly with every stitch; if you add twist, you’ll know it because your thread starts tying itself in knots. A lot of twist results in a thread that may not flatten and spread to cover the underlying fabric. It might even stay entirely round, which is good if you’re couching it down, not so good for satin stitch. Like cotton, silk can take a lot of twist before it becomes wire: on average, when in doubt, always add a little more twist to silk.

Choose a yarn structure: sample silk threads
I learn a lot by looking at and handling examples of things to understand how they behave. 
In the image below silk threads are shown at 250x; they’re all from the same shot, split to allow me to name them. The white line indicates a 45° angle. [I’ve spelt ‘Gutermann’ incorrectly: it should be Gütermann. Sorry.]

6 different silk threads photographed at 250x to show twist angle and structure.

Using a needle to unpick the thread and a jeweller’s loupe to see the result I can say the first three (1,2, and 3 in case of doubt) are all 3-ply threads. 4, the embroidery floss, is 2-ply. Why? 3-ply yarns are almost circular in cross-section, so they look much the same diameter regardless of how they lie on the fabric, whereas 2-ply yarn is roughly oval in cross-section: it has a flatter, wider side and a narrower side.
So a 3-ply sewing thread will make a more uniform line of stitches, and being circular and tightly-spun might even move more smoothly through the fabric. The 3-ply Sajou and Soie Perlée stand cylindrical, high and glossy above a ground fabric or other stitches to catch the light and provide structure to a design.
By contrast the 2-ply embroidery floss will lie relatively flat on its flat side and because it is relatively loosely plied (compare the twist angle) it will spread even flatter to cover more of the ground fabric.

5, the 2-ply handspun silk top, is almost as tightly spun as the commercial threads, it’s just a bit thicker. It’s relatively ‘fuzzy’ with a halo of ends around the thread by comparison with the spun reeled silks above it,  but that is not proof that they are reeled and the handspun is spun from silk top: heat is used to burn that fuzzy halo off yarns mill-spun from silk top.

6  I will explain a little later. 

Other factors to consider
Sewing thread and most embroidery threads (leaving aside those attached to the fabric by other threads) have to pass through a fabric multiple times. Fabric is hard on thread. Every slub will catch on the fabric, the leading edge of the slub will abrade more and fray and eventually fail. The slub will enlarge the hole made by the needle, damaging the fabric and leaving the rest of the thread a bit loose in that large hole.
So unless you want texture and are happy to live with the consequences, spin consistent singles and ply consistently. You don’t need a lot of silk to make a lot of thread, so buy the best quality silk you can find. Avoid clumps of short fibres, neps, noils and other annoyances if you can, otherwise pick them out of the fibre as you spin. Or accept the consequences: it’s unlikely to be fatal or even a disaster! Uneven silk thread works well in rustic textiles sewn in the boro tradition, even in relatively precise geometric figures.    
Detail of sashiko stitched with uneven handspun silk.
There is significant variation in thread thickness and the amount of twist. Not my best spinning, but mottanai applies here: use what you have, waste nothing.back of waistcoat showing that uneven spun silk is appropriate to boro repairs.
And it looks perfect appropriate, at least to me.

I have an example of silk embroidery in my historic textiles collection.
undyed linen card case c. 1720 with yellow silk embroidery in back stitch and some satin stitch

This is probably an envelope case to hold visiting cards c. 1720 (dated by the style of embroidery). Undyed linen (note that there are two layers, the outer being a much finer weave) hand-sewn and embroidered with yellow silk. 

photo to show detail of flower and stitches worked in yellow silk on undyed linen card case with insert at 250x to show that the silk is floss, 2-ply.

A slightly closer view of the embroidery including a view of the back because embroiderers always like to see the reverse. The flowers and other details are back stitch, with a simple wrap binding the edges of the envelope. The insert detail shows more clearly the sheen of the silk – after 300 years! – and the structure of the yarn, which is a 2-ply twisted floss. 
And that’s why I tried Number 6 in the photo above, quickly twisting together a couple of strands of silk floss from Pipers Silks in the UK. It works, would work better if I used more strands for a thicker thread. But I’m not going to do that: I want to use that silk as it comes because it is so very beautiful and so very, very challenging.
pack of reeled silk floss for embroidery in various shades of blue with label from Pipers Silks.

I hope that’s enough to get you started. Use the best silk you have, spin evenly, spin reasonably tightly if not very tightly, it’s good fun!

The Cassimere Insanity Part I

If you’re visiting because you’ve heard about my article A Brief History of an 18th-Century Woven Cloth: Cassimere in the Winter 2019 Spin Off, welcome.

Honestly, that’s what it is, insanity. I just didn’t realise it until I’d dug the hole too deep to climb out:
I had to keep going all the way to the other side.

I am deeply curious about how yarns were spun in England before the Industrial Revolution. In the Middle Ages England was the leading producer of woollen textiles in Europe: across a wide swathe of the country you can still see the ‘wool churches‘, magnificent structures paid for by the profits of the medieval wool trade, which is to say people buying and selling wool fibre, yarn and fabrics. ‘The medieval wool trade’ … four words that encompass centuries of skill needed to breed sheep producing different types of wool, to develop the hand spinning, dying, weaving and finishing skills to spin the different types of yarn needed to create different cloths that could then be finished to create some of the most beautiful and desirable fabrics known in Europe at that time. In England at that time skilled hand spinning was so fundamental that we have little information about how fibre was spun except in illustrations: everyone knew how to spin, so there was no need to document it. Nonetheless surviving fabrics can tell us something about the fibres and skills used in their construction.

the beginning

In 2014 I was invited to be one of the spinners demonstrating techniques at John Styles’ ‘Spinning in the era of the spinning wheel’ workshop at the Victoria and Albert Museum Clothworkers’ Centre in London. Historians and fibre arts handworkers met to discuss the making of an array of fabrics from the V&A’s immense collection. One of the items on display was a book of fabric samples, ‘T.350-1989: Bound sample book containing different types, qualities and colours of cassimere or kerseymere cloth.’ I’d first seen cassimere (also known as kerseymere) mentioned in Kerridge’s Textile Manufactures in Early Modern England as a cloth invented by Francis Yerbury and patented by him in 1766; I remembered it because of the name, which I had read somewhere is thought to have been derived from ‘cashmere’ to reflect its softness, and because it had never occurred to me that a fabric could be patented. And now here it was in front of me, or at least examples of what were known as cassimere in 1795.

25.Cassimerebook27.CassimereSample

Note that my finger is NOT TOUCHING anything.
It’s hovering about 1cm above the fabric to give some idea of scale.

I was entranced. Moths and time had removed some patches of the surface fibre from one swatch (the one I photographed), revealing the twill structure and the beautifully-spun yarn. There were many other wonders spread out on the tables, but I left the workshop determined to find out more about this thing called cassimere. Kerridge focuses on the history of textile manufacturing, not the textiles themselves, and mentions cassimere again only as being responsible for bringing weavers into employment in large workshops, which was “possible because the looms were narrow and necessary because the weaves were new and intricate [compared with earlier standard weaves].”

The search for information

The internet rapidly made clear that cassimere/kerseymere continued in production until the 20th century and beyond, but also that these were very different fabrics from that patented by Yerbury… Aha! The patent! We were now living in Canada, so I couldn’t just pop down to the British Library in London. I emailed the Business & IP Centre asking if there was any way I could find a copy online, and will be eternally grateful to the  staff member who noticed I was writing from Canada and sent me a PDF.

Yerbury’s patent YerburyPatent1766-1

Page One of Yerbury’s patent.

Greetings from the 21st century, Francis. But I wish you’d given me more information! The meat of the patent is on pages 2 and 3, where Yerbury’s ‘New Invention’ is contrasted with the ‘common method of making cloth’. In short:

Common cloth warp is spun with a lot of twist, the weft with as little twist as possible and about 2/3 thicker than the warp, and the two should have different twist directions in order that they interlace tightly when woven. The fabric is a plain weave and the final fulled cloth is thick, water-resistant and durable.

Yerbury’s new Invention warp and weft are spun in the same manner “nearly about the same degree of smallness, weight and twist”. There is no specific weight or thickness of yarn but it should be spun from soft, good wool, all Spanish (i.e. merino) or a mix of Spanish and English. He describes two kinds of cloth distinguished in the weaving; one is clearly a straight twill, right or left; the other “quilled in the weaving with a flat whale [wale]” defeats my current understanding. According to the Google Books preview of The Dictionary of Fashion History, Beckinsale’s The Trowbridge Woollen Industry mentions only twill weave for cassimere.

Yerbury developed his new ‘cassimers’ fabrics to fill a niche in the market, which at that time was virtually crying out for lighter wools suitable for wear in warmer climates. But on the third page of his patent he mentions another reason for devising an innovative fabric: not only was the common cloth “hot, inconvenient and heavy for the summer wear at home and warmer climates abroad”, but it “hath also been introduction of many slight and whimsical things from our great rivals in trade the French”. In other words, the French were saying rude things about heavy, traditional English broadcloth.

So this is how I discovered cassimere. In Part II I’ll tell you how I found more information and began spinning.