The Cassimere Insanity Part II
(Part I is here)
Just a warning that this turned out to be a very long post. I could have said more, though, so it could be worse.
I need to know more!
This is how my everyday insanity progresses. I find something interesting, I ask myself questions about it, I look for answers, I find fascinating nuggets of information that give rise to more questions … and before I realise it I’ve dug myself into a hole so deep that if myth were correct I’d see stars in the sky at midday.
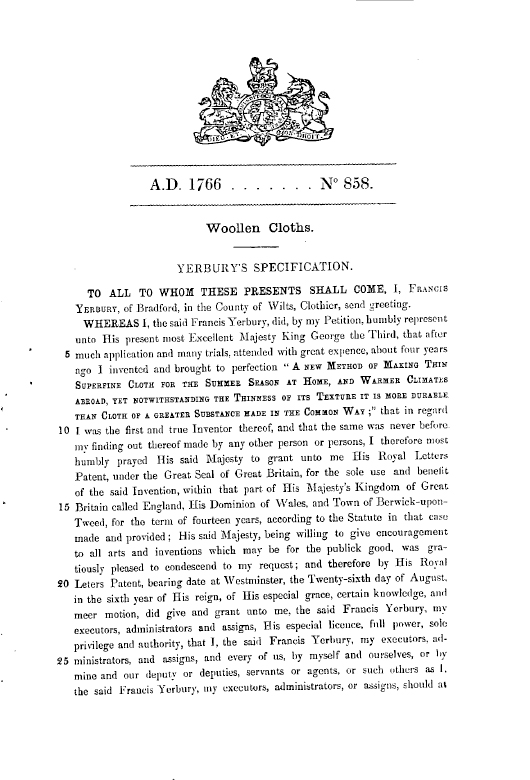
Yerbury’s Patent contains very general information. As a hand spinner I have specific questions that it doesn’t answer.
What was that ‘Spanish wool’ really like?
“soft, good wool, all Spanish or a mix of Spanish and English”
By 1800 Great Britain was importing 5 million pounds weight of fine merino wool each year from Spain. In Sheep and Man Ryder states that the name ‘merino’ was first applied to the sheep in the 15th century, but the breed type can be traced to at least the 13th century. There is evidence of fine-wooled sheep in Roman times, including textiles from 1st-century Italy containing fibres of 16-24 microns. So it’s not unreasonable to assume that by the 18th century ‘soft’ Spanish wool was similar to modern Merino, which is roughly the same range. At some point during all this research I found two manufacturers selling cassimere fabric for re-enactors. I ordered samples from both, but only that from Kochan & Phillips resembled my memories of the fulled cassimeres in the V&A. Sean Phillips kindly advised the use of fine merino, so I used 16 micron merino for this project, which on reflection was almost certainly finer than necessary.
fibre preparation
How were the wools prepared for spinning? Warp for traditional broadcloth (Yerbury’s ‘Common Cloth’) was combed, and probably spun with some type of short forward (worsted) draw for strength, while the weft was carded and probably spun softly woollen to encourage fulling. Yerbury’s ‘New Invention’ has warp and weft spun in similar fashion, and worsted yarns don’t full well, so they were probably woollen or semi-woollen spun. But from hand-carded wool or drum-carded wool? Lewis Paul’s spinning machine invented in 1738 drove rapid development of carding technology, and in 1775 Richard Arkwright was able to patent a carding machine fundamentally similar to modern drum carders that produced continuous lengths of roving. Only 10 years later Arkwright was unable to prove his invention had been unique – which suggests there were other carding machines in use at the time – and his carding machine became common property. Yerbury seems the type of man who might well have taken advantage of new technology, so I felt it was reasonable to spin from drum-carded fibre. As I was not spinning a soft and lofty yarn – this had to be strong enough for a singles warp as well as weft – I eventually found it more convenient and faster simply to spin my modern merino ‘top’ (traditional top is produced by combing, but most commercial top we buy today is pin-drafted from carded fibre) from the fold.
spinning and preparing the yarn for weaving
One fundamental assumption based on my general research into historic textiles is that cassimere, like most fine historic textiles, was woven from singles rather than plied yarns; the samples I’ve seen do seem to be singles.
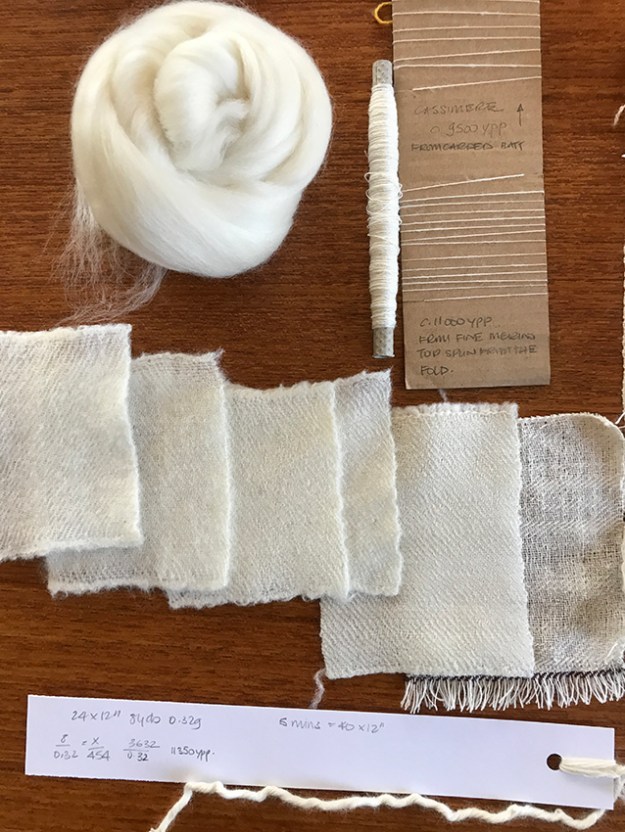
What grist was the yarn for this ‘superfine’ cloth? Superfine by contrast with earlier cloths, so what were they? Textiles and Clothing 1150–1450 speaks of coarse as fewer than 10 ends/cm, good middle quality 12-13 ends per cm, and fine as >18 ends per cm. The authors are writing of archaeological finds, so that’s in the finished cloth. What did it look like before fulling? Crumbs. There’s an entire research program for me right there if I have time. Fulled broadcloth was roughly half its woven width (hence the name: it was broad on the loom) so roughly half that epi? Sean Phillips discussed cassimere specifications with me, and his suggested grist of 9,000- 10,000 yards per lb (ypp) was similar to what I’d found mentioned elsewhere.
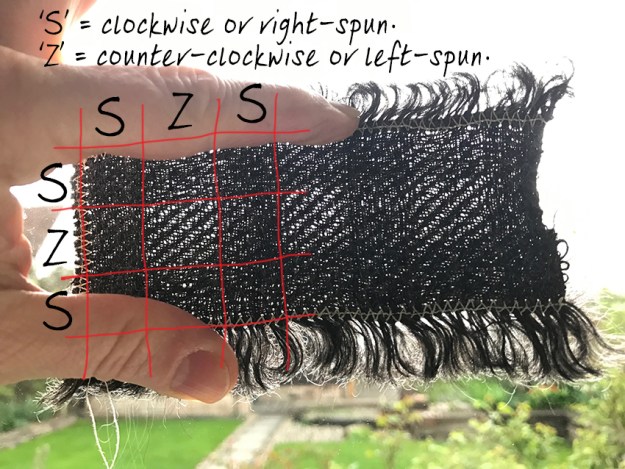
I looked at twist angle in the Kochan & Phillips sample – which was thoroughly fulled – and concluded that I couldn’t conclude anything useful from it, even with a microscope and Mabel Ross to hand.
So I sat down at my Majacraft Rose and started spinning fine singles in the standard clockwise direction. Skeined a sample – a known length – off the bobbin, weighed it, calculated yards per lb. Fail. Try again. This was not an easy grist for me to maintain: the fibre was so fine it was easier to spin a finer yarn. If I stopped paying attention the yarn would become too fine; when I then tried for thicker it would be too thick.

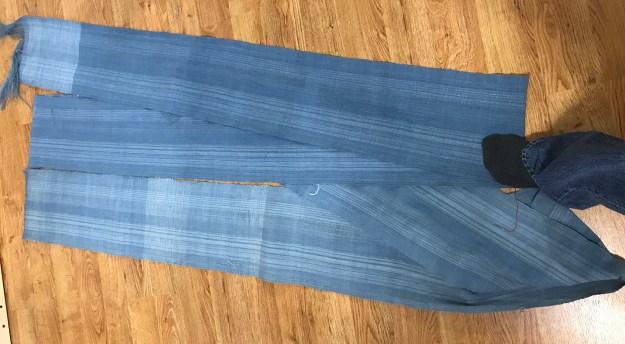
But I persevered, wound a decent sample on a control card to sit by the wheel for quick comparisons while spinning and, more importantly, wound off samples and checked the ypp regularly throughout the spinning process. I spun and I spun and I spun and I looked at the yarn I was spinning – so much finer than any handspun wool I’d woven before – and wondered whether it would weave. I am not an experienced weaver. I didn’t want to spend weeks spinning something I couldn’t make into cloth! I stopped spinning, wound off into skeins, steamed them to set the twist and sized them with gelatine to further hold the twist. I don’t have my notes for this to hand so I can’t remember the exact strength of the size, for example, but I have found a picture of one of the cassimere warps drying after sizing in what I call The Sizing Room (everyone else calls it the bathroom).

The skein is spread evenly on the chopsticks so as few threads overlap as possible. If necessary I will cut tight skein ties to spread it more widely, as fewer ties are needed once a sized skein dries. I do not mess about with it any further: too much handling will increase the fuzziness despite the size. The milk bottle supplies enough weight to eliminate pig-tails and straighten the yarn, but not so much as to risk stretching it. The plastic separator increases airflow around the two sides of the skein. I try to remember to rotate the skein once or twice to minimize pooling of the size at the bottom of the skein, as this glues some of the threads together; it’s not a fatal flaw but pulling them apart is unnecessary stress and can create fuzz. I am all about preventing fuzz.
weaving
I remember thinking it was a good sign that the warp beamed on my Ashford table loom with no trouble at all.
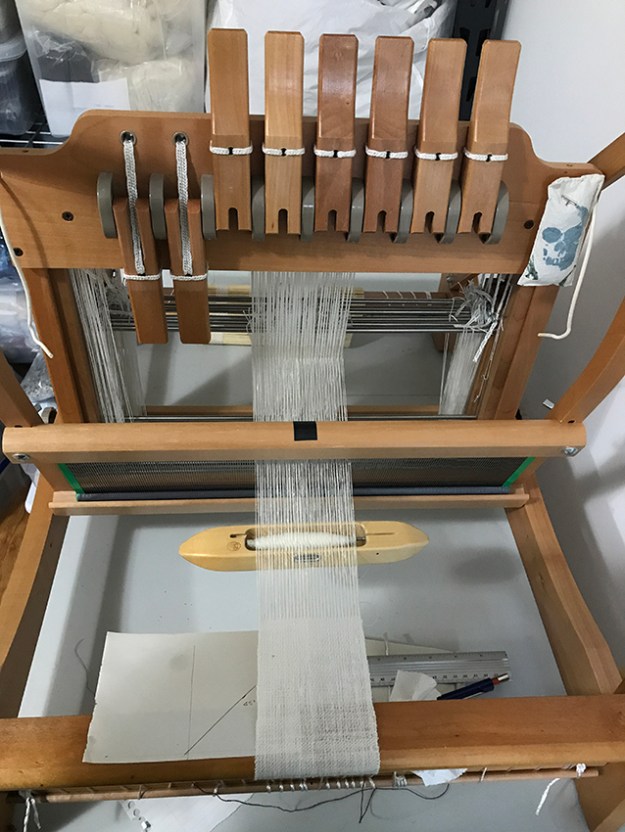
The 45° angle shows I tried hard to beat square!
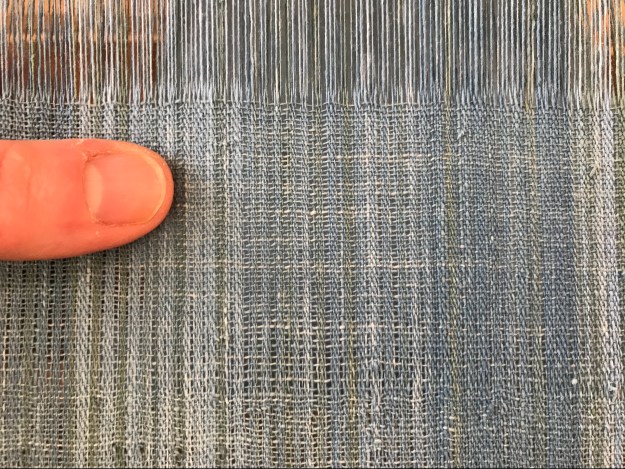
It wove like a dream. On reflection I should have sett it slightly tighter for a slightly denser cloth “well struck in the loom” as Yerbury phrased it but at this point I had no idea how fulling would affect it.
I wove to the end of the short sample warp, cut it into six pieces, blanket-stitched the cut edges with more of the singles as thread (in case cotton sewing thread interfered with the wet finishing of such small samples). A soak in hot water followed by hand washing removed the size and allowed the fabric to find its shape, which was lovely. Light and warm. But nothing like Yerbury’s cassimere: fabric isn’t finished until it is finished. Wet finished.
finishing
Yerbury’s cassimere was to be “smartly grounded at the fulling mill by a quick motion”. Fulling has two purposes, the first being to remove any fats and oils used in processing the fibre for spinning. We’re talking serious oils here, such as rancid butter and fish oils used to grease wool for combing, but fortunately these combine with the ammonia compounds in stale urine to become soap that not only scours the cloth but lubricates it. This aids the second purpose, which is to work the fibres together, starting the process of interlocking wool scales that leads to felting. The fabric thickens, becomes denser and less flexible, also more resistant to wear, and for centuries it was a normal part of the finishing of wool fabrics, converting wide bolts of relatively thin plainweave broadcloth into narrow bolts of water-resistant warm hardwearing fabric. The picturesque ‘waulking’ of cloth in Scotland is fulling by hand, suitable only for relatively small scale fabric production. The Romans relied on slave labour walking in place, trampling the fabric in tubs of ankle-deep urine. Water-powered fulling mills had been in use since the 12th century in medieval England: a stock mill imitated the action of walking feet with wooden stocks driven by a waterwheel working either horizontally or vertically. Modern fulling mills are rotary, uniformly processing immense lengths of fabric. I knew without even asking that no commercial fulling operation could do anything with my tiny samples!
I first tried fulling my sample as I’d fulled wools before, working it by hand on a flat surface. Always in the warp and weft directions, never on the angle as that will deform the fabric. The result was nice to the touch, but far from even and both thicker and less dense than seemed right.
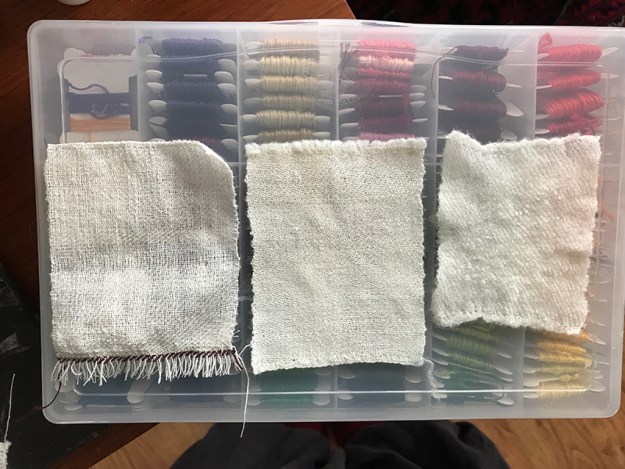
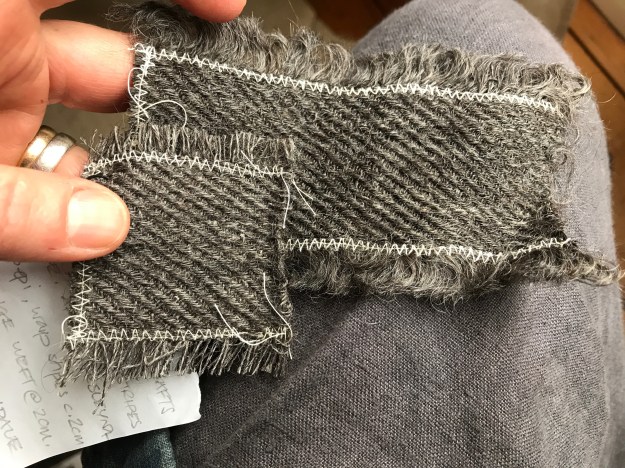
From left: cloth off the loom; washed; fulled by rubbing
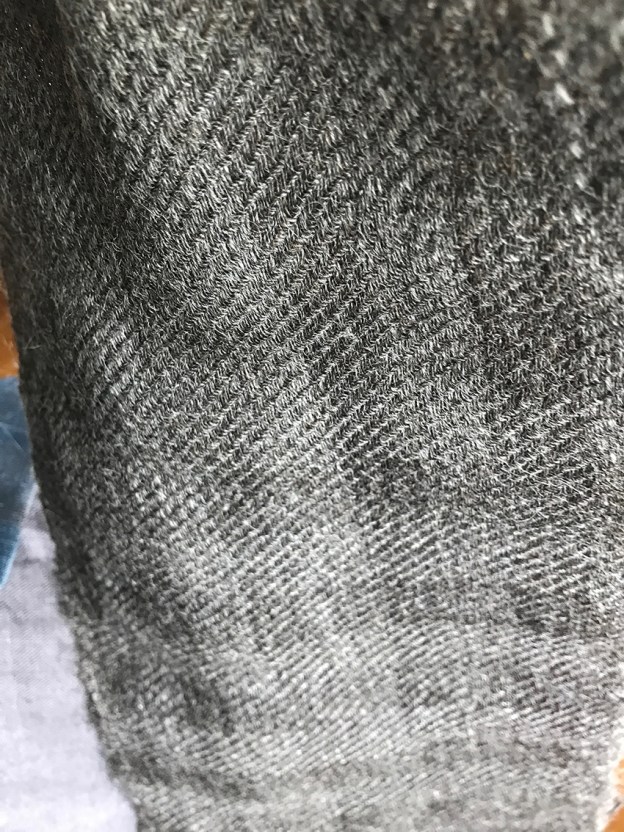
So I imitated a vertical fulling mill with a wooden mallet wrapped in plastic. The remaining three samples were wetted, lightly soaped and then fulled by incessant (or so it felt) tapping with the mallet on our kitchen counter. It worked. It more than worked, it made a lovely fabric, dense and light and very different from the hand-fulled sample. If you’re at all interested in fulling, you should try this technique.
So that will suffice. What next? Raise the nap: brush to raise fibres from the surface of the fulled fabric. In times past teasels mounted in wooden frames might be used for this, and it was skilled work. I used a nailbrush and would not call myself skilled, but the fabric developed a lovely soft halo of fibres.
After the nap was raised it was sheared or cropped. Shearsmen were probably the most highly skilled of all the craftsmen involved in this process, able to crop a uniform finish by eye on yards of fabric using huge steel shears. Fabrics were often napped and sheared repeatedly to obtain the smoothest possible finish.
Fortunately I had tiny shears (my embroidery snips) to match my tiny piece of fabric.

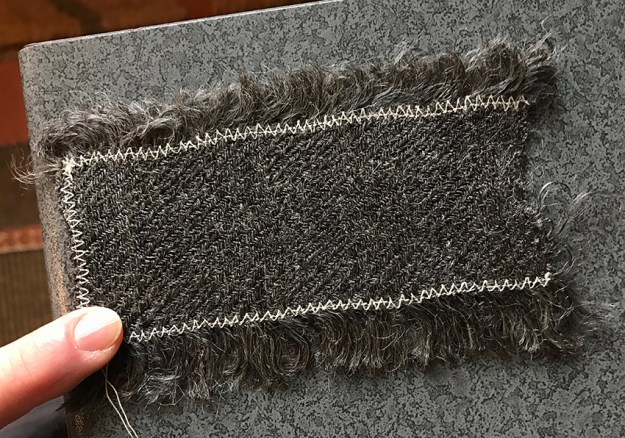
I love this piece of fabric. It’s delightful. Not as densely woven as the 18th-century swatch I saw in the V&A, but still cassimere. It’s light, warm and the singles woven in twill structure make it remarkably stretchy. But each time I handled the swatches I ended up admiring the second one, the plain washed fabric. Still flexible, but soft and smooth with a lovely drape. I wondered what it would feel like as a larger piece. I had more fibre, I could find out. For speed I spun the singles for this fabric from the fold and thinner, which I found easier. Roughly 11,000ypp, roughly 13 yards spun per 5 minutes while watching tv, so could have been faster.
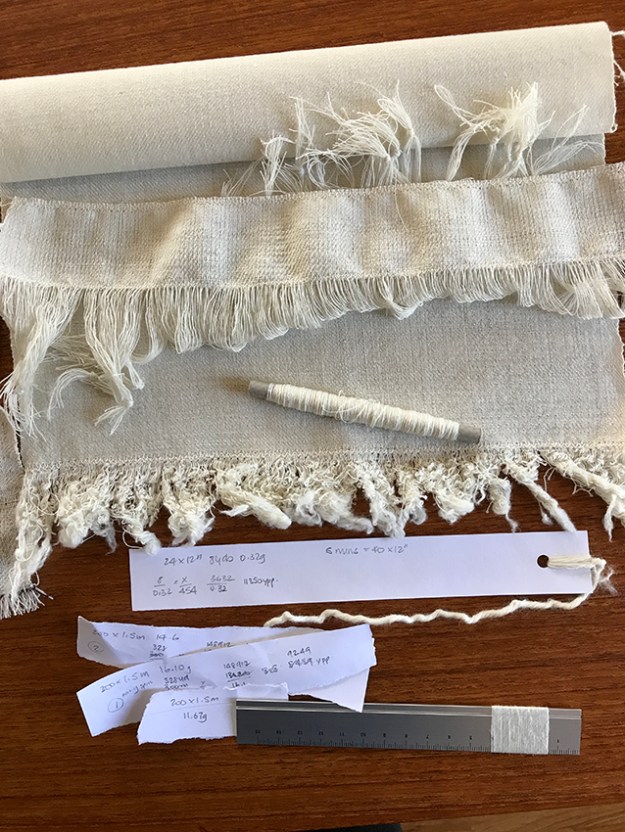
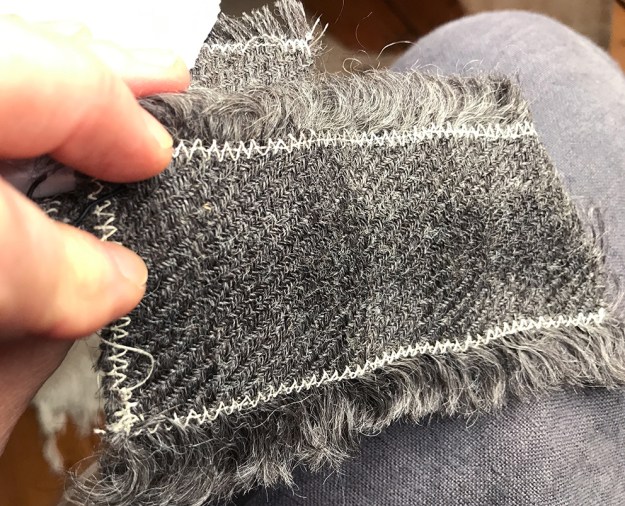
The full set of samples from the first cassimere warp: from right, loom state; washed; fulled by rubbing; fulled with a mallet, no further finishing; mallet-fulled, nap raised; mallet-fulled, nap-raised and sheared. Plus my control card and a sample skein spun for the second cassimere warp.
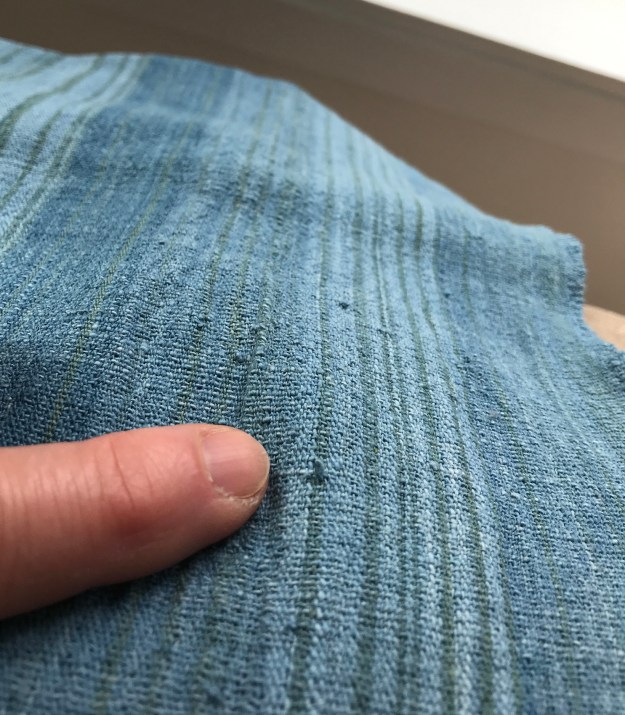
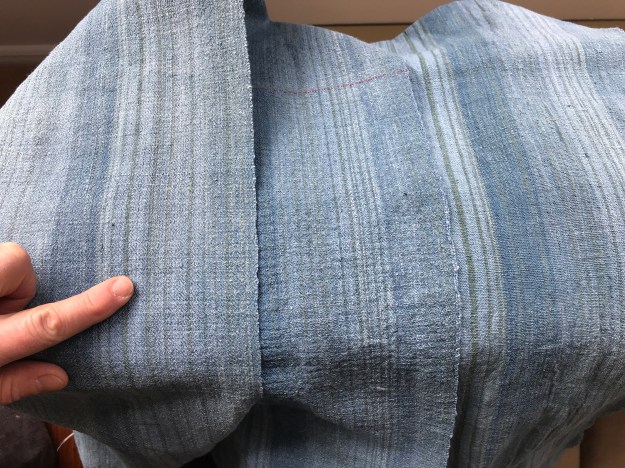
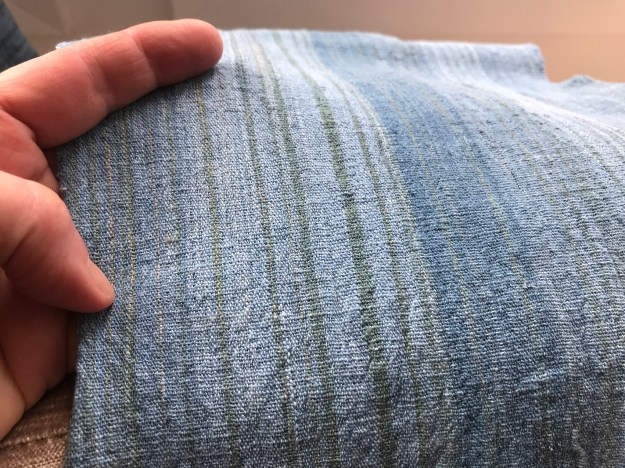
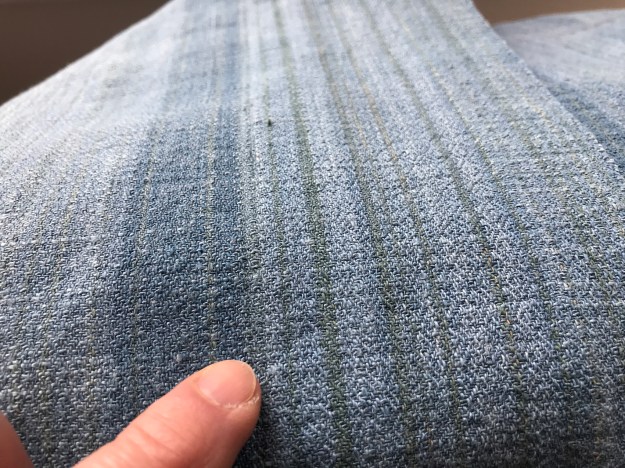
I spun, I skeined, I sized as before. I wound a shorter but much wider warp and wove it off sett at 48epi (it wrapped at 72). Soaked in hot water, washed and ironed, it had a subtle sheen and draped beautifully.
By the twentieth century it seems from catalogue descriptions of fabrics and garments that almost any wool twill could be described as a cassimere so, while this isn’t Yerbury’s patented cassimere, it’s still a cassimere. And once I’ve spun the current big bag of silk, I’ll be spinning to make more of it.


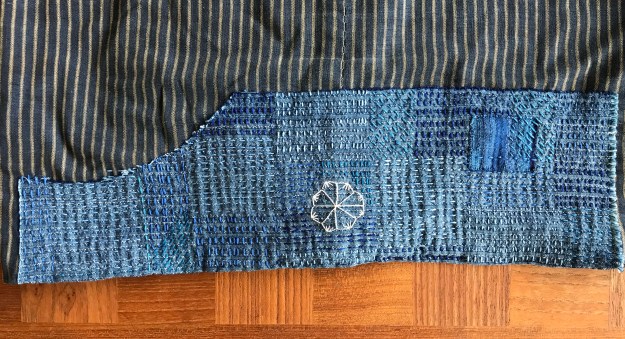 Various shades of blue embroidery thread in blocks of stitching. I included one of the remaining fragments of my favourite fabric, and left a circle clear of stitching for a semamori motif.


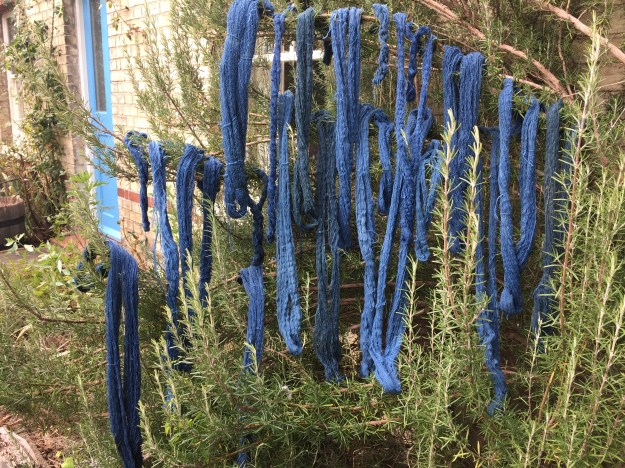 Indigo-dyed handspun cotton singles drying on the rosemary bush by the kitchen door. I miss that bush, and our North Ronaldsay sky-blue doors.
 I had to finish drying the yarns on the radiator. Hmm. Clearly I dyed silk fibre, too. I wonder where that is? In one of the many boxes, of course.
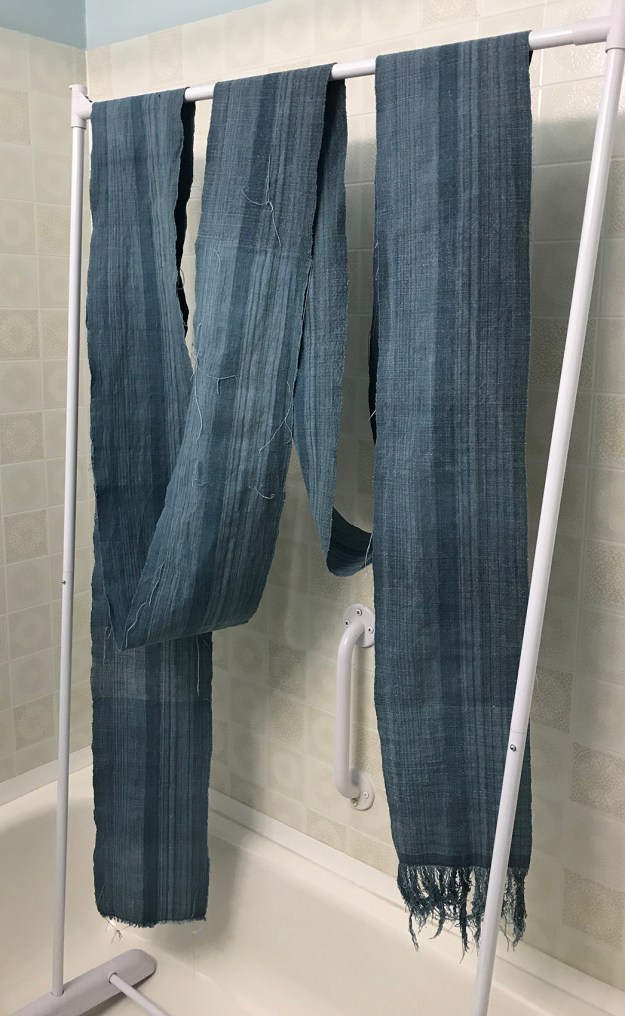
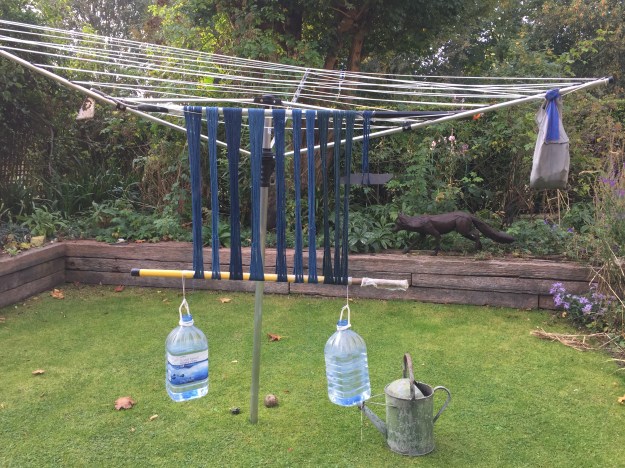 The gelatin-sized yarns drying under light tension – those water bottles are not full! – suspended between the hoe and an old rake handle wrapped in clingfilm aka Saran wrap on the clothes tree. The old grey lunchbag contains clothes pegs.
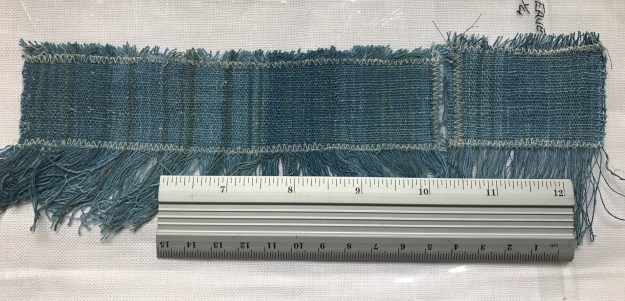

 I have started weaving some fine yarns with the lease sticks in place. Like back-to-front or front-to-back warping, lease sticks in or out is something weavers seem to choose as habit early in their careers. I didn’t like the lease sticks in when weaving thicker, fuzzy yarns: my impression was that the sticks were encouraging fuzziness and binding of threads in the warp. But feeding firmly sized, finer yarns through the even tension of the lease sticks seems to correct some of my warping issues.
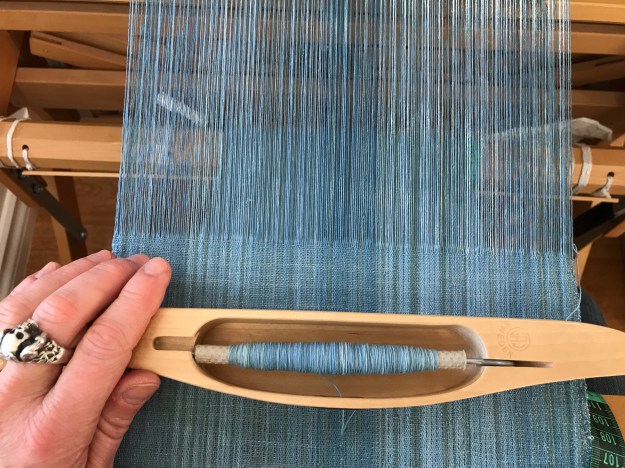

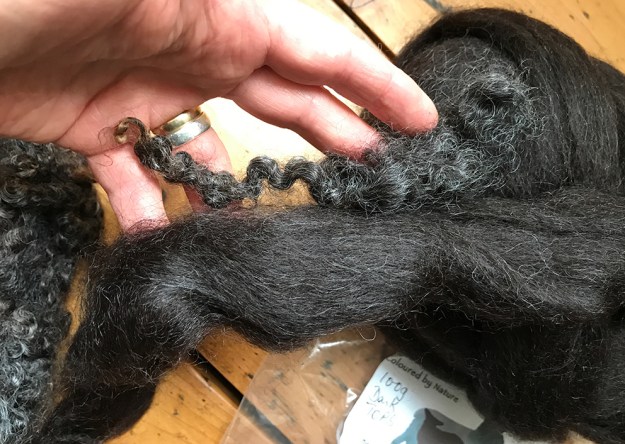 The fibre: a slightly darker version of the Wensleydale top, together with a washed lock from a Wensleydale fleece. Shiny!
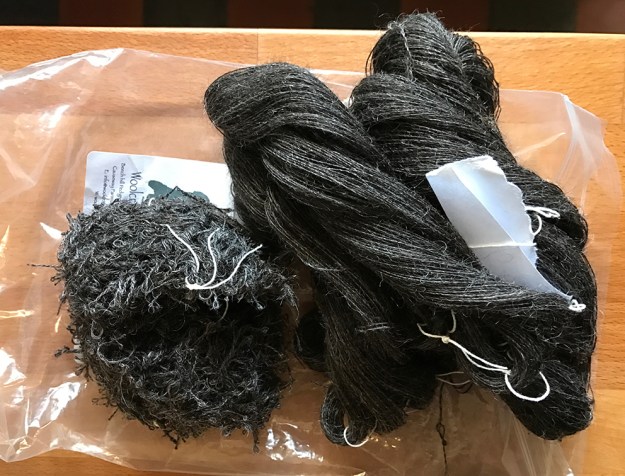 The singles, before and after steaming to set the twist.
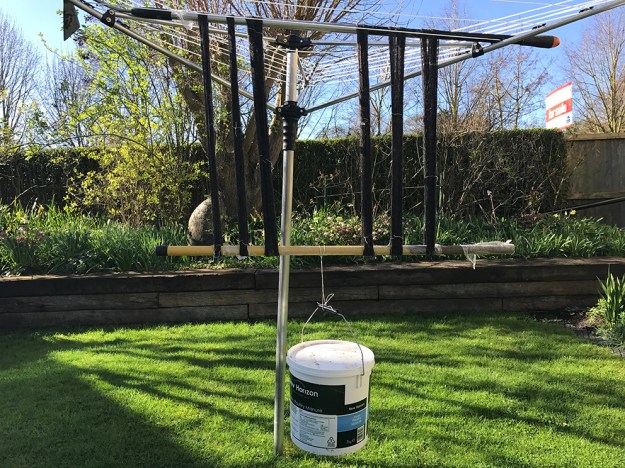 The sized singles yarns drying on the clothes tree. The plastic bin is weighted with just enough water to hold the singles taut, removing the pigtails, but with minimal stretching. Remember that wet wool is weaker than dry wool.
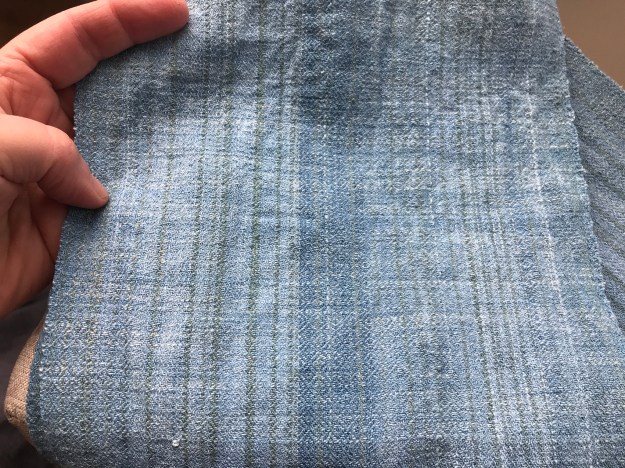
 Unsurprisingly the weft stripe is more obvious on one side, the warp stripe on the other, but the chequerboard is visible on either side if the light is right.